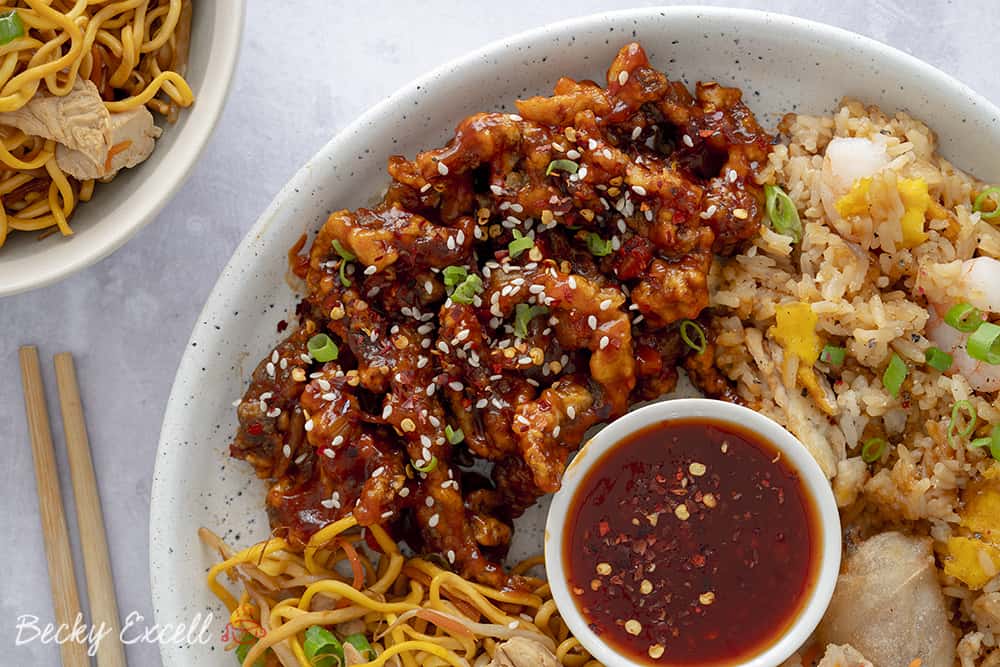
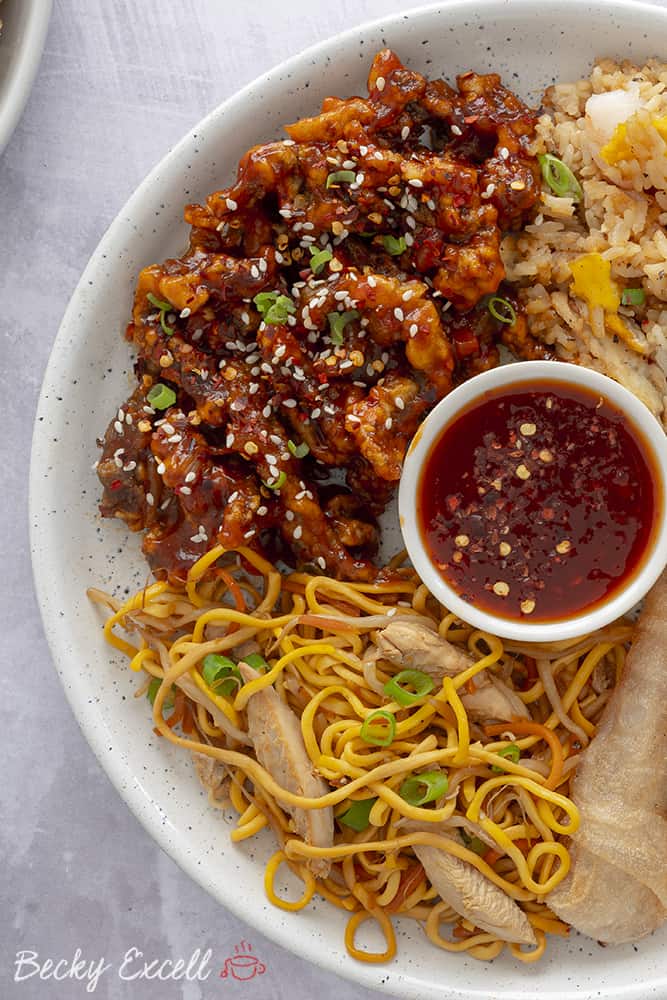
Yep, Mark’s been back in the kitchen again and that means… I’ve stolen his gluten free crispy chilli beef recipe to share with you guys!
Clearly Mark had picked up on the not-so-subtle hints I’d dropped over the last few weeks… I really missed eating crispy chilli beef – I mean, it must be over 8 years since I last ate it. As if by magic, Mark’s gluten free crispy chilli beef recipe appeared!
It goes without saying that having someone there to cheer you up when the world is on top of you is so important.
As IBS makes my life like riding a rollercoaster upside-down several times a day, there’s so much joy in being reunited with a meal you haven’t eaten in almost a decade.
It brings back so many happy memories of family Chinese takeaways (back when I could actually eat anything!) and meals out in China Town.
(another place I haven’t eaten in years!)
That’s why I absolutely had to twist Mark’s arm and get him to actually measure the ingredients for once – so we could write it up!
Mark professes that he can only cook Chinese food, as that’s the type of food he used to cook with his Mum at home (she’s from Malaysia.)
And I definitely do not have a problem with that! He’s so good at recreating these dishes that I miss so much from the Chinese takeaway – I made a blog post sharing all of the Chinese takeaway recipes he’s made for me here: 10 gluten free Chinese takeaway recipes you won’t believe you can eat.
So here’s a few tips you’ll need know before making Mark’s gluten free crispy chilli beef recipe…
So I thought I’d link to a few items in the recipe that you might now know were gluten free/might not know where to find to them.
(those items being Bird’s custard power, gluten free brown sauce and gluten free Worcester sauce)
There’s ‘accidentally’ gluten free brown sauce in supermarkets, which you can find here. It’s with all the regular brown sauce/ketchup etc so please be careful that you buy the right one. Remember to always check the ingredients too in case products change!
Mark’s secret ingredient to creating the batter is a couple of tablespoons of gluten free custard powder (it’s optional, but he swears by it!) and fortunately, Bird’s custard powder is gluten free and dairy free too. It makes the batter thick and crispy, whilst still staying nice and light.
Lastly, gluten free Worcester sauce is something you can easily find in the free from aisle.
Oh and here’s a little advice on adapting this recipe to be low FODMAP…
- Worcester sauce (as long as it’s gluten free) is low FODMAP even though it contains onion and garlic in very tiny quantities. I can’t tolerate fresh onion in any quantities, but I’m fine with this!
- Sadly there’s no such thing as brown sauce that’s gluten free AND onion/garlic free, but you can either leave it out or substitute it with a low FODMAP BBQ sauce.
- Make sure you make your sweet and sour sauce using this recipe or you can use this low FODMAP sweet and sour sauce too.
Make sure you don’t go overboard on the sauce either – tomatoes are high FODMAP in certain quantities and sweet and sour sauce often contains a decent amount of ketchup or tomatoes in some form!
So what’s Mark’s gluten free crispy chilli beef recipe like?
It’s AMAZING. It tastes exactly like what you’d get from a Chinese takeaway – it’s super crispy and that sauce is sososo sweet, sticky and spicy!
Honestly, it satisfied all of my crispy chilli beef cravings that I’d been having for well over 8 years. This definitely isn’t a recipe you can make in 30 minutes, but trust me – it’s so worth the effort whenever those Chinese takeaway cravings kick in!
We used to have a Chinese takeaway once a month back when I could eat gluten, so Mark and I usually make a dish like this about that often these days.
Ok – without further ado, I’ll once again hand you over to Mark who has been kind enough to write this up for you guys!

Gluten Free Crispy Chilli Beef Recipe
Ingredients
- 1 litre vegetable oil (for deep frying)
For the batter
- 400 g thinly cut beef steaks
- 150 g cornflour (or ideally use potato starch)
- 2 tsp salt
- 5 tbsp Bird's custard powder (optional - it's gluten free!)
- 2 large eggs (beaten)
For the sauce
- 300 ml sweet and sour sauce (you can use a jar as long as it's gluten free, or make your own - recipe link above)
- 2 tbsp gluten free soy sauce
- 2 tbsp gluten free brown sauce (linked above)
- 1 tsp gluten free Worcester sauce (linked above)
- 1/2 tsp dried chilli flakes (increase to 1 tsp or more if you like it a little spicier)
- 1/2 green pepper
- 1 tbsp cornflour (or potato starch) mixed in 2 tbsp of water
- 2 tbsp garlic-infused olive oil (make sure it has no bits of actual garlic in it if you're low FODMAP)
- sesame seeds (optional)
- spring onions, chopped (green parts only if low FODMAP)
Instructions
- If you don't have a deep-fryer (it's not mandatory!) start by pouring your vegetable oil into a medium-sized saucepan until it reaches half way. Don't overfill!
- Heat this at a medium heat until it reaches 180-190c or 375f - this takes me around 15 minutes. If you don't have a cooking thermometer to check the heat, then you can test the heat by adding a small cube of gluten free bread. It should brown in 10 seconds at 190c.
- While your oil is heating, you can prepare your beef. Before slicing your thinly cut beef steaks, I'd recommend covering them in clingfilm and pounding them with a meat tenderiser or rolling pin to get them as flat as possible. Then, slice them as thinly as you can - the thinner/smaller the strips are, the crispier they'll be.
- OPTIONAL: Soak your beef strips in a bowl of water (so the water is just covering the meat) and 1 tsp of salt for anywhere from 1-3 hours. After that time, drain the water away and squeeze as much water out of the meat as possible. This will ensure that the beef is tender and ready for frying.
- Combine all of the dry ingredients for your batter and split it 50/50 into two mixing bowls.
- Place all of your beef into one of the bowls and mix it around until well-coated and all the flour is used up. Keep squeezing the beef to compact all of the flour onto it.
- Pour over your pre-beaten egg over your coated beef. Mix it all around by hand or with a spoon until well-coated.
- Lastly, place your coated beef into the second dry batter mix bowl and coat again. Try and separate them as much as poss, though bear in mind that it's not actually possible to keep them all separate! Again, keep squeezing the beef to compact all of the flour onto it.
- Carefully lower your twice coated beef into the hot oil - try not to let them clump together too much. Add as much as you can at once so it cools down the oil. It should bubble up nicely. Leave this to fry for about 5 minutes.
- Using a slotted spoon or a set of tongs, remove your crispy beef from the oil and place it onto a plate with kitchen roll. This will allow it to drain.
- Once you've fried all of your beef, pop it onto an oven tray and place in the oven at 180/200c fan for 10 minutes. This will make it even crispier! At this point (before popping it in the oven) you can always freeze your crispy beef once cooled for another day, and then reheat it by spreading it onto a baking tray and oven-baking it for 20 minutes.
- Now for your sauce. Start by pouring in 2 tbsp of garlic-infused oil into a large wok or frying pan and turn on at a medium-high heat. Begin frying your chopped green pepper until softened.
- Add in your gf brown sauce and stir thoroughly for around 30 seconds. Then add your gf Worcester sauce and sweet and sour sauce.
- Keep stirring and then add your gluten free soy sauce and chilli flakes. Stir in once more and then add your cornflour mixture to thicken the sauce.
- Allow the sauce to stay on the heat until it's thickened up a bit and then add all of your now battered and cooked crispy beef strips.
- Stir around thoroughly until well coated and nice and sticky. Finish with some sesame seeds and chopped spring onion greens.
- Serve immediately and enjoy!
Thanks for reading how to make Mark’s gluten free crispy chilli beef recipe! If you make it, I’d love to see how it turned out. So absolutely make sure that you send me a pic using my social media links below…
Any questions about the recipe? Please do let me know by leaving a comment below or on Facebook / Twitter / Instagram!
Thanks for reading,
Becky xxx
Oh and don’t forget to pin this for later!


