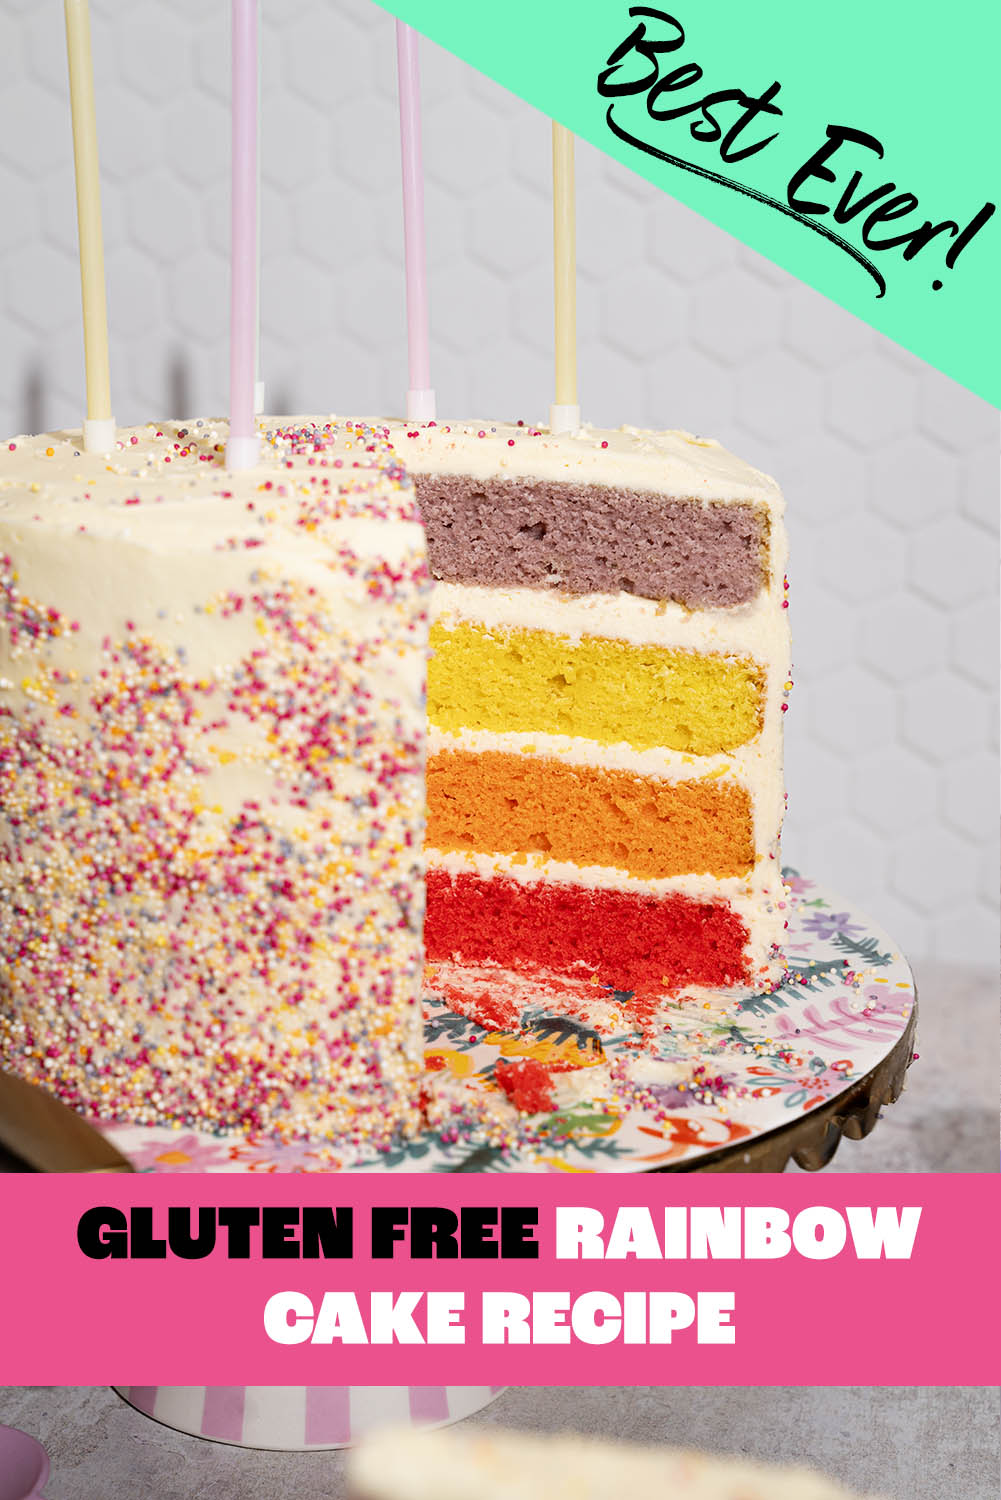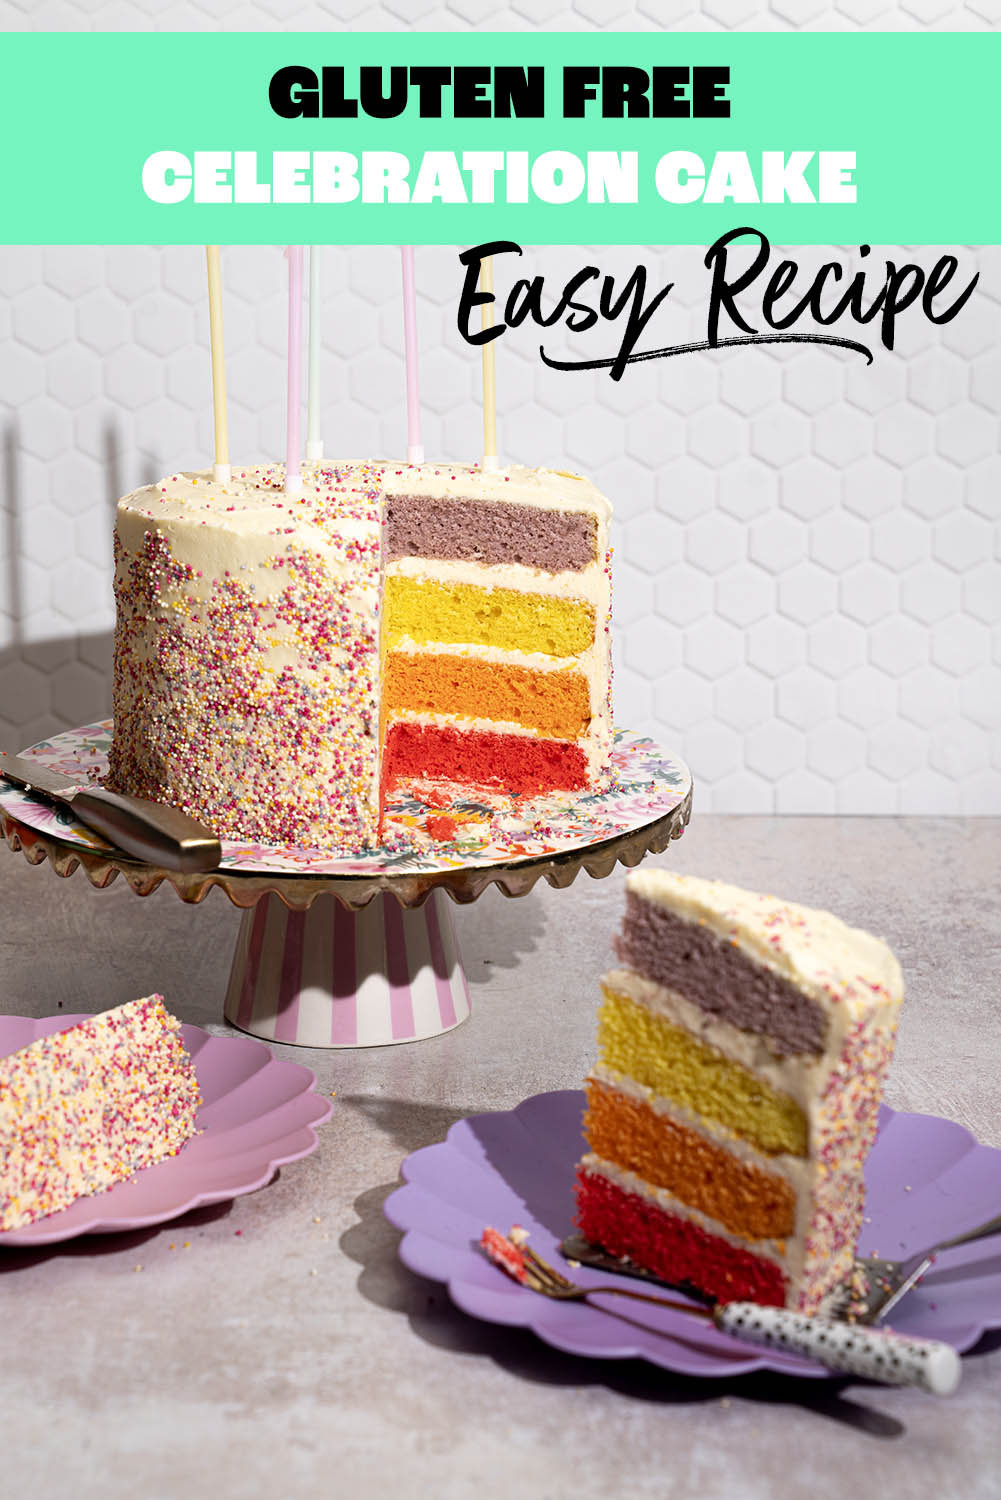

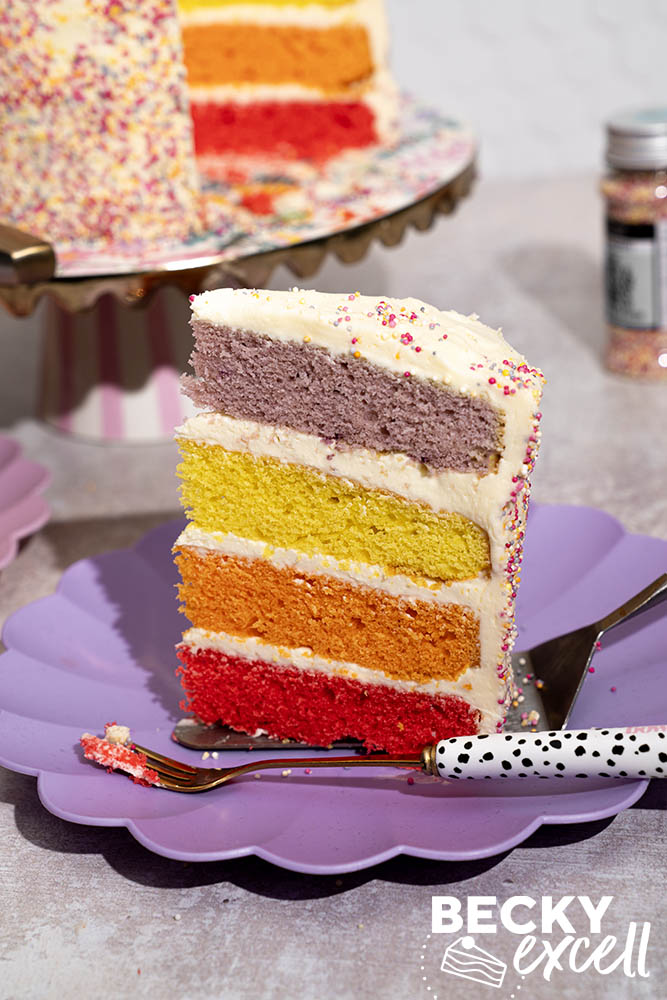
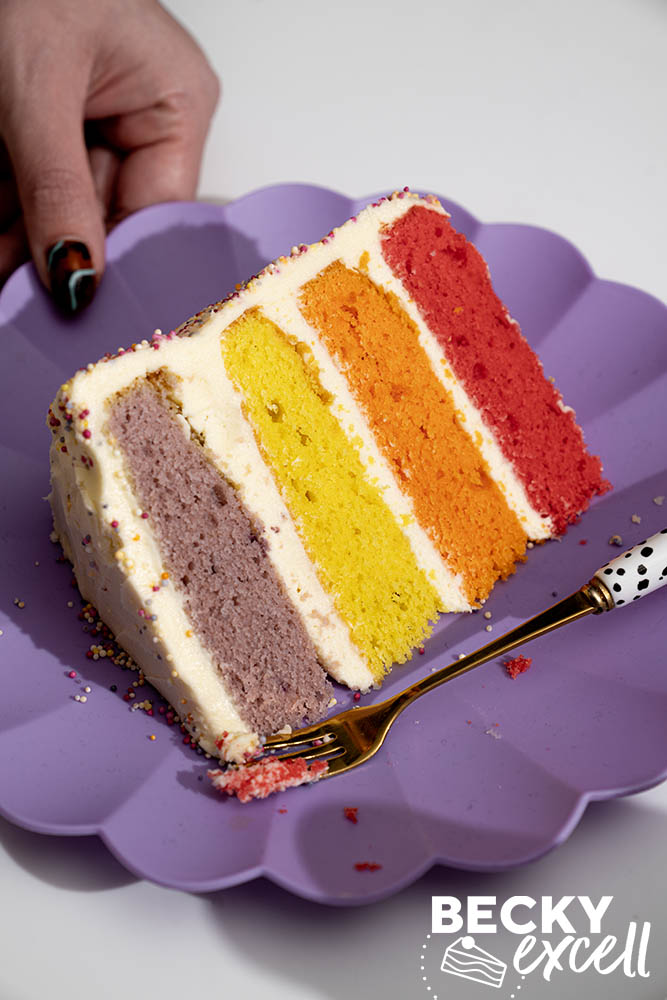
Introducing my Gluten-free Celebration Cake recipe! Four colourful layers of vanilla sponge, fluffy buttercream and plenty of (gluten-free!) rainbow hundreds and thousands. Truly a cake fit for birthdays or literally any other special occasion you can think of!
Feel like you’ve seen this cake somewhere before? Hmm… well, you might have! This is my recreation of a popular supermarket celebration cake that is definitely never gluten-free… but naturally, my version is! It’s fun, a bit over the top and much easier to make than it looks, especially if you take my advice on the sprinkles.
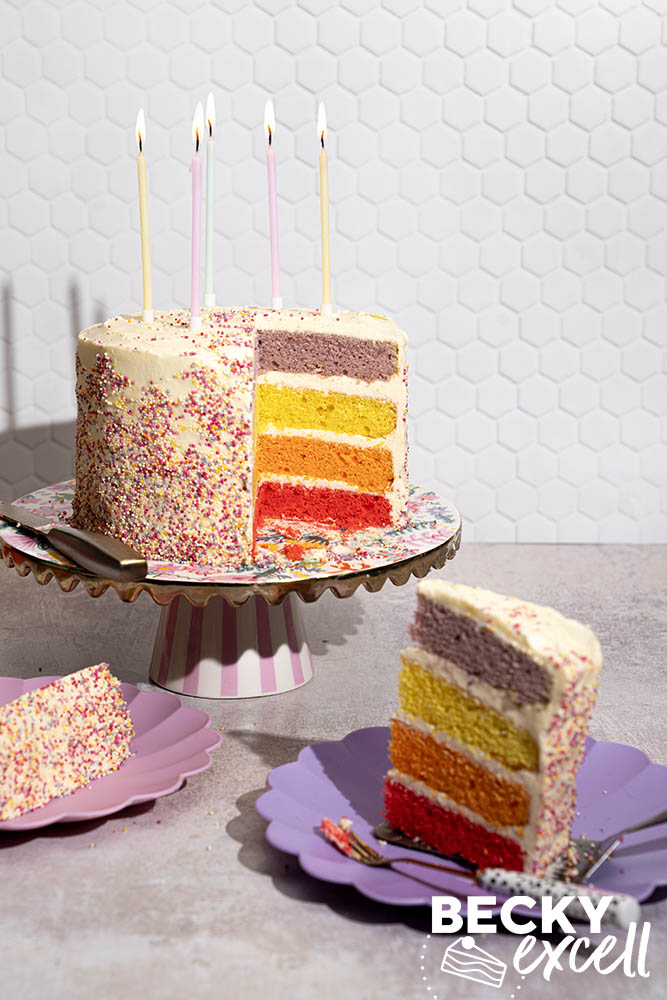
Welcome back to the seventh instalment of ‘How To Make Bake Off Gluten-free’! After last week’s gluten-free Cornish pasties, Episode 7 was Free From Party Week. The Showstopper was a free from children’s birthday cake with an interactive or moving element. So I thought I’d follow the party theme and make the ultimate free from celebration cake, fit for a children’s birthday party or… just any special occasion at all! The moving element is the cake going from the plate and into your mouth in case you were wondering 😂 I do hope you’ll forgive me that it doesn’t double up as a vacuum cleaner!
Some keen-eyed readers might have already spotted that this is a like-for-like-ish recreation of the M&S Rainbow Layer Cake, which is NOT gluten-free. Over the last 10-ish years, I’ve lost count of how many times that cake has been carted out at family birthdays/special occasions along with the words ‘sorry, you can’t eat this’. So when Bake Off asked for a free from birthday cake, I finally had the perfect excuse to make a version I could actually have a slice of.
Also I’ve always found it a bit odd that M&S’ rainbow cake only has four colours… but since we’re recreating it, four it is! But it’s for that reason that I decided against calling this a ‘gluten-free rainbow cake recipe’. Also because I already have a traditional rainbow cake recipe in my second book.
So if you are after a proper rainbow cake with green and blue in there too, the full six-colour version is in How To Bake Anything Gluten-free. And if you bake either, please post a photo of them in my Facebook group. I love seeing them exist in the world!
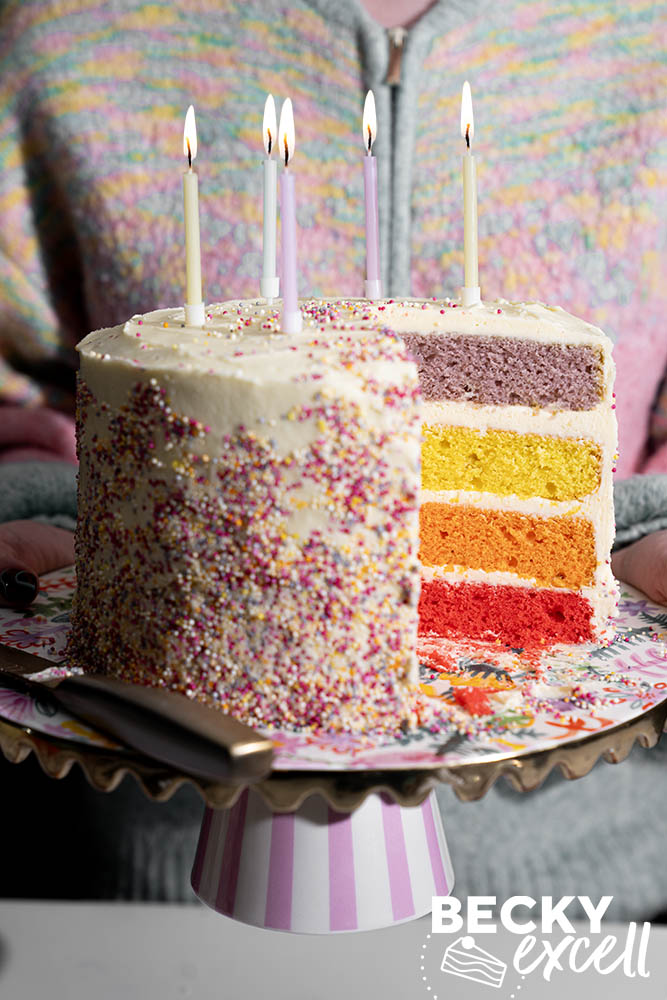
Why you’ll love my Gluten-free Celebration Cake Recipe
- It won’t fall apart or crumble to pieces. I started making gluten-free cakes in 2013… let’s just say that all these years later, this is not something you ever need to worry about with any of my recipes! The sponges are soft, moist and bouncy – exactly as you’d expect – and nobody would ever know this cake is gluten-free. That’s a promise!
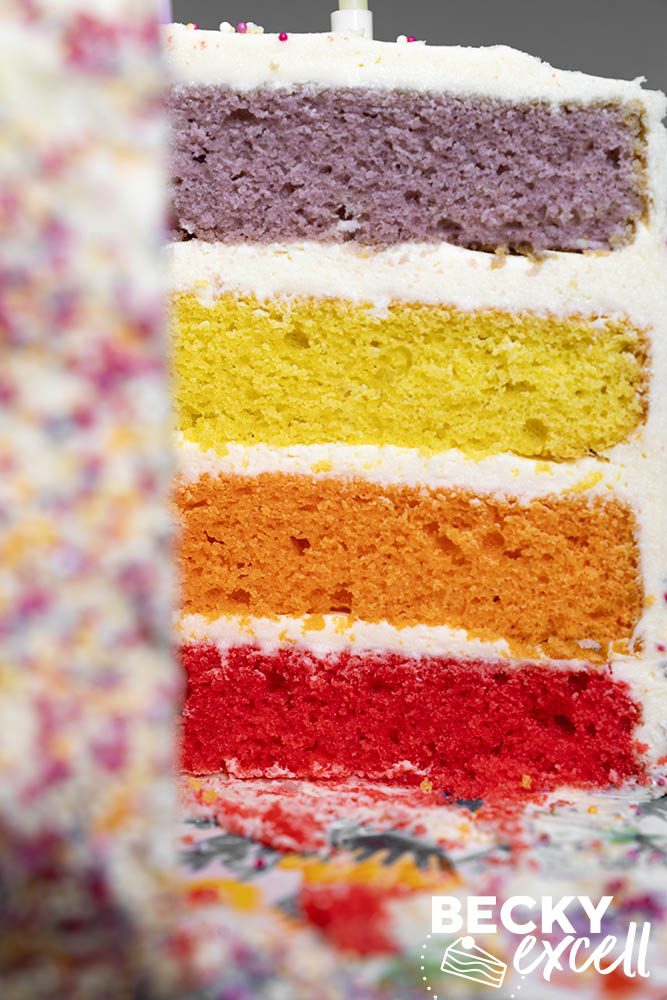
- All four sponges start with the same cake mixture. Divide it between four bowls, add a different colour to each and you’re ready to bake. This recipe is mega simple: it’s just making cake batter, icing and decorating!
- The sponge uses a supermarket gluten-free flour blend. I made it with FREEE by Doves Farm gluten-free self-raising flour. No need to concoct your own flour blend from lots of separate flours.
- One batch of vanilla buttercream does the whole job. Use it to sandwich the sponges, seal in the crumbs and give the cake a smooth finish.
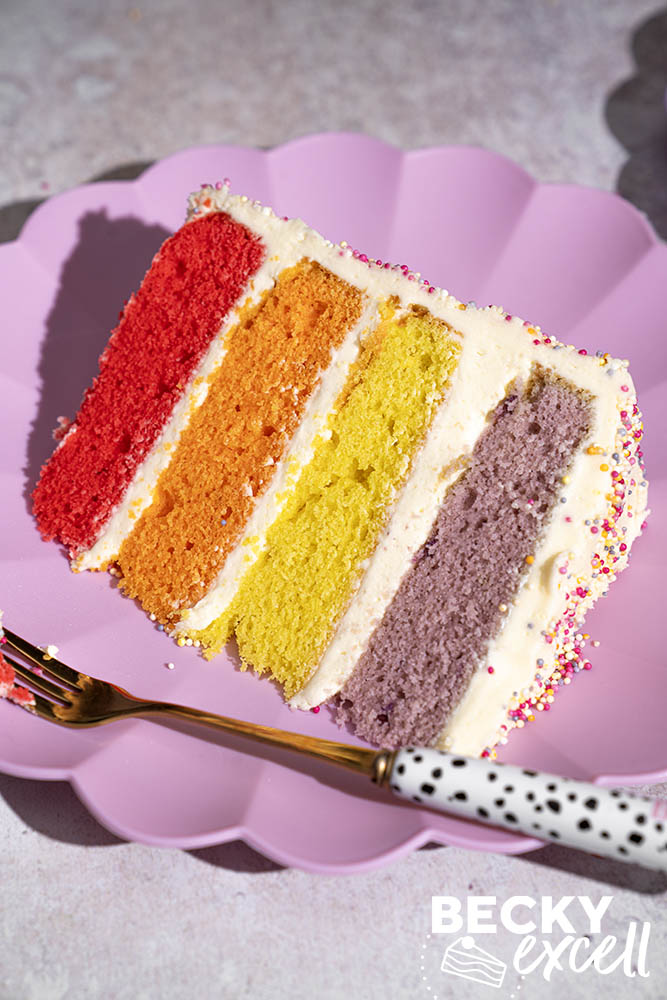
- A scatter of hundreds and thousands is the only finishing touch it needs. Once you slice into it, the four colours do the rest!
Ingredients for my Gluten-free Celebration Cake Recipe
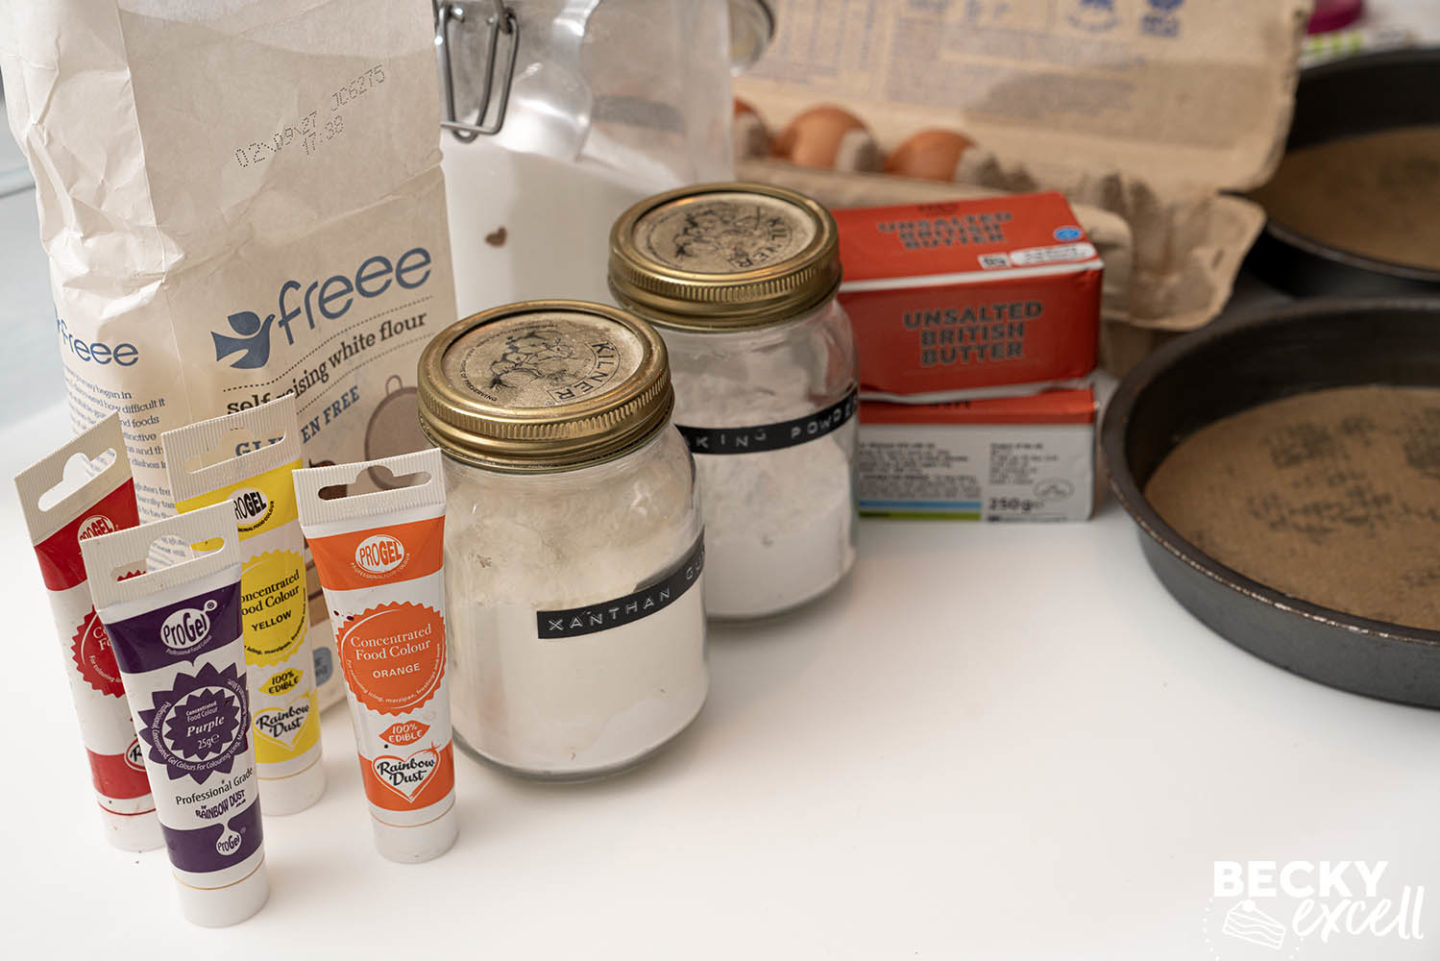
For the sponges, I use FREEE by Doves Farm gluten-free self-raising flour with a little extra xanthan gum and gluten-free baking powder. I buy all three of these in the supermarket. You’ll also need caster sugar, vanilla extract and softened unsalted butter. Your butter should be soft enough to press a finger into while still holding its shape.
You’ll need seven large eggs, which came to around 400g without the shells. Lightly beat them together before adding them to the mixture. If you’re baking in two batches, weighing the beaten eggs makes it easy to give each batch exactly half.
For the colours, use concentrated red, orange, yellow and purple food colouring gels or pastes suitable for baking. I used about 4-5 drops per bowl. The strength varies by brand, so start with a little, mix it in and follow the dosage guidance on the pack. See the FAQ section for links to what I used.
The vanilla buttercream uses softened unsalted butter, icing sugar and vanilla extract. Keep a little milk to hand in case you need to loosen it.
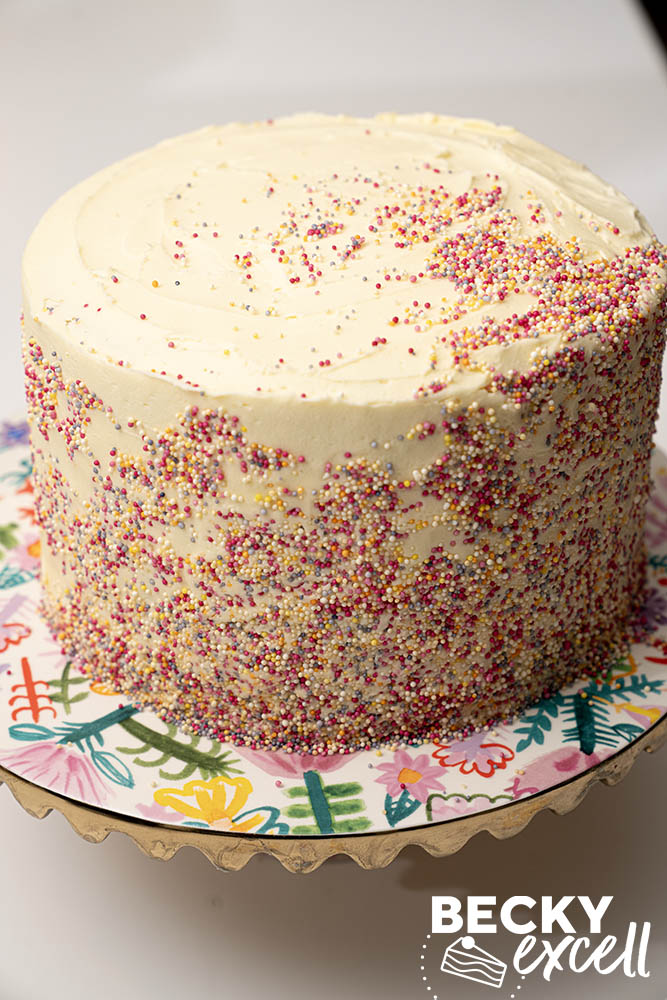
For the finish, I used the little round gluten-free rainbow hundreds and thousands you can see in the photos. You’ll only need enough for a scatter if you’re doing the top. Ensure they’re gluten-free; check the FAQ section for what supermarket product I used.
Shopping list:
Here’s everything you’ll need for the sponges, vanilla buttercream and decoration. The recipe card below gives you the amounts for each part.
- 400g caster sugar
- 1kg unsalted butter, softened (400g for the sponges and 600g for the buttercream)
- 395g gluten-free self-raising flour (I use FREEE by Doves Farm)
- ¼ tsp xanthan gum
- ½ tsp gluten-free baking powder
- 3½ tsp vanilla extract (1½ tsp for the sponges and 2 tsp for the buttercream)
- 7 large eggs
- Red, orange, yellow and purple concentrated food colouring gels or pastes suitable for baking
- 1kg icing sugar
- 1-3 tsp milk, if needed to loosen the buttercream
- Gluten-free rainbow hundreds and thousands (see the FAQ section for the ones that are Coeliac-friendly and gluten-free)
How to make my Gluten-free Celebration Cake Recipe
- Heat your oven to 160°C fan / 180°C conventional. Grease four 20cm round tins and line the bases with non-stick baking paper.
- Lightly beat the eggs in a bowl. In a separate bowl, cream the butter and caster sugar until pale and fluffy, then mix in the flour, xanthan gum, baking powder, vanilla and beaten eggs until smooth.
- Weigh the mixture and divide it equally between four bowls. Colour one portion red, one orange, one yellow and one purple, then spread each into its own tin.
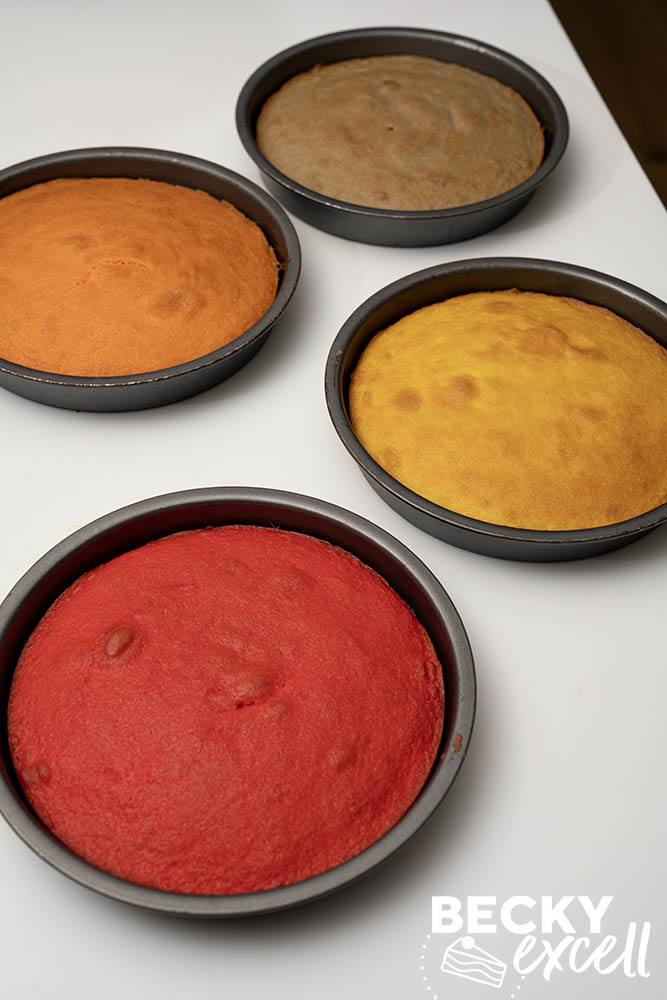
- Bake for 20-25 minutes, until the centres spring back lightly and a skewer comes out clean. Leave the sponges in their tins for 10 minutes, then turn them out onto a rack to cool completely.
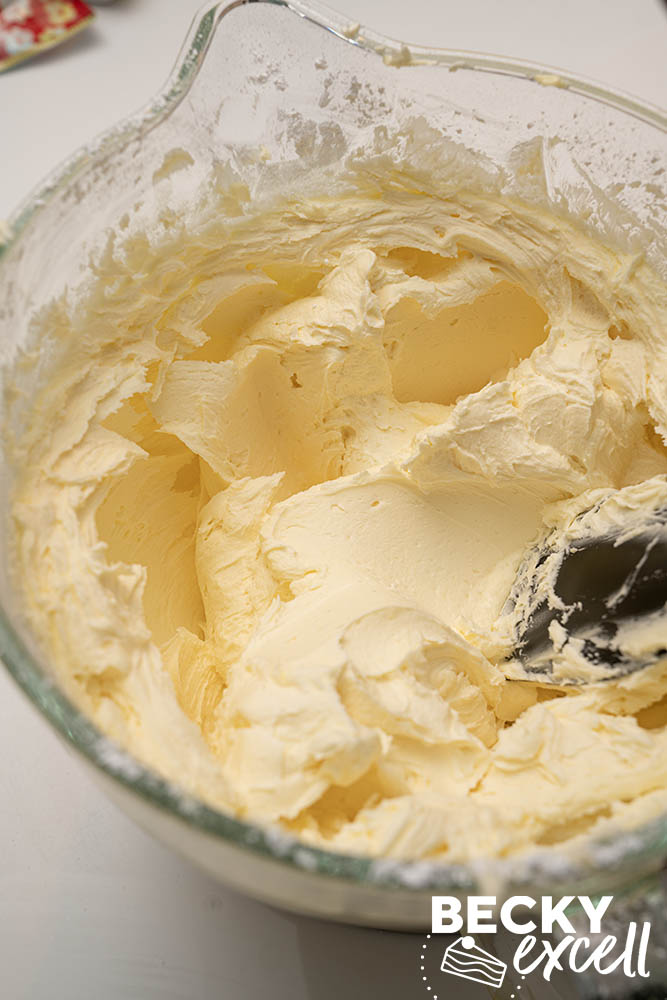
- Beat the butter for the buttercream until very pale and fluffy. Add the icing sugar in 2-3 stages, starting slowly each time, then beat in the vanilla. Add a little milk if the icing needs loosening.
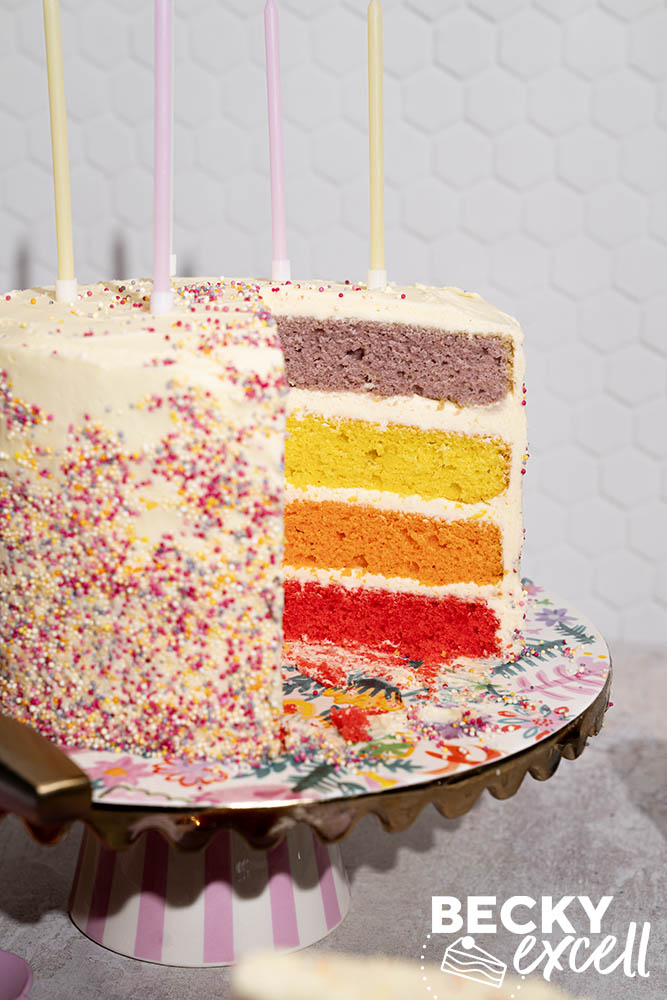
- Level any domed sponges and stack them red, orange, yellow and purple from the bottom up, with 150g buttercream between each pair. Apply a thin crumb coat and chill for about 20 minutes, until firm.
- Apply the final coat of buttercream and decorate with hundreds and thousands. Chill for about 30 minutes to firm up the icing, then let the cake come back towards room temperature before serving.
A few tips before you start
Get four medium bowls and four silicone spatulas out before you start. Having one of each for every colour makes mixing the batter and scraping it into the tins a breeze. I ended up raiding my baking cupboard for random-sized bowls and wooden spoons, which were next to useless for scraping the sides of a bowl!
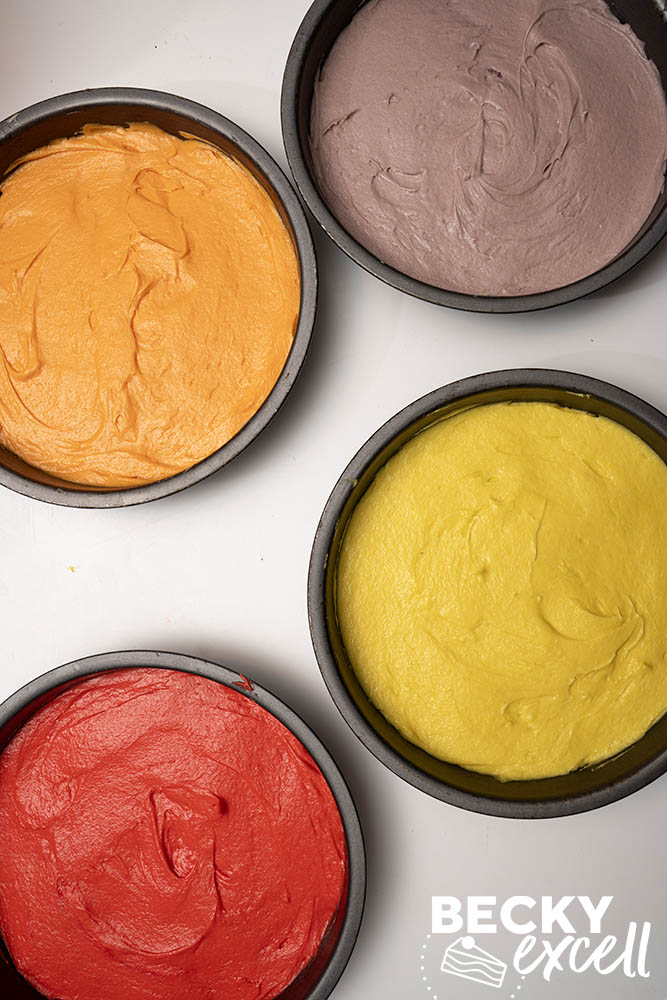
Weigh your finished batter and divide that number by four. You should have around 380-400g per bowl. Pop each empty bowl onto the scales and zero them before you spoon in the mixture. Once you’ve added the colouring, scrape right down to the bottom of the bowl to check for streaks and stop mixing as soon as the colour is even.
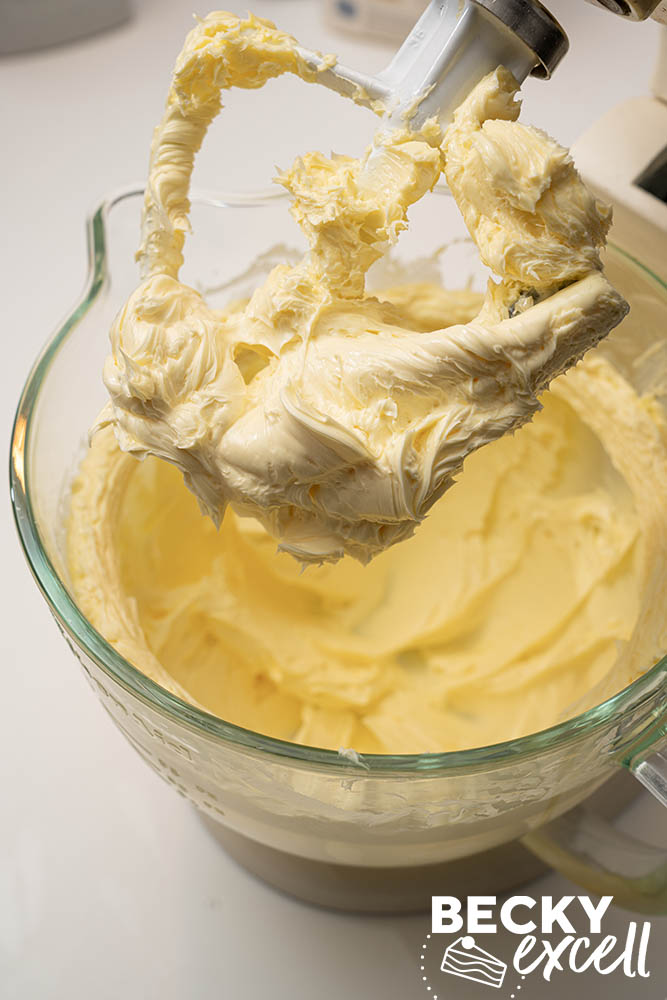
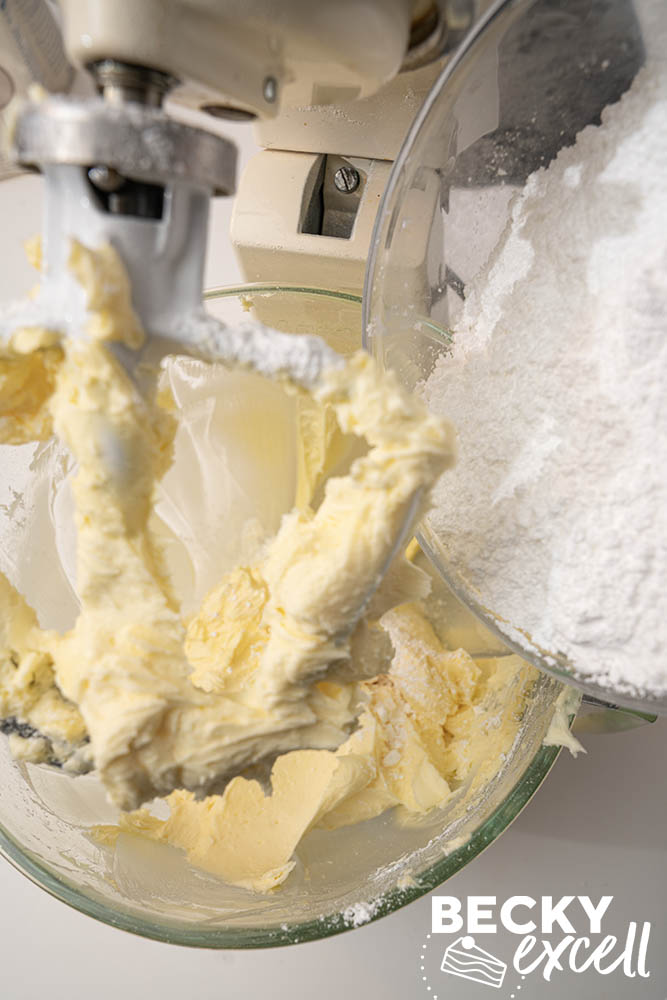
I use an electric hand whisk or stand mixer for the sponge, and a stand mixer for this much buttercream. Give the butter about 5 minutes on medium speed to get it really pale and fluffy. When you add the icing sugar, start slowly to avoid a mini icing sugar explosion, then turn it up to medium-high and beat for about 3 minutes after each addition.
A small cranked palette knife and a plastic cake scraper come in handy for the crumb coat. For the final coat, I use a large palette knife to apply the buttercream and a cake scraper to smooth the sides. A turntable makes that part easier if you have one. To finish the top, sweep the scraper inwards from the outside edge towards the centre.
Make sure you’ve got space in the fridge for the assembled cake, board and all. Cover the bowl of remaining buttercream while the crumb coat sets so it stays soft and spreadable for the final coat.
Storage and leftovers
Keep the finished cake covered in the fridge and enjoy it within 2-3 days. A tall cake box or airtight container is handy for keeping the buttercream from getting squashed. If you’ve already cut into the cake, cover the exposed sponge so it stays soft.
You can decorate it the day before a party and keep it covered in the fridge overnight. Give it time to come back towards room temperature before serving, as the buttercream will be firm straight from the fridge.
Can I freeze it?
Yes! If you’re getting ahead, let the sponges cool completely, wrap each one well and freeze for up to a month. Defrost them overnight in the fridge while still wrapped, then let them come towards room temperature before assembling the cake.
You can freeze leftover slices for up to a month too. Freeze them on a lined tray until the icing is firm enough to wrap, then wrap each slice and pop them in an airtight container. Defrost in the fridge and let the slices come towards room temperature before eating.
Recipe tips, swaps and FAQs
Is this recipe gluten-free? Is it suitable for people with coeliac disease?
Yes! Provided all the ingredients you use are gluten-free, including your food colourings and hundreds and thousands. If you’re baking for someone with coeliac disease, follow Coeliac UK’s advice on avoiding cross-contamination.
Can I make this dairy-free?
Yes! Use a hard dairy-free alternative to butter, or a dairy-free baking spread for the sponges.
For the buttercream, use a hard dairy-free alternative to butter.
If you need to loosen it, use dairy-free milk. However, I find that, when using a dairy-free block like Stork to make buttercream, it tends to yield looser buttercream already. Check your sprinkles and food colourings are suitable too.
Can I make this vegan or egg-free?
I don’t have a tested egg-free version of this particular bake. There are seven eggs in the mixture and they do a lot of the work here, so I’d start with a sponge recipe that’s written to be egg-free if you need that swap.
Can I make this lactose-free? Or low lactose?
Butter is naturally low in lactose. Use lactose-free milk if you need to loosen the buttercream. If you need the cake to be lactose-free, use a butter alternative labelled lactose-free for both the sponge and the icing.
Is this gluten-free celebration cake low FODMAP?
Yes, as long as you use a low FODMAP gluten-free flour blend. Use lactose-free milk if you need a little to loosen the buttercream. Regular butter is fine.
Which gluten-free flour should I use?
I use FREEE by Doves Farm gluten-free self-raising flour. It’s a blend you can find in the supermarket. If you’re using a different brand, look for a gluten-free self-raising blend suitable for cakes. The recipe is written for self-raising flour, so the ½ tsp baking powder is only a little extra.
Do I need xanthan gum if my flour already contains it?
My FREEE self-raising flour already contains xanthan gum and I still add the ¼ tsp in the recipe. That’s the amount for the entire four-layer cake. If you’re making two half batches, split it between them along with the other sponge ingredients.
What hundreds and thousands should I use? Which ones are gluten-free?
I used the little round ones from Waitrose. They come in an 85g jar called Cooks’ Ingredients 100s & 1000s.
The Waitrose ones are made with maize starch. Some brands use wheat starch in their hundreds and thousands, so do check the ingredients and any ‘may contain’ warnings on the jar, especially if you’re buying a different brand.
Can I use liquid food colouring for the rainbow layers?
I’d stick to a concentrated gel or paste made for baking, like Rainbow Dust ProGel concentrated food colouring – I bought these on Amazon and they’re more than enough to last you ages.
Liquid colouring tends to be for colouring icing and often bakes out leaving barely any trace of colour present (plus you add tons of extra unwanted liquid). Check that your colours are suitable for baking, not just icing!
What equipment do I need to make this gluten-free celebration cake?
- Four 20cm round cake tins and non-stick baking paper to line the bases. If you only have two tins, see my tips for baking in batches below.
- Digital kitchen scales, four medium mixing bowls and four silicone spatulas. Having a bowl and spatula for each colour makes mixing and scraping the batter into the tins much easier.
- An electric hand whisk or stand mixer and wire cooling racks. I prefer a stand mixer for the buttercream as there’s quite a lot of it!
- A cake board or flat serving plate, a small cranked palette knife, a large palette knife and a cake scraper for stacking and icing.
- A cake leveller is handy if the sponges have domed, and an icing turntable makes smoothing the sides easier. If you’re putting sprinkles on the sides, have a large rimmed tray ready to catch the strays.
Can I make this if I only have two cake tins?
Yes! Make two fresh half batches of sponge mixture. Weigh the lightly beaten eggs so you can use half in each. Divide each half batch between two bowls. Colour and bake the red and orange layers first, then mix the second batch for the yellow and purple layers when you’re ready to bake again. If you’re reusing the tins, let them cool completely before re-greasing and lining them again.
What’s the easiest way to trim the tops of my sponges?
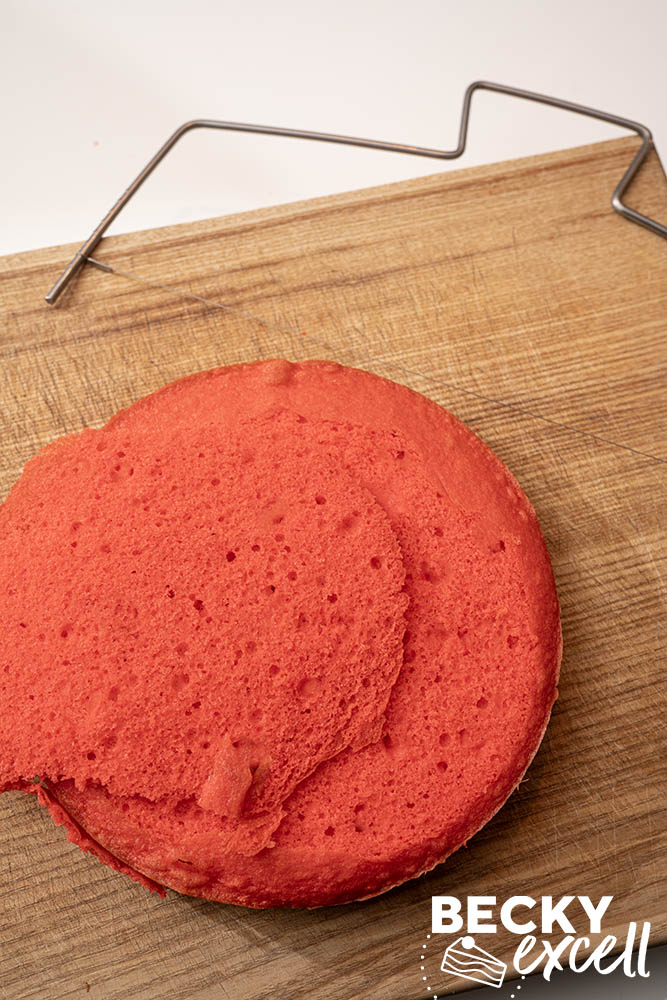
I use a cake leveller. Once the sponges are completely cool, place each one on a flat surface and set the leveller to take off just enough of the dome to leave a flat top. A long serrated knife works too if you’re careful. I find a leveller easier to keep straight and feel much safer using one.
Troubleshooting
How do I get hundreds and thousands to stick to the sides of the cake?
They stick with a little pressure while the buttercream is still soft. Getting them there is the faff! I tried throwing them at the cake, which mostly sent them bouncing off in every direction. I persevered and got the sides covered for the photos (but quickly realised full side coverage wasn’t worth the effort or mess!), yet I still ended up with hundreds and thousands all over the floor. A quick search online taught me that other bakers have had much the same experience with little round sprinkles.
That’s why I’d recommend you just sprinkle them on top. Use the back of a spoon to make a shallow dip in the buttercream, leaving a slightly raised rim around the edge. Scatter the hundreds and thousands into the dip and the rim will help keep them from rolling off.
If you fancy doing the sides like I did, set the cake on a large rimmed tray and gently press small handfuls into the soft buttercream. Work from the bottom up, turning the cake as you go. Reuse the sprinkles that land in the clean tray and leave the top plain. Next time I’d probably do it outside if I could!
Why is my buttercream too thick to spread?
First, give it a good beat once all the icing sugar and vanilla are in. If it’s still too stiff, beat in 1 tsp milk at a time. Around 1-3 tsp should do it. Stop when it spreads easily with a palette knife and still holds its shape.
Why are crumbs getting into my final coat of buttercream?
Usually it’s because the crumb coat is still soft or you’ve missed a patch of sponge. As you spread the final coat, your palette knife can pick up loose crumbs and drag them through the fresh buttercream. You should still be able to see the sponges through the finished crumb coat!
Scoop some buttercream into a separate bowl for the crumb coat and keep any leftovers in that bowl. That way, any crumbs you pick up on your palette knife stay out of the buttercream you’re saving for the final coat.
Chill the crumb coat until it’s firm to the touch before applying the final coat.
How do I smooth little air pockets in the buttercream?
If you can see a lot of air bubbles in the bowl, use a spatula to press the buttercream against the sides of the bowl before you spread it on the cake. If you spot a little hole after scraping the sides, dab in a bit of buttercream with your palette knife and give that section another gentle pass with the scraper.
Gluten-free Celebration Cake Recipe
Equipment
- 4 20cm round cake tins or 2 if baking in batches
- Stand mixer or an electric hand whisk
Ingredients
For the sponges
- 400 g caster sugar
- 400 g unsalted butter softened, or use dairy-free baking spread
- 395 g gluten-free self-raising flour see FAQ section for what I used
- 1/4 tsp xanthan gum
- 1/2 tsp gluten-free baking powder
- 1 1/2 tsp vanilla extract
- 7 large eggs around 400g without the shells
- concentrated food colouring gels or pastes suitable for baking see FAQ section for what I used
For the vanilla buttercream
- 600 g unsalted butter softened
- 1 kg icing sugar
- 2 tsp vanilla extract
- 1-3 tsp milk only if needed to loosen the buttercream
For decoration
- 85 g gluten-free rainbow hundreds and thousands see FAQ section for what I used
Instructions
- Preheat your oven to 160°C fan / 180°C conventional. Grease four 20cm round cake tins and line the bases with non-stick baking paper. If you're baking in two batches, see the FAQ section before you start.
- Crack the eggs into a bowl and lightly beat them together.
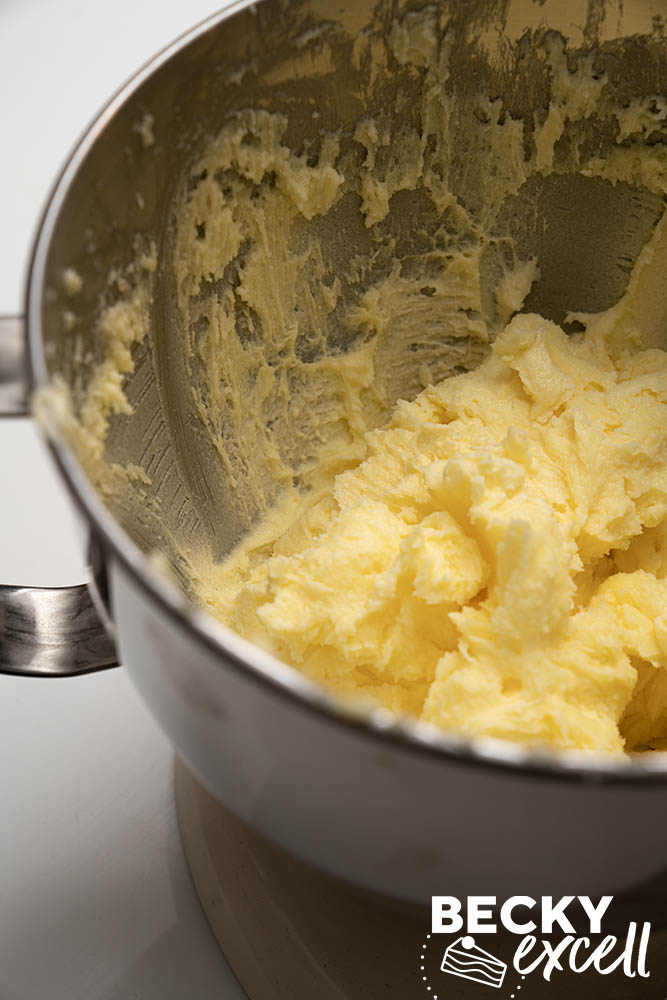
- In a large mixing bowl, cream the butter and caster sugar with an electric hand whisk or stand mixer until pale, light and fluffy. Scrape down the sides of the bowl as needed.
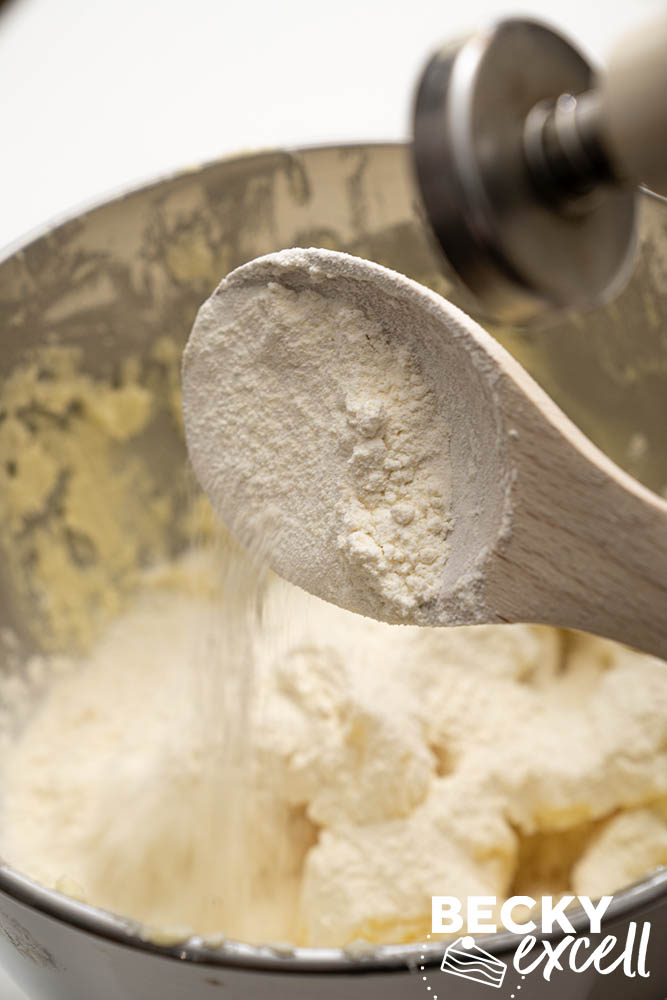
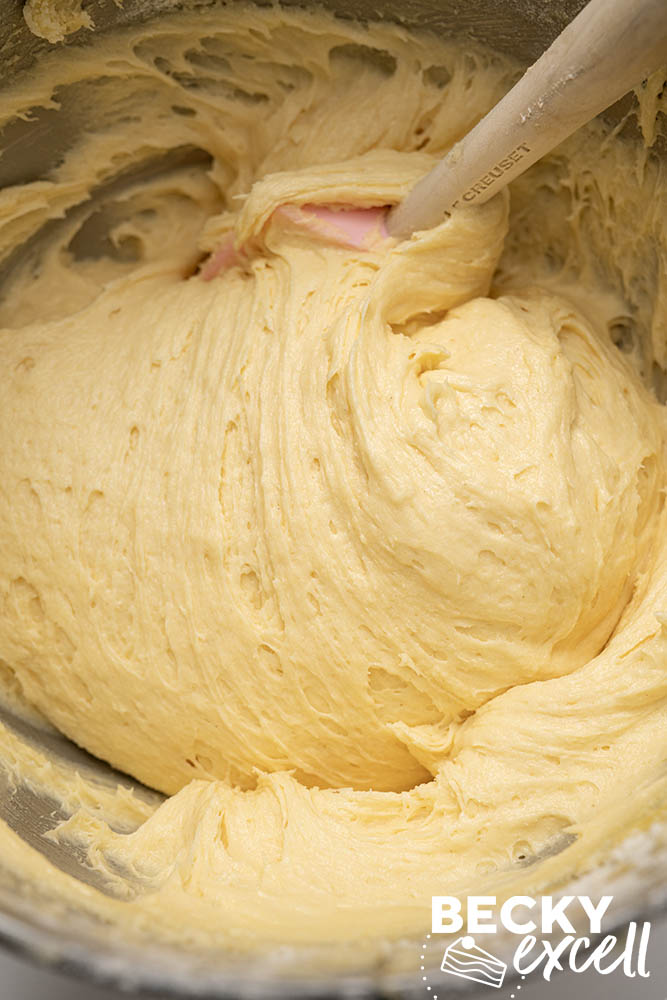
- Add the gluten-free self-raising flour, xanthan gum, baking powder, vanilla extract and beaten eggs. Mix until smooth and evenly combined, scraping down the sides and bottom of the bowl.
- Weigh the finished mixture and divide its weight by four. You should have around 380-400g per bowl. Zero the scales with each empty bowl in place before spooning in the mixture so the layers bake to an even thickness.
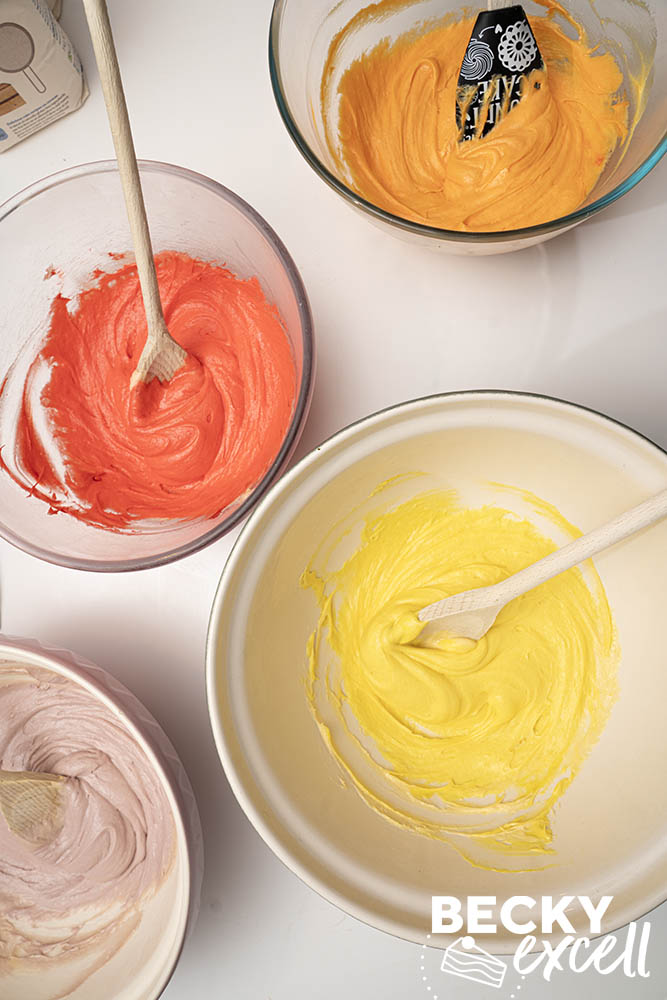
- Colour one bowl red, one orange, one yellow and one purple. I used 4-5 drops per bowl, though the amount you need may vary by brand. Add the colouring gradually, following the guidance on the pack. Use a silicone spatula for each bowl and stop mixing as soon as the colour is even, with no streaks or lumps of colouring.
- Transfer each colour to its own tin and gently level the tops. Bake for 20-25 minutes, checking from 20 minutes. The centres should spring back lightly when touched and a skewer should come out clean.
- Leave the sponges in their tins for 10 minutes before carefully turning them out onto wire racks. Leave them to cool completely.
- For the buttercream, beat the softened butter on medium speed for about 5 minutes until very pale and fluffy. I use a stand mixer for this, but an electric hand whisk works too.
- Add the icing sugar in 2-3 stages. Start slowly each time to avoid a mini icing sugar explosion, then turn up to medium-high and beat for about 3 minutes after each addition.
- Add the vanilla extract and mix once more. If the buttercream is too thick to spread, beat in 1-3 tsp milk, a teaspoon at a time, until it spreads easily and still holds its shape.
- If the cooled sponges have domed, use a cake leveller to trim just enough off the tops so they stack evenly. A long serrated knife works too if you’re careful.
- Secure the red sponge to a cake board or flat serving plate with a small dab of buttercream, placing its flat base underneath. Spread 150g buttercream evenly over the sponge, taking it almost to the edges.
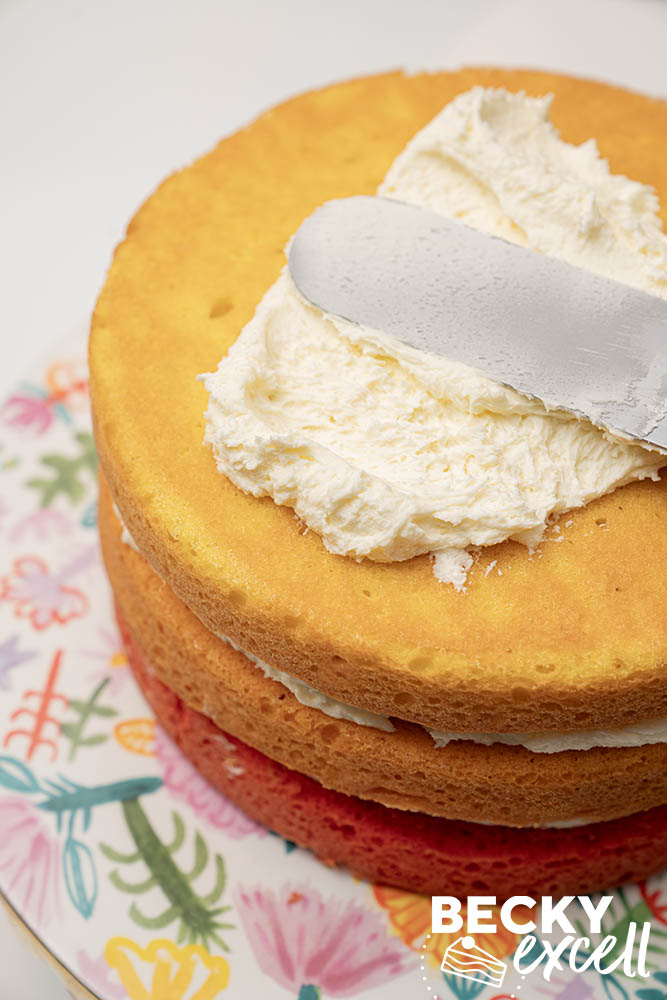
- Place the orange sponge on top and press down gently. Spread over another 150g buttercream, then add the yellow sponge and another 150g buttercream. Finish with the purple sponge, placing its flat base uppermost.
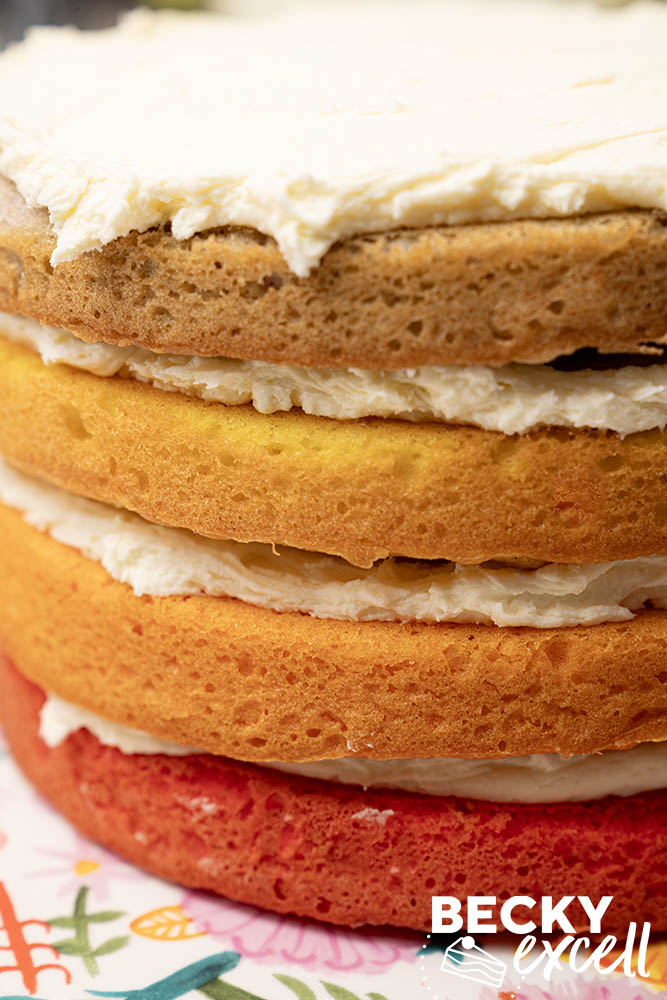
- Use a small cranked palette knife to apply a thin crumb coat to the top and sides, filling any gaps between the layers. Smooth it with a scraper. You should still be able to see the sponges through it. Chill for about 20 minutes until firm to the touch and cover the remaining buttercream while you wait.
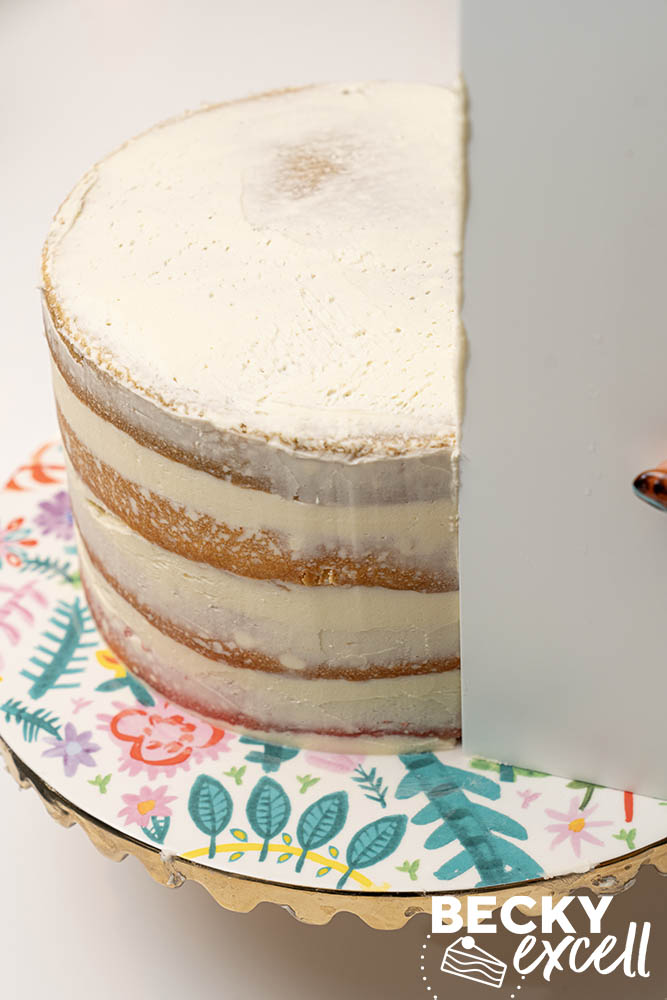
- Apply a generous final coat of buttercream, about 5mm thick, with a large palette knife.
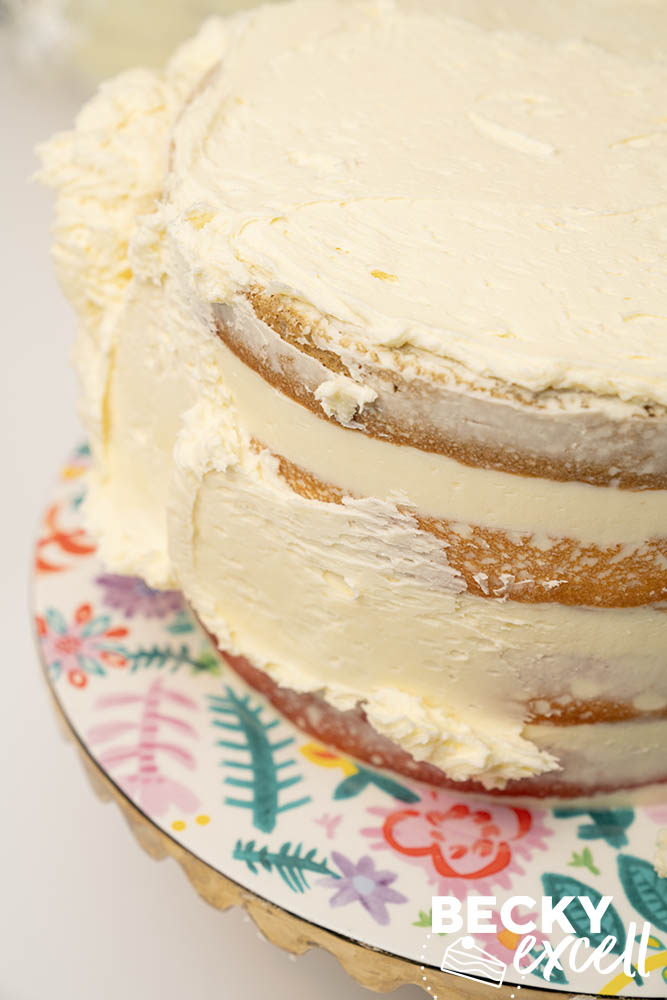
- Smooth the sides with a cake scraper, using a turntable if you have one. Sweep the scraper inwards from the edge towards the centre to level the top. You may have some buttercream left over.
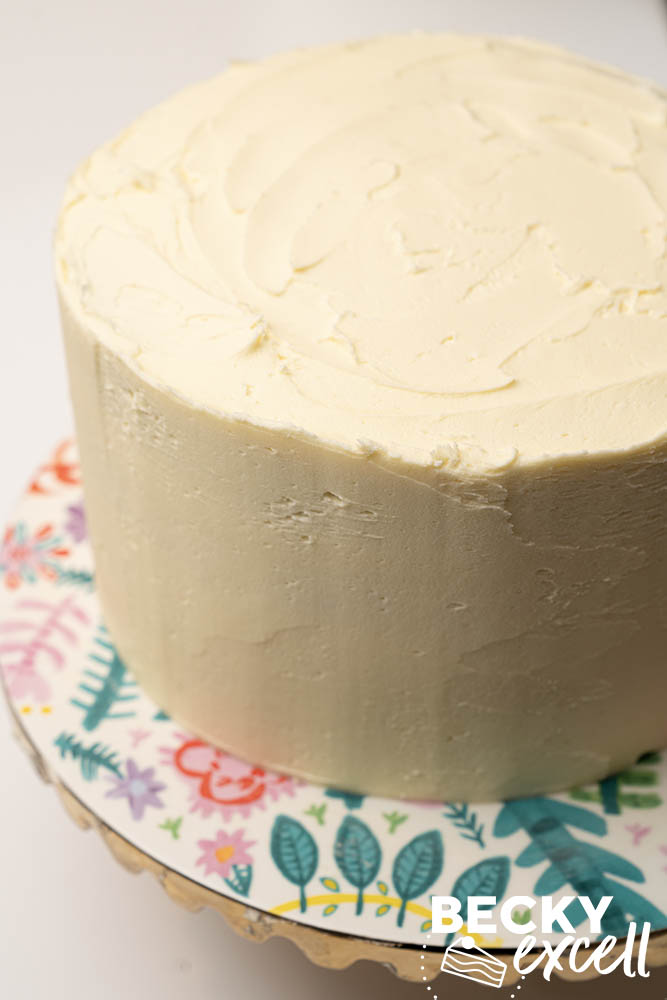
- If you want sprinkle-covered sides, put the cake on a large rimmed tray and gently press small handfuls of hundreds and thousands into the buttercream while it’s still soft. Work from the bottom up, turning the cake as you go. Reuse any sprinkles that fall into the tray and leave the top plain. It’s a real faff to get an even coat, and the little round sprinkles bounce and roll everywhere, even with a tray.I’d just sprinkle them on top instead. Use the back of a spoon to make a shallow dip in the buttercream, leaving a slightly raised rim all the way round. Scatter the hundreds and thousands into the dip so the rim keeps them from rolling off.
- Refrigerate for about 30 minutes to firm up the buttercream. Let the cake come back towards room temperature before serving.
Nutrition