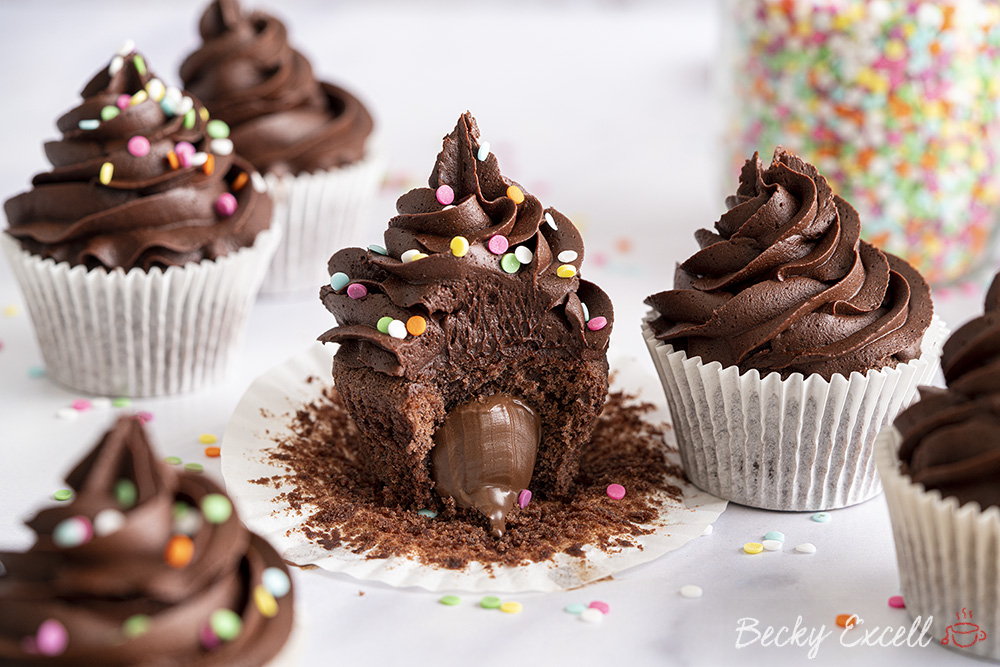
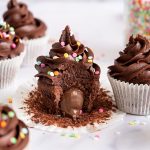
Gluten-free chocolate cupcakes recipe – super easy to make with a hidden, Nutella-filled centre. Best of all, nobody would know they’re Coeliac-friendly and wheat-free!
Gluten-free chocolate cupcakes recipe, anyone? When I posted these on Instagram, they quickly became my most successful post *ever* at 12,000+ likes… numbers aren’t everything in life, but it made one thing clear – you guys loved the look of these!
And that’s when I realised that I needed to get this recipe up ASAP! Can you believe it’s been 8 years since I started this blog and I’ve still never posted chocolate cupcakes before?
Well, that all changes now! After all, this is exactly the thing I’d see in the window of a bakery, yet (obviously) it would never be gluten-free.
Of course, you get used to that feeling after many years of ditching gluten, but it never stops you craving a moist, chocolatey cupcake topped with sweet, whipped buttercream!
Here’s a few reasons why you need to make these if you weren’t convinced already…
Why make my gluten-free chocolate cupcakes?
- Super easy to make – just make cupcakes, whip up some icing and construct!
- It’s a SUPER moist and chocolatey sponge cake, topped with an indulgent, thick, sweet chocolate icing, topped with colourful sprinkles. What more could you want?
- Best of all, you’d never know it was gluten-free by tasting or looking at them – they’re super soft and NOT crumbly or dry at all.
- Nutella is gluten-free in the UK so celebrate that fact by making these! (for the optional filling)
- Yep, it’s easy to make dairy-free too – just see the FAQ section to find out how.
So what do my gluten-free chocolate cupcakes taste like?
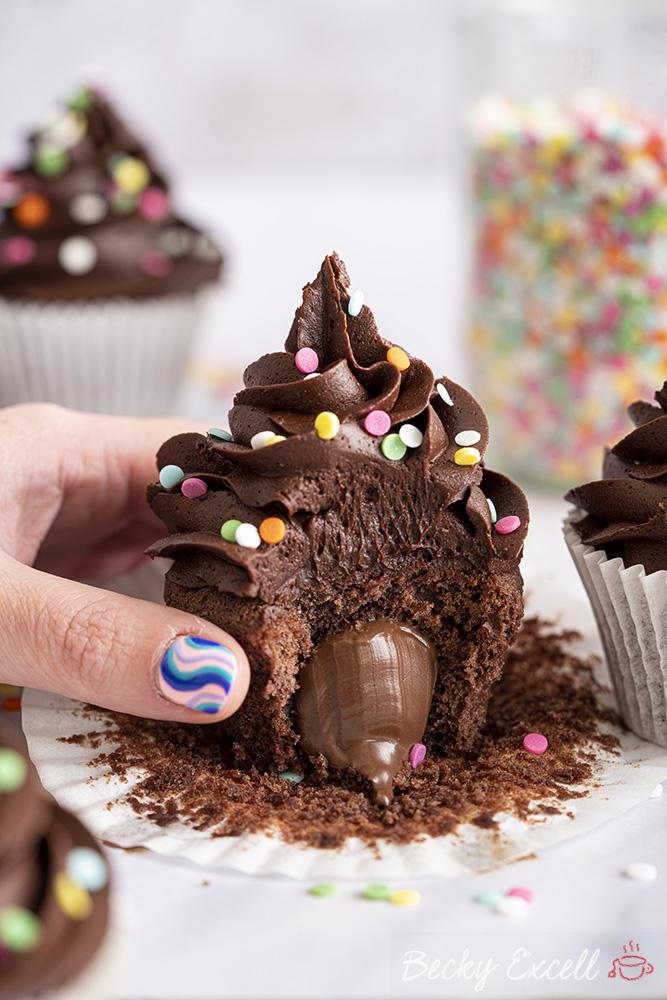
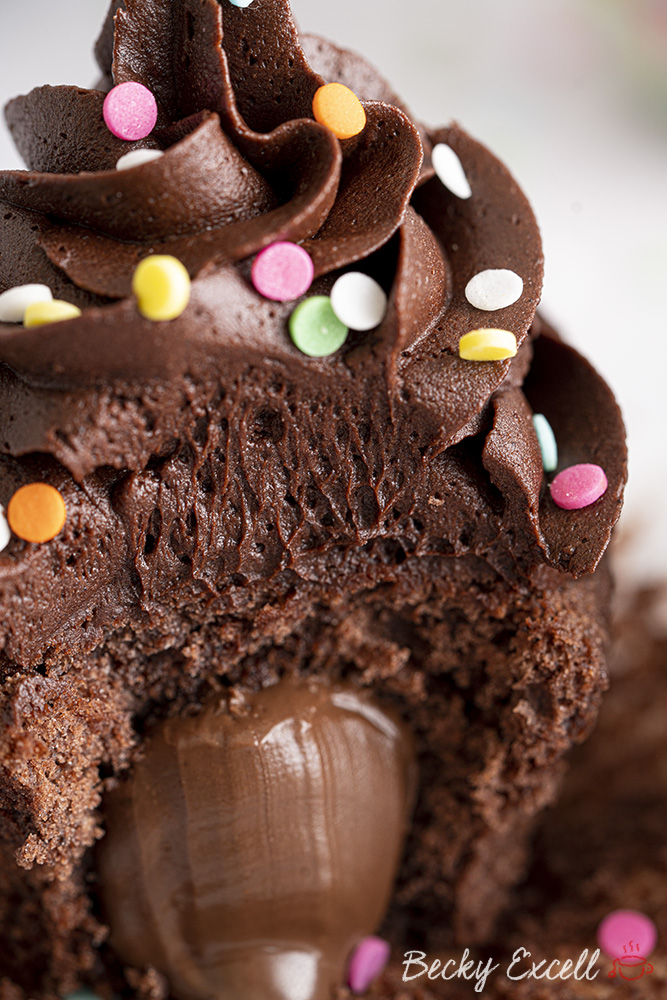
Each cupcake is beautifully soft, moist and indulgently chocolatey, filled with oozing Nutella in the middle.
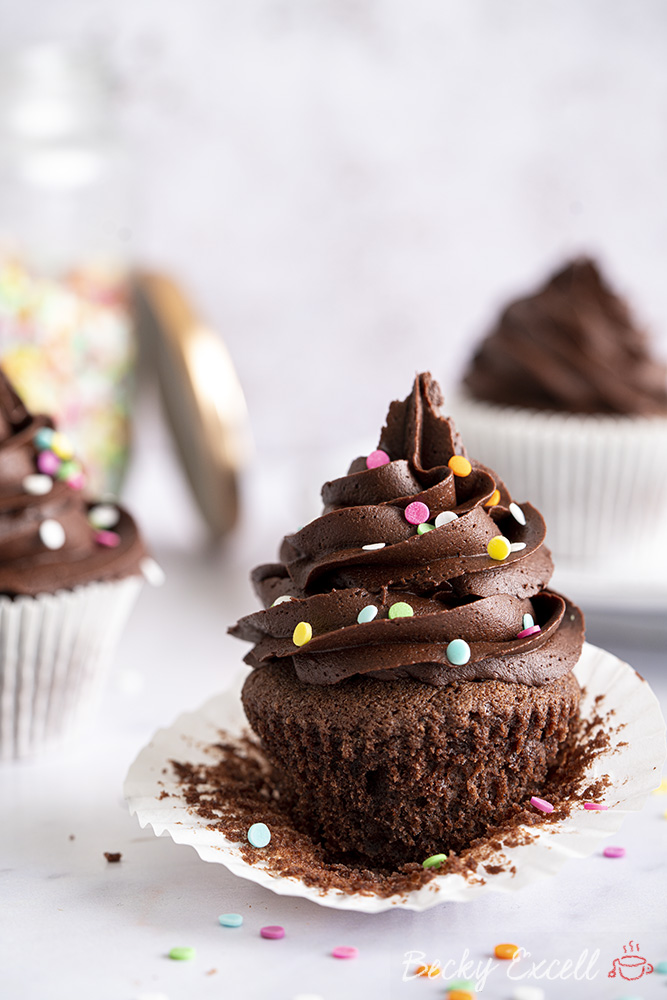
Then they’re topped with fluffy, rich and indulgent chocolate buttercream and colourful, crunchy gluten-free sprinkles.
Honestly, if I could find one of these out in the wild and it was gluten-free… I think I’d faint! But fortunately, you can easily make these at home – no fainting required.
Here’s everything you’ll need for this recipe – consider it your shopping list! Keep scrolling until you see the recipe card for the measurements and method ??
Gluten-free chocolate cupcakes recipe: Ingredients
- Butter – Butter is king in cakes and buttercream, but make sure yours is softened before you mix up the cake batter. Leaving it out of the fridge for a couple of hours should do it.
- Caster sugar – Of course, sugar isn’t just for sweetness – it helps to achieve a lovely crisp exterior and helps the cake to form a crumb.
- Medium eggs – I used medium eggs for this recipe, though large eggs should be fine too.
- Gluten-free self-raising flour – I used Doves Farm’s FREEE flour, which you easily find down the free from aisle in supermarkets. If you can’t find a blend like this where you live, you can always make your own using my gluten-free flour recipe.
- Cocoa powder – The easy, instant way to a wonderful chocolatey flavour.
- Gluten-free baking powder – Though there’s a little of this in gluten-free self-raising flour, a little goes a long way to ensure a nice, perfect rise.
- Xanthan gum – This helps to bind the cake crumb together so it doesn’t become crumbly, replacing the gluten that would otherwise do the same job.
- Nutella – Yes, Nutella is gluten-free in the UK!
- Icing sugar – You’ll need this for the buttercream as caster sugar won’t cut it whenever it comes to creating icing.
- Dark chocolate – You’ll need to melt this into the buttercream – don’t worry though, it doesn’t taste like dark chocolate. The butter and icing sugar help to balance it out to a more, rich, indulgent flavour.
- Gluten-free sprinkles – Any will do, as long as they’re gluten-free!
So I thought I’d kick things off with a little frequently asked questions section – if you just want the recipe, then keep scrolling!
But I’ve thrown in some tips here that will be really helpful if this is your first time making this, or you want to adapt it. So here they are!
Gluten-free chocolate cupcakes recipe: Frequently asked questions
Can I make this recipe gluten-free? Is it suitable for Coeliacs?
It is gluten free, though nobody would know just by tasting it – trust me!
Bear in mind that minimising cross-contamination is hugely important if you’re Coeliac or making this for someone who is. Here’s some tips from Coeliac UK on minimising the risk of cross contamination.
Also, make sure that all ingredients used don’t have any gluten-containing ingredients. Then sure that they also don’t have a ‘may contain’ warning for gluten, wheat, rye, barley, oats (which aren’t gf), spelt and khorasan wheat (aka Kamut).
Here’s some more info from Coeliac UK on identifying safe gluten free products.
Can I make your gluten chocolate cupcakes recipe dairy free?
Yes! Here’s the simple swaps you need to make:
- Use Stork hard margarine instead of butter.
- Use dairy-free dark chocolate.
- Instead of using Nutella for the filling, use this specific chocolate hazelnut spread, which is dairy-free. But watch out! The jarred version by the same brand has a ‘may contain dairy’ warning, so please be careful!
Lastly, ensure that your cocoa power is dairy-free and that’s it!
Can I make your gluten chocolate cupcakes recipe vegan?
Yep! If you follow the instructions above to make this recipe dairy free, then all you’ve got left to contend with is the eggs.
Here’s a few ideas you can use as egg replacements, so each of these = 1 egg.
- 3 tablespoons of aquafaba – water from a can of chickpeas. Make sure you whisk it up until frothy before adding.
- Egg replacement powder – I’d recommend using Orgran as it’s gluten free.
- 1 tablespoon of chia/flax seeds mixed with 2 tablespoons of water and left for 10 minutes in the fridge.
- 3 tablespoons of applesauce.
I haven’t tested all of these egg alternatives so let me know how you get on in the comments below.
Is this recipe low FODMAP?
It can be! Simply use dairy-free dark chocolate and omit the Nutella for the filling. Then, one cupcake would be suitable for the elimination phase of the low FODMAP diet.
Is Nutella gluten-free?
Yes, in the UK, Nutella is gluten-free! But don’t take my word for it (you never know when things might change after all), here’s a link to it so you can check it for yourself.
According to Coeliac UK, if a product has no gluten-containing ingredients and no ‘may contain’ warning for gluten, wheat etc. then that makes it safe for Coeliacs and those on a gluten-free diet.
Can I make your gluten-free chocolate cupcakes in a food processor or standing mixer?
Of course you can, but you definitely don’t need to. I use both a stand mixer and an electric whisk for this recipe. Here’s a link to the electric whisk I use.
A stand mixer makes making buttercream a breeze and an electric whisk speeds up mixing the cake batter.
You can of course, use either for both tasks too, just make sure you clean your stand mixer bowl in between of course.
Can I make this recipe completely by hand?
Of course! Just a good ol’ fashioned wooden spoon or spatula will do. Just make sure you give it a lot of welly, otherwise your mixture won’t be consistent!
Making the buttercream can take a little longer by hand, but it’s definitely do-able.
Do I need any special equipment to bake your gluten-free chocolate cupcakes?
Certainly not! You will need a good quality muffin tray, so here’s a link to the one I use.
Of course, you will need a piping nozzle and piping bags if you want to finish them like I have in the photos. I use the 1M star nozzle in this set to pipe cupcakes and piping bags like these.
Do I need weighing scales to bake your gluten-free chocolate cupcakes?
In short… yes, yes and yes! And I wouldn’t advise attempting any of my recipes without them.
A lot of work went into fine tuning ratios and quantities and for me, baking is all about consistency and precision. I want you to make this recipe and for it to turn out EXACTLY like mine did.
I’d recommending using digital cooking scales like these so you know you’re getting an accurate measurement and replicating my recipe as accurately as poss.
Can I bake your gluten-free chocolate cupcakes with less sugar?
I can definitely understand the need to reduce sugar in our foods, but this is one of the recipes where I wouldn’t advise removing it from the cake batter itself.
Of course, the sugar isn’t just for sweetness. It’s integral to the structure of the cake once baked and is sooo important.
However, if you want to reduce the overall sugar, you can always omit the Nutella filling, or reduce the amount of buttercream on each cupcake.
Can I make this recipe without xanthan gum?
In some of my recipes, yes, but I wouldn’t recommend leaving xanthan gum out of this one. You’ll see xanthan gum in a lot of my recipes as it’s an essential ingredient in gluten-free baking.
Without gluten to bind the cake batter together, you can be left with a very loose and crumbly sponge texture which won’t work for this recipe.
Some people have asked if they can use psyllium husk powder instead of xanthan gum, but I’ve found that it definitely results in a denser sponge so I wouldn’t overly recommend it.
If you’re really against xanthan gum or you simply don’t have any, you can omit it if pushed. There’s a little in gluten-free self-raising flour anyway, so they should still turn out fine.
Can I make this recipe using other gluten-free flours like buckwheat flour or coconut flour?
There’s a big difference between ‘gluten-free plain/self-raising flour’ and a *singular* type gluten-free flour. When I say ‘gluten-free plain or self-raising flour’ in a recipe, I mean a BLEND of gluten-free flours, not just one, singular flour.
Most gluten-free flour you buy in the supermarket typically contains a blend of rice flour, potato flour, maize flour, tapioca flour AND buckwheat flour. That’s a lot of different flours!
In gluten-free self-raising flour, there’s usually even a little baking powder and xanthan gum in it too which always helps.
So to replace it with just one specific type of flour… that’s not going to cut it at all. Definitely go for a gluten-free flour blend.
How can I tell when my gluten-free chocolate cupcakes are done?
Grab a skewer and give one a poke in the centre. If it comes out clean, then it’s done!
But if the skewer comes out moist and cake-like, it’s best to pop them back in for a bit longer.
How to store your finished cupcakes
How long can I keep your gluten-free chocolate cupcakes for?
I usually find that my cupcakes last for around 3-5 days in an airtight container. It’s usually eaten by that point, but I wouldn’t recommend keeping it for longer than that.
If it’s any longer than that then I’d highly recommend reading the next question…
Can I freeze your gluten-free chocolate cupcakes?
Of course! I’ve frozen them for up to a month and after allowing them to fully thaw, you’d never know they were frozen.
Simply leave each cupcake out at room temperature for 4-5 hours to defrost.
Gluten-free chocolate cupcakes recipe: Method
Oh and here’s a printable version of my gluten-free chocolate cupcakes recipe. Please remember to give it 5 stars if you tried it and enjoyed it as it helps people know it’s worth trying too! ⭐️ Feel free to leave your written reviews in the comments below this post.
Gluten-free chocolate cupcakes recipe (dairy-free/low FODMAP option)
Ingredients
For the cupcakes
- 200 g butter softened (use Stork hard margarine if dairy-free)
- 200 g caster sugar
- 4 medium eggs
- 165 g gluten-free self raising flour
- 25 g cocoa powder
- 1/4 tsp gluten-free baking powder
- 1/4 tsp xanthan gum
For the filling (optional)
- Nutella as much as you like
For the icing
- 250 g butter softened (use Stork hard margarine if dairy-free)
- 185 g icing sugar
- 55 g cocoa powder
- 110 g dark chocolate dairy-free if necessary
- gluten-free sprinkles for topping
Instructions
For the cupcakes:
- Preheat your oven to 160C Can / 180C and place cupcake cases into your cupcake tin. I sprinkle a little rice into each hole before the case as this helps reduce unwanted moisture.
- Cream together your softened butter and sugar using an electric hand whisk. Do so until lighter in colour and fluffier in texture.
- Gradually add your eggs (I whisk briefly in between each addition) and mix in.
- Sift in your flour, cocoa, baking powder and xanthan gum and then mix with your electric hand whisk until combined.
- Spoon your mixture into your cupcake cases and place in the preheated oven for 20-22 minutes.
- Remove from the oven and allow to cool very briefly in the tin, then move the cases to a cooling rack.
For the icing:
- Melt your dark chocolate (I do this is the microwave in 20 seconds bursts), put to one side to cool whilst making the rest of the buttercream.
- To make your icing, place your butter in a stand mixer (or electric hand whisk if you don't have a stand mixer), mix on its own on a high speed for about 5 minutes. The butter should change from a more yellow colour to being a lot more pale.
- Add your icing sugar gradually to the butter (I do this in two stages). I mix each addition of icing sugar for around 3 minutes before adding the second half.
- Sieve in your cocoa powder and then mix again until fully combined.
- Add in your cooled melted chocolate and mix until dispersed evenly, the colour is a lovely rich chocolate colour and it's a nice thickness to spread.
To assemble your cupcakes:
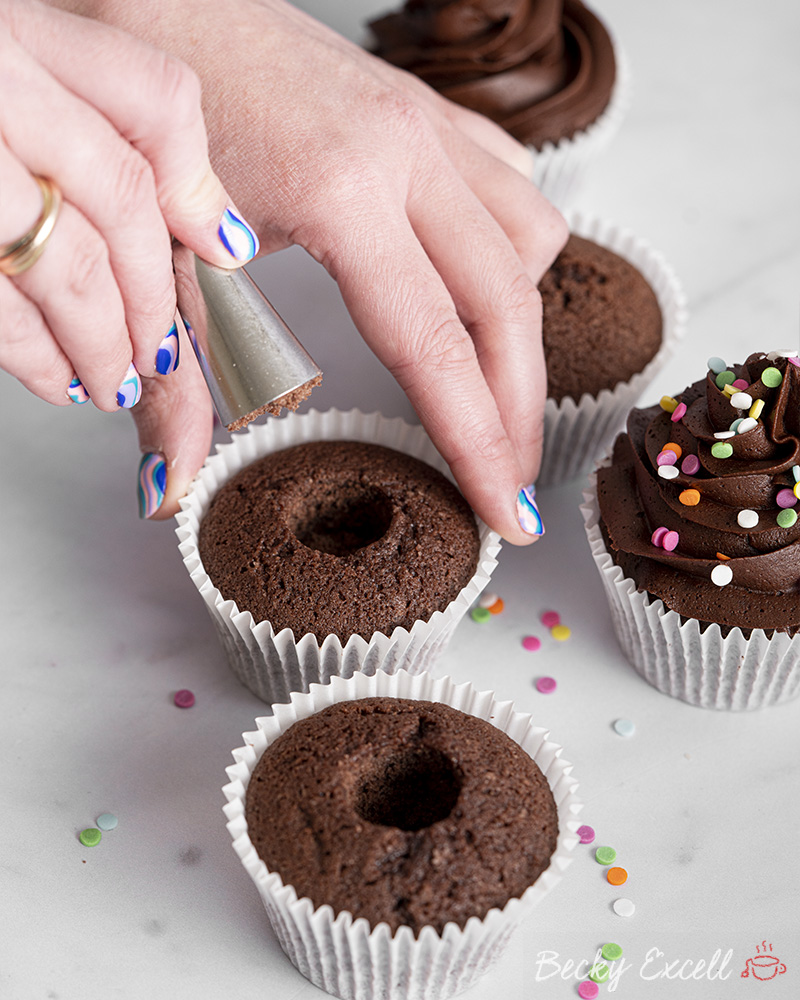
- Once the cupcakes are cool, if filling, you need to core each cupcake. I use the larger end of one of my piping nozzles to gently push into the centre of each cupcake, then removing the core as you pull it out. You could use a knife and remove a little too. Just make sure you don't go too deep as you need some of the cake beneath to hold the filling!
- To fill, ready your Nutella. If your Nutella is a bit stiff, beat it a little or warm it (in a bowl) in the microwave for 10 seconds (you aren't wanting it to be hot, just a little loose).
- Spoon a decent amount of Nutella into the hole you've made in each cupcake until they're all filled.
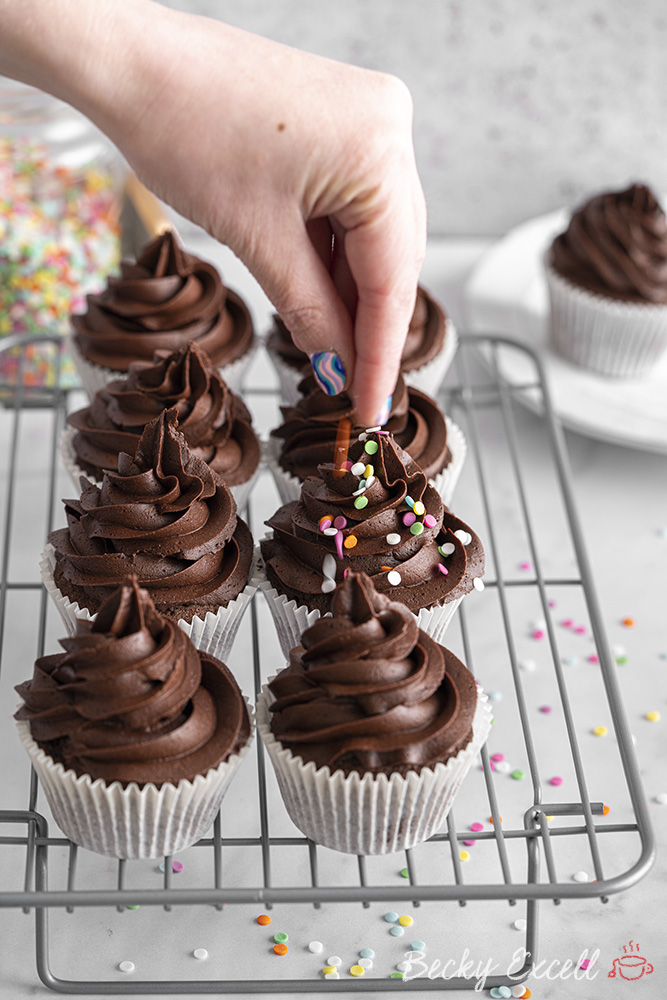
- To finish, transfer your chocolate icing into a piping bag with a large star nozzle. Then pipe your buttercream on top. Alternatively, you can always spoon a little icing onto each cupcake and spread, if you'd prefer.
- Finish with colourful sprinkles and enjoy!
Nutrition
Any questions about the recipe? Please do let me know by following me on Instagram and leaving me a comment on a recent photo.
If you want to send me a photo of how your bake turned out, you can request to join my Facebook group and post it there. Myself and everyone else would love to see it!
Thanks for reading,
Becky xxx
Oh and don’t forget to pin this for later!

