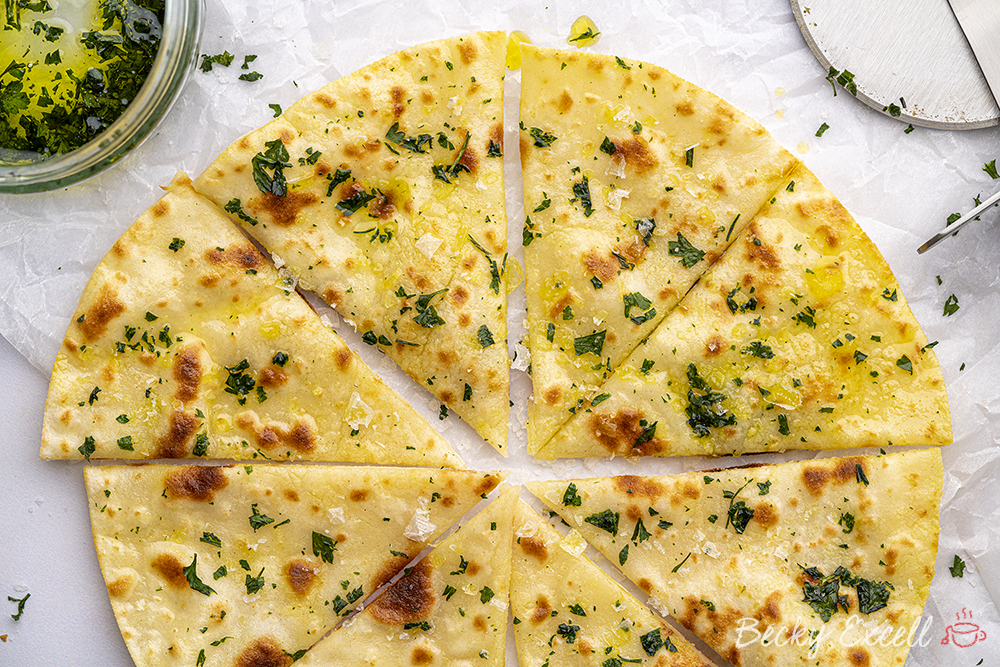
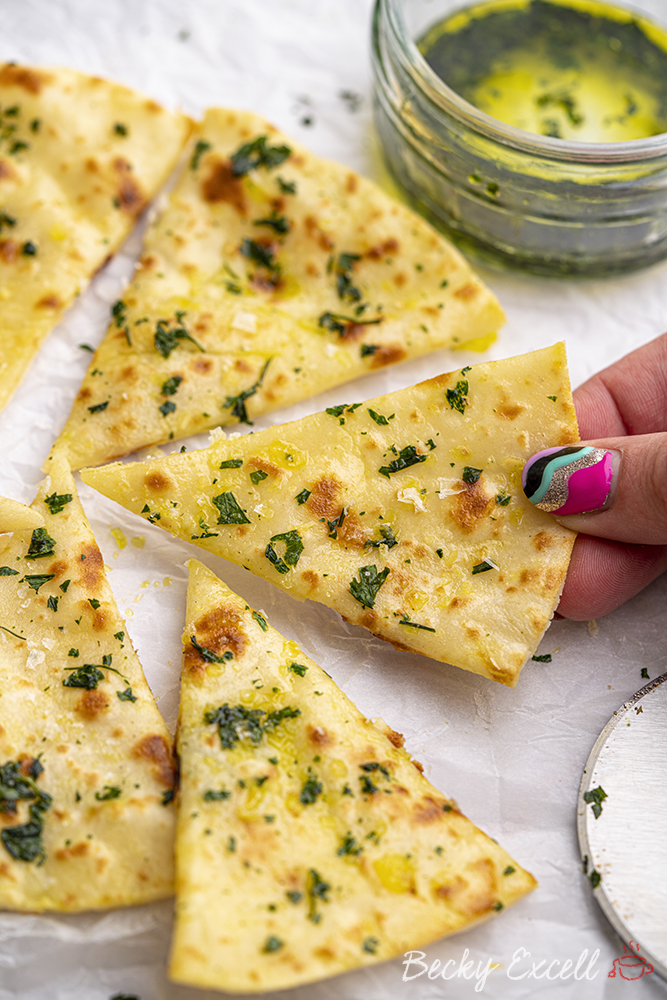
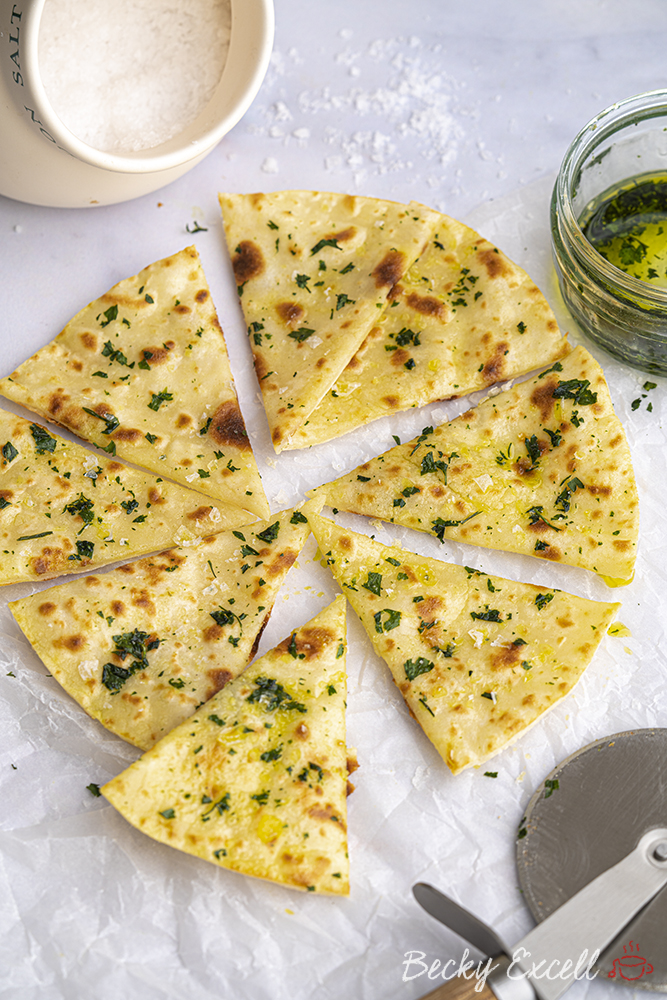
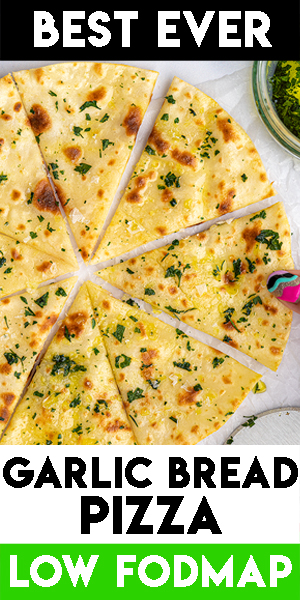
Gluten free garlic bread pizza recipe – it’s thin and crispy with a delicate garlic flavour that you’ll want to eat with every single meal. Plus, it just so happens to be low FODMAP, vegan and dairy free too!
Gluten free garlic bread pizza recipe! That’s not something I thought I’d ever write here on the blog… because I can’t tolerate garlic!! Yet I’ve found out a way to make it happen and nobody would ever know it’s gluten free or low FODMAP…
Not too long ago, I posted my 3-ingredient gluten free pizza base and you guys absolutely loved it! Who knew you could make an insanely good pizza base, with zero gluten or dairy and it taste so darn good?
But what I didn’t tell you guys in that post is that I’ve been using the exact same method to make my gluten free garlic bread pizza recipe ?
So in actual fact, this recipe is basically that, but with a little extra to show you how to make the garlic butter topping. So if you’re already made my pizza base before, this will be a doddle for you.
And if you’re wondering how I’m able to make garlic bread that I can eat, despite being intolerant to garlic, then read on to find out my low FODMAP garlic bread hack…
The secret is garlic-infused olive oil! You can easily buy it in Tesco and Asda and I think FODY makes some too but it’s waaay too expensive on Amazon. It gives you all the garlic flavour without any of the high FODMAP nasties in garlic.
If you’re low FODMAP, please make sure there’s no actual bits of garlic floating around at the bottom of the bottle. That’s the kind of garlic-infused oil you SHOULDN’T buy! It should be totally clear and just look like regular oil.
Once you’ve got a bottle, you’re ready to take on my garlic bread pizza recipe! Just like my gluten free pizza recipe, every slice is a lovely, thin and crispy base – super flexible and tastes like fresh bread.
Honestly, you just have to give it a try! Of course, if you can eat garlic (lucky you), I’ve thrown in an option where you can use minced garlic too for a super-garlicky taste.
Here’s a few answers to some frequently asked questions, as well as a few tips and product recommendations for this recipe. Hopefully this will help you to make this recipe perfect, first time!
Can I make this recipe gluten free? Is it suitable for Coeliacs?
It is gluten free, though nobody would know just by tasting it – trust me!
Bear in mind that minimising cross-contamination is hugely important if you’re Coeliac or making this for someone who is. Here’s some tips from Coeliac UK on minimising the risk of cross contamination.
Also, make sure that all ingredients used don’t have any gluten-containing ingredients. Then make that that they also don’t have a ‘may contain’ warning for gluten, wheat, rye, barley, oats (which aren’t gf), spelt and khorasan wheat (aka Kamut).
Here’s some more info from Coeliac UK on identifying safe gluten free products.
Is your gluten free garlic bread pizza recipe dairy free?
Yep, this recipe is dairy free! Simply use dairy free yoghurt – I used Koko dairy free plain yoghurt to make this recipe.
Can I make this recipe vegan?
It is vegan if you use dairy free yoghurt!
Is your gluten free garlic bread pizza recipe low FODMAP?
Yes! You can easily make this low FODMAP by using lactose free plain yoghurt – that way, it’s suitable for the elimination phase of the FODMAP diet and all other phases too.
Garlic-infused oil without any bits of actual garlic in it is of course, 100% low FODMAP.
Is this recipe nut free?
Yep, this is a nut-free recipe as far as ingredients go, BUT make sure you check the ingredients label on ALL the products you use just to be safe.
Even if the products don’t contain nuts, they may have a ‘may contain nuts’ warning due to being produced in a factory that handles nuts.
You can never be too careful so always read the labels on everything first.
Do I need any special equipment to make your gluten free garlic bread pizza recipe?
Not especially, but having a metal cake lifter like this can make your life a billion times easier. It’ll make transferring your rolled out dough to the frying pan an absolute walk in the park!
Having a rolling pin like mine makes this recipe a doddle because you can adjust how thick you want the dough too. No more guesswork!
I can’t buy gluten free self-raising flour where I live, can I use gluten free plain flour?
If you use gluten free plain flour, then the baking powder and xanthan gum go from being optional to mandatory. Gluten free self-raising flour naturally has a little xanthan gum and baking powder in it but gluten free plain flour doesn’t, so make sure you add your own.
Can I make this recipe without xanthan gum?
As I said, there’s a little xanthan gum in self-raising flour already that will help to replace the gluten in regular flour. So in a sense, yes you can skip adding more xanthan gum, though I always make mine with it just to be safe. It really helps the texture!
But if you wanted to make this with gluten free plain flour and no xanthan gum, then you’re on your own – I wouldn’t recommend it!
Can I make this recipe using other gluten free flours like buckwheat flour or coconut flour?
There’s a big difference between ‘gluten free self-raising flour’ and a *singular* type gluten free flour. When I say ‘gluten free self-raising flour’ in a recipe, I mean a BLEND of gluten free flours, not just one, singular flour.
Most gluten free flour you buy in the supermarket typically contains a blend of rice flour, potato flour, maize flour, tapioca flour AND buckwheat flour. That’s a lot of different flours!
So to replace it with just one specific type of flour… that’s not going to cut it at all. Definitely go for a gluten free flour blend.
Do I need weighing scales to bake your gluten free garlic bread pizza recipe?
In short… yes, yes and yes! And I wouldn’t advise attempting any of my recipes without them. One of the worst things you can do in any baking recipe is alter the quantities by mistake or on purpose.
A lot of work went into fine tuning ratios and quantities so I wouldn’t mess around with them unless you really know your stuff. I’d recommending using digital cooking scales like these so you know you’re getting an accurate measurement.
What yoghurt should I use for this recipe?
It’s totally up to you – I like to keep this vegan and dairy free so I used Koko dairy free plain yoghurt. It also has no high FODMAP ingredients in it.
But if you don’t mind it being NOT dairy free or vegan, feel free to use plain natural yoghurt or greek yoghurt too.
Lactose free plain yoghurt is the best for the elimination phase of the low FODMAP diet.
How long can I keep your gluten free garlic bread pizza for?
They’re best eaten fresh as they will start to lose their crisp, freshly baked exterior unless eaten a few hours after baking. However, you can keep them in an airtight container in the fridge for up to 3-5 days before topping them.
Then when you want to enjoy one again, simply reheat in the oven at 200C for 5 minutes. When they’ve got back it’s slightly crisp exterior, they’re ready to top!
Can I freeze your gluten free garlic bread pizza?
Yes! That’s what we usually do with them – I often double the quantities of this recipe and make four pizza base. We then usually eat two for dinner and freeze two for next time.
You can keep them in the freezer in an airtight container for up to 2-3 months with or without toppings.
When you want to eat them, you can cook them straight from frozen by placing them into the oven on a baking tray at 200C for 10-12 minutes. Again, when they’ve got back their slightly crisp exterior, they’re ready to top!
Can I freeze your gluten free garlic bread pizza dough?
Yes you can! And to be honest, this is probably better than freezing the finished product as they will ALWAYS come out better when freshly baked.
Simply pop your dough into an airtight container and freeze for up to 2-3 months. I like to freeze my dough ready-portioned out in 2 separate containers so I have the option of defrosting as much or as little dough as I like at a time.
Simply pop in the fridge and allow to defrost overnight, or leave at room temperature for 5 hours. If you freeze one huge ball of dough without portioning it out, it will of course take much longer to defrost.
Can I reheat them in the microwave?
You can, but I wouldn’t recommend it. They’ll lose their crisp exterior! Of course they’ll still be lovely and soft and flexible, but I’d always recommend reheating these in the oven instead.
Can I reheat your gluten free garlic bread pizzas in the oven?
Yes! This is the best way to do it, whether your gluten free garlic bread pizzas are chilled or frozen. Simply place them onto a baking sheet and pop them into the oven at 200C for 5 minutes from chilled or 200C for 10-12 minutes from frozen.
Troubleshooting
My dough was too wet and sticky to roll. What should I do?
Firstly, it’s supposed to be a little sticky as a formed dough in the bowl. As long as you’re able to bring it together into a ball, when you start rolling it out on a floured surface, the extra flour should make sure it doesn’t stick to your surface, hands or rolling pin.
There’s only two main ingredients here (yoghurt and gf flour) so measuring them out correctly is really important. It’ll stop you from adding in too much yoghurt in the first place and making the dough too wet!
But of course, if you have added too much yoghurt by accident, you can always just add a little extra flour until it’s the correct consistency.
My dough was too dry and cracked and crumbly.
If the dough seems a little crumbly in the bowl, get it out of the bowl and knead it on a floured surface first before adding any extra wet ingredients.
This will ensure that it’s truly combined and there isn’t any yoghurt not properly mixed in at the centre of the dough. If you measured out all of your ingredients accurately, you should avoid getting dough that’s either too dry or cracks and crumbles.
How do I stop my dough sticking to the surface / rolling pin?
Make sure you roll out your dough on a well-floured surface and also flour your hands and rolling pin. It’ll make all the difference!
My rolled out dough breaks when I try to transfer it to the frying pan.
Since we’re rolling out our dough to be nice and thin, obviously it needs care to get it into the frying pan in one piece.
Using your hands can be very hit and miss. That’s why I recommend using something like a metal cake lifter like this to really get underneath the dough and supporting it as you transfer it into the frying pan.
It’s not mandatory for making this recipe, but it’ll certainly make your life a hell of a lot easier!
There’s a bit of a burning smell when I’m dry frying my gluten free garlic bread pizza.
As we’ve just rolled out the pizza base on a floured surface, when we transfer the rolled out dough to the frying pan, you can easily transfer dusty bits of flour with it.
This dusty flour will cook pretty quick in a hot, dry frying pan and start to burn. It’s best to clean out your frying pan every now and then (especially if making more than two pizza bases at a time) if you start to notice a build up of brown dusty flour.
Can I print your gluten free garlic bread pizza recipe?
Of course! Just hit the print button located on the recipe below ?? (otherwise you might end up printing this entire post which would probably make your printer go into early retirement)
Gluten Free Garlic Bread Pizza Recipe (low FODMAP, vegan + dairy free option)
Equipment
Ingredients
For the bread
- 260 g yoghurt I use plain coconut yoghurt, but any plain yoghurt would work
- 250 g gluten free self raising flour
- 1/4 tsp xanthan gum optional
- 1/2 tsp gluten free baking powder optional
- 1/2 tsp salt
Garlic Topping Option 1: Low FODMAP option
- 3 tbsp garlic-infused oil
- 60 g butter dairy free if necessary, room temp
- 2 tbsp fresh parsley finely chopped
- salt and pepper
Garlic Topping Option 2: If you can eat garlic
- 2 tsp minced garlic paste I buy this in a jar next to the spices
- 120 g butter dairy free if necessary, room temp
- 2 tbsp fresh parsley finely chopped
- salt and pepper
Instructions
- Preheat your oven to 200C Fan / 220C.
- Mix together your garlic topping in a bowl - option 1 if you can't tolerate garlic and option 2 if you can tolerate garlic. Mix it together so it's nicely combined and put to one side for later.
- Add all your bread ingredients into a bowl and mix together. I initially just do this with a spatula and then as it starts to come together I use my hands to ensure it's all pushed into a big ball.
- Knead the dough briefly so it's smooth and combined (you might need a little flour if it's a bit sticky, it shouldn't be)
- Cut the dough into 4-5 pieces. (To be honest you can cut it to whatever size you want your bread to be!)
- On a lightly floured surface use a rolling pin to roll out your dough. I roll mine to just over 0.5cm thick but slightly thicker or thinner would be fine too. You can do this in any shape you like, I choose to do mine in a round-ish shape.
- Heat up a frying pan - no oil needed.
- Carefully lift up your rolled dough and place it in the heated frying pan (I like to use my cake lifter to lift the dough). Allow to cook on one side for a few minutes, you should start to see some puffing up.
- Once some golden browning has occurred, flip the bread and cook for slightly less time on the other side.
- Repeat steps 6-9 with your other pieces of dough. If there is any flour in your frying pan that might have burnt in the heat, make sure you wipe out the pan in between each piece of bread.
- Spread some of your garlic butter mixture onto your breads, as much as you want 🙂 - You could also add some cheese if you want cheesy garlic bread.
- Place in the oven for about 5 minutes until heated through. If you are in a hurry you could just spread the garlic butter on the breads and not put them in the oven, but I think it really helps the flavour and crispiness!
- Slice up and enjoy!
Nutrition
Any questions about the recipe? Please do let me know by following me on Instagram and leaving me a comment on a recent photo!
Thanks for reading,
Becky xxx
Oh and don’t forget to pin this for later!

