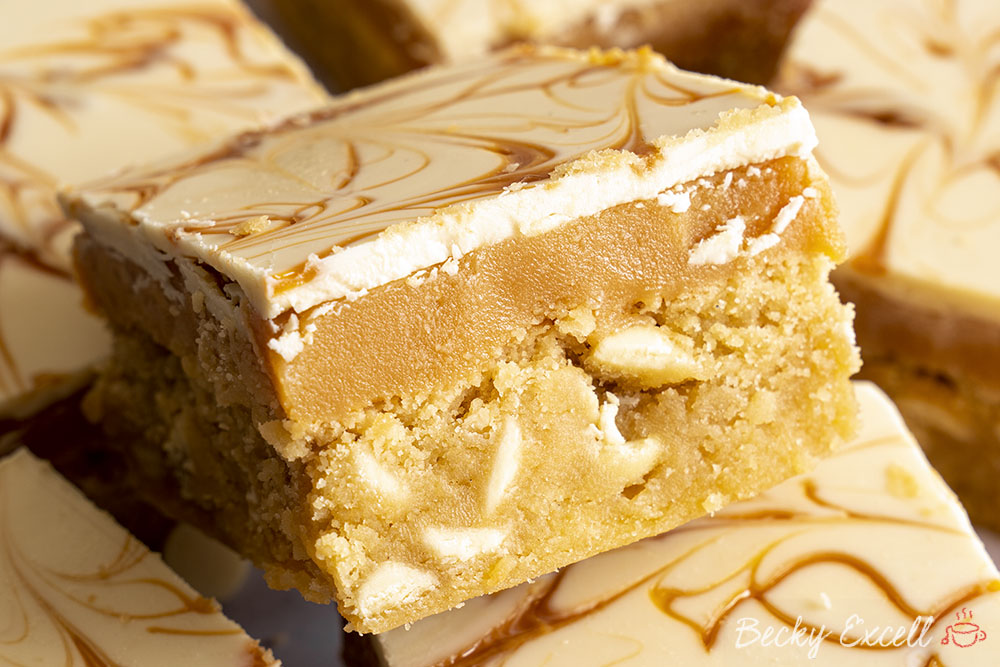
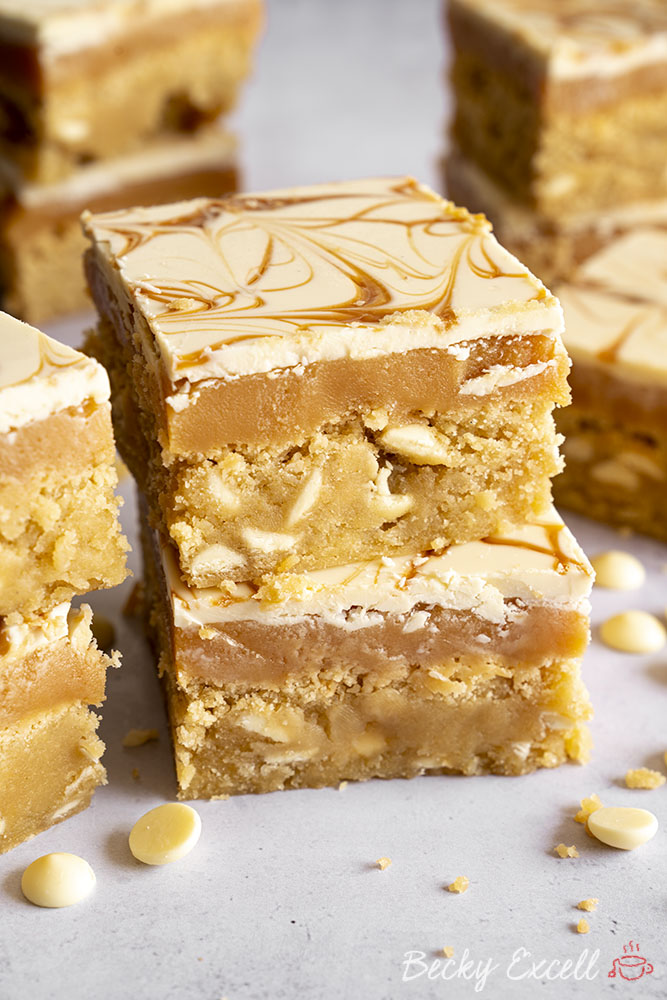
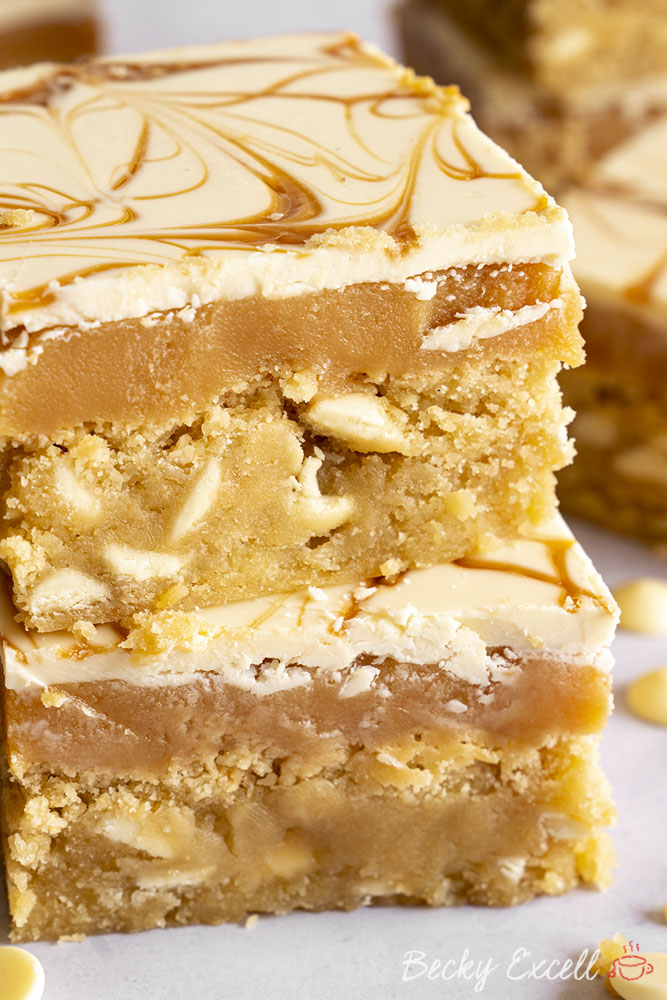
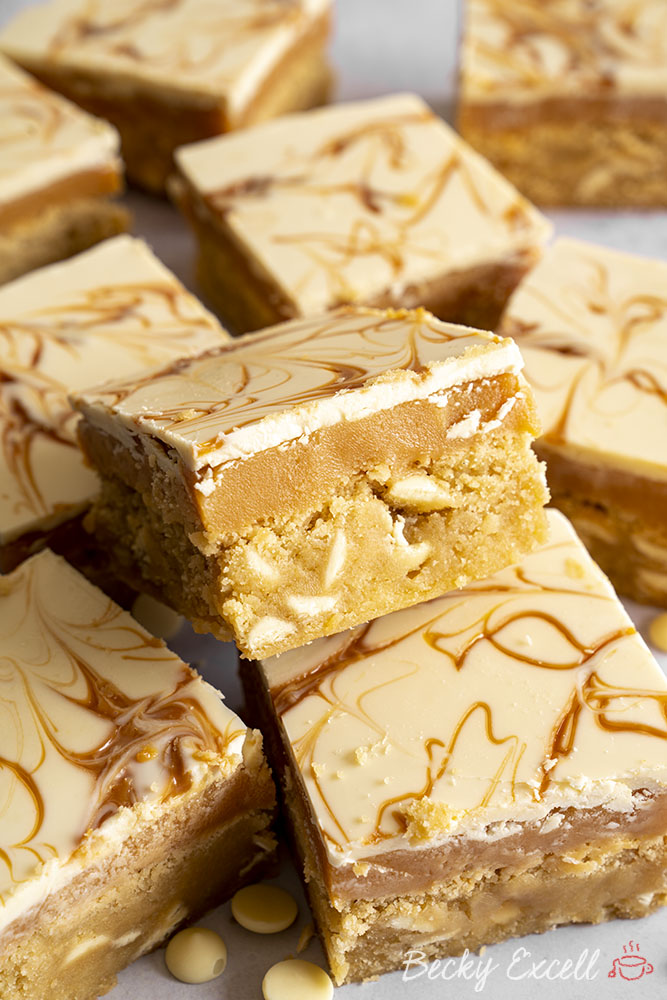
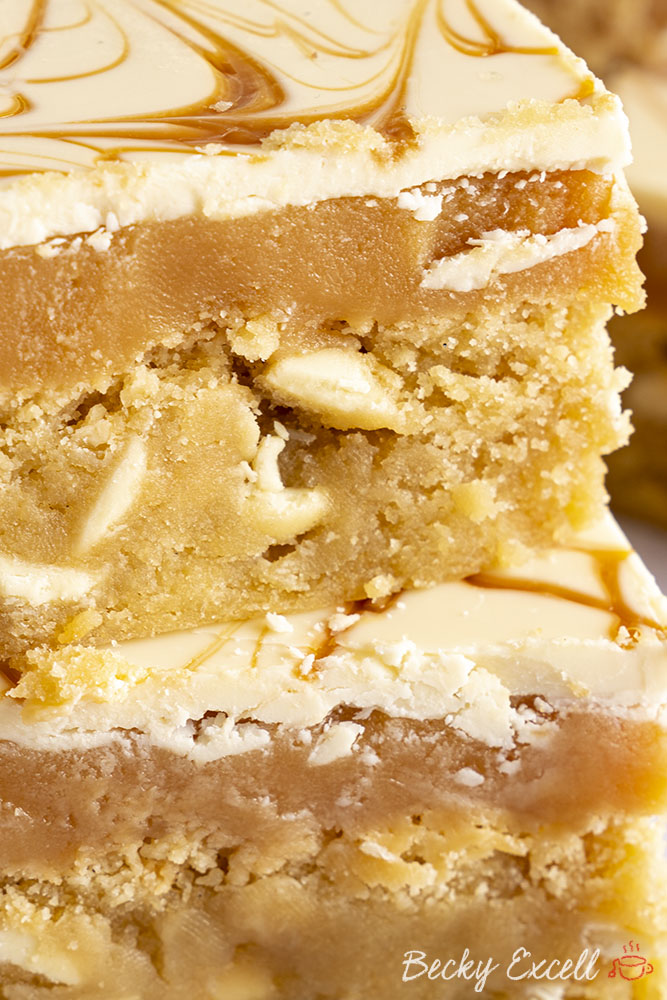
Gluten-free Millionaire’s blondies recipe – the ultimate sweet treat that you never knew you needed! Three layers of pure bliss, that you’d never know is gluten-free.
Gluten-free Millionaire’s blondies recipe, anyone? A few of you guys have been asking me for this one ever since I posted it on Instagram, so here it is!
This one is a combo of my two fave sweet treats – Millionaire’s shortbread and white chocolate chip blondies.
And the result is absolutely out of this world! Honestly, it’s a combo I never knew I needed and now I’ve tried one… I can’t live without it!
I love creating recipes like this because it’s something that us gluten-free folks would never find out in the wild.
Often, we’re lucky enough to find a bog-standard brownie that’s gluten-free, let alone something super special like this. But as I’m sure you’ve never tried one of these before… what does a gluten-free Millionaire’s blondie taste like?
In a word: unreal. The blondie is buttery, fudgy, sweet and packed with chunky white choc chips.
The caramel is sweet and sticky, also a little buttery thanks to the golden syrup. Lastly, the white chocolate on top gives each bite a lovely snap, which works perfectly against the soft caramel and moist blondie.
All the layers just work so well together, but best of all… you would NEVER know this is gluten-free AT ALL.
Here’s everything you’ll need for this recipe, keep scrolling until you see the recipe card for the measurements and method ??
Gluten-free Millionaire’s blondies recipe: Ingredients
For the blondie base:
- butter, melted
- light brown sugar
- caster sugar
- large eggs
- vanilla extract
- gluten free plain flour
- xanthan gum
- cornflour (cornstarch)
- white chocolate chips
For the caramel layer:
- butter
- golden caster sugar
- golden syrup
- condensed milk (1 tin)
For the chocolate top:
- white chocolate
- caramel sauce (optional -I just used Carnation caramel)
So I thought I’d kick things off with a little frequently asked questions section – if you just want the recipe, then keep scrolling!
But I’ve thrown in some tips here that will be really helpful if this is your first time baking this, or you want to adapt it. So here they are!
Gluten-free Millionaire’s blondies recipe: Frequently Asked Questions
Can I make this recipe gluten free?
It is gluten free, though nobody would know just by tasting it – trust me!
Bear in mind that minimising cross-contamination is hugely important if you’re Coeliac or making this for someone who is. Here’s some tips from Coeliac UK on minimising the risk of cross contamination.
Also, make sure that all ingredients used don’t have any gluten-containing ingredients. Then make that that they also don’t have a ‘may contain’ warning for gluten, wheat, rye, barley, oats (which aren’t gf), spelt and khorasan wheat (aka Kamut).
Here’s some more info from Coeliac UK on identifying safe gluten free products. Double check your sprinkles to make sure they’re gf too.
Can I make your gluten-free Millionaire’s blondies recipe dairy free?
Unfortunately, this is a difficult one to make dairy-free. Of course, you can make the blondie base dairy-free by using dairy-free white chocolate chips and Stork hard margarine instead of butter.
However, as the caramel layer uses condensed milk, adapting it to be dairy-free isn’t a straight-forward, simple swap. The caramel really needs to set to work and dairy-free options are much harder to set.
I am working on a dairy-free caramel, so watch this space!
Can I make your gluten-free Millionaire’s blondies recipe vegan?
As this is a tricky one to make dairy-free, as described above, unfortunately, this isn’t easy to adapt to be vegan either.
Is your gluten-free Millionaire’s blondies recipe nut free?
Yep, this is a nut-free recipe as far as ingredients go, BUT make sure you check the ingredients label on ALL the products you use just to be safe.
Even if the products don’t contain nuts, they may have a ‘may contain nuts’ warning due to being produced in a factory that handles nuts.
You can never be too careful so always read the labels on everything first.
Is your gluten-free Millionaire’s blondies recipe low FODMAP?
Unfortunately, due to the high dairy content, this recipe isn’t suitable for the elimination phase of the low FODMAP diet.
When you’ve (hopefully) successfully reintroduced dairy without problems, maybe come back and give this one a try!
Can I make your gluten-free Millionaire’s blondies in a food processor or standing mixer?
I’d recommend avoiding a food processor to make this as it’s a little overkill for this recipe.
A standing mixer is great on a low-medium speed, but I prefer to use an electric hand whisk, personally.
Can I make your gluten-free Millionaire’s blondies without any kind of electric mixer/appliance at all?
Of course! You can easily make this entire recipe by hand.
Do I need any special equipment to make your gluten-free Millionaire’s blondies recipe?
As I mentioned, you can easily make this entire recipe by hand, so you certainly don’t need any crazy appliances or anything like that.
What you will need however is a 9″ square baking tin – here’s the one I use. Apart from that, you’ll just need a little baking paper too!
Do I need weighing scales to make your gluten-free Millionaire’s blondies?
In short… yes, yes and yes! And I wouldn’t advise attempting any my recipes without them.
A lot of work went into fine tuning ratios and quantities and for me, baking is all about consistency and precision. I want you to make this recipe and for it to turn out EXACTLY like mine did.
I’d recommending using digital cooking scales like these so you know you’re getting an accurate measurement and replicating my recipe as accurately as poss.
Can I make this recipe without xanthan gum?
You’ll see xanthan gum in a lot of my recipes as it’s an essential ingredient in gluten free baking – in cakes and biscuits, it helps to replace gluten by binding the texture together.
As we’re using gluten free plain flour which has no xanthan gum added, I’d always recommend leaving it in. But if you struggle to tolerate it, feel free to omit it from this recipe.
Can I make your gluten-free Millionaire’s blondies without sugar?
I can understand the need to reduce sugar in our foods, but sugar is integral to the structure of this bake – it’s not just for adding a sweet taste!
Sugar helps to achieve that nice crisp finish on the top of your blondies. Plus, the caramel won’t set without the correct measurement of sugar, so remove the sugar at your own risk!
Can I use other sugar apart from brown sugar in this recipe?
Brown sugar not only adds a distinct taste, but it’s unrefined and contains molasses which will greatly contribute to the lovely gooey, fudgy finish of your blondies.
You’re welcome to substitute it for caster sugar, but I’d always recommend using brown sugar for these if you can.
Bear in mind that using caster sugar in the caramel will make the caramel a lot lighter in colour.
How long can I keep your gluten-free Millionaire’s blondies for?
In an airtight container, they should last up to 3-4 days. If you intend to keep them any longer than that, see the info below on how to freeze them.
Can I freeze my gluten-free Millionaire’s blondies?
Yep! You can freeze them for up to 2-3 months without a problem – just make sure you put it in an airtight plastic container. It’s probably a good idea to slice it all first so you can defrost a slice at a time.
A single slice should take around 4-5 hours to thaw at room temperature.
Can I print your gluten-free Millionaire’s blondies recipe?
Of course! Just hit the print button located on the recipe below ?? (otherwise you might end up printing this entire post which would probably make your printer go into early retirement)
Gluten-free Millionaire’s blondies recipe: Troubleshooting
My blondies aren’t fudgy and moist in the middle like yours. They’re more like cake. What did I do wrong?
If you followed the recipe to the letter, then it’s likely that your oven was either too hot, or they were in too long. Overbaking blondies will mean they have no moisture to them and become more like a cake.
Still perfectly edible, but not much of a blondie.
My blondies are really wet in the middle instead of being fudgy. What did I do?
Firstly, if you haven’t baked them long enough, they’ll definitely be more on the sloppy side than nice and fudgy whilst holding their shape. We want them to be moist in the middle, but not so that they fall apart when cut.
When they first come out of the oven, they’ll still be a little moist if you poke them with a skewer, but after allowing them to cool, they should be the perfect fudgy, consistency.
The skewer should come out 95% clean, with a little evidence of blondie on it. That’s perfect!
My caramel didn’t set – what did I do wrong?
Caramel is definitely a tricky thing to perfect – timing is everything. You need to make sure you have it on the heat until it darkens in colour and thickens slightly – this usually takes up to 8 minutes. You also need to make sure when you are melting your ingredients for the caramel initially that you don’t let them get too hot. If they do they can separate and you will just get an oily layer of butter and a caramel that’s unable to thicken. Melt the ingredients on a low/medium heat, don’t rush it and make sure you keep stirring once melted at all times!
Gluten-free Millionaire’s blondies recipe: Method
Oh and here’s a printable version of my gluten-free Millionaire’s blondies recipe. Please remember to give it 5 stars if you tried it and enjoyed it as it helps people know it’s worth trying too! ⭐️
Gluten-free Millionaire's Blondies Recipe
Equipment
Ingredients
For the blondie base:
- 250 g butter melted
- 130 g light brown sugar
- 130 g caster sugar
- 2 large eggs
- 1 tsp vanilla extract
- 285 g gluten free plain flour
- 1/4 tsp xanthan gum
- 1 tbsp cornflour cornstarch
- 200 g white chocolate chips
For the caramel layer:
- 185 g butter
- 35 g golden caster sugar
- 65 g golden syrup
- 397 g condensed milk 1 tin
For the chocolate top:
- 300 g white chocolate
- 2 tbsp caramel sauce optional (I just used Carnation caramel)
Instructions
For the blondies:
- Preheat your oven to 160C Fan / 180C and prepare a 9x9 inch square tin with non stick baking paper - it needs to be fairly deep.
- In a large bowl mix together your melted (and cooled) butter with your caster sugar and light brown sugar. Mix until properly combined and you no longer see the yellow of the liquid butter.
- Add in your eggs and vanilla extract, mix until combined.
- Add in your gluten free flour, cornflour and xanthan gum. Briefly mix until just combined and the mixture is smooth without any visible flour or lumps.
- Fold in your white chocolate chips.
- Spoon / pour the mixture into your tin and bake in the oven for around 30-35 minutes. The very centre might still seem a little wobbly but the outer edges should be fairly cooked through. If you cook it for not long enough, it will still be liquid, if you cook it for too long it will be like a cake, not a blondie!
- Once cooked allow the blondie to completely cool in the tin.
For the caramel:
- Just before the blondie base has cooled you can start to make your caramel.
- Place all your caramel ingredients into a saucepan on a low/medium heat. Allow the butter to melt and the sugar to dissolve. Mix well to ensure it doesn't stick to the bottom and is combined.
- Once the sugar has dissolved and the butter melted, turn the heat up so the mixture starts to bubble a little. Keep stirring continuously for about 5 minutes (although I often going to about 7/8 minutes), the mixture should have thickened and also developed into a darker golden colour.
- Pour on top of your cornflake layer, spreading it so that it's even. Place in the fridge to set I tend to leave it for no less than 90 minutes.
For the topping:
- Melt your white chocolate. You can do this in the microwave, or in a bowl over a saucepan of boiling water on the hob. If you melt it in the microwave, make sure you mix it every 20 seconds or so to ensure the chocolate doesn't burn.
- Pour your white chocolate all over the top of the set caramel layer. Make sure it spreads evenly to the edges.
- Spoon on blobs of your caramel and using a skewer or a knife, swirl it around to make some random patterns!
- Place back in the fridge to allow the chocolate to fully set. This often takes a couple of hours.
- Once fully set, remove the millionaires from the tin and slice into squares. To help the chocolate top not to crack - remove the millionaires from the fridge about 30 minutes before you want to cut it. Also I find that warming your knife on hot water before each cut, helps the knife to slide through the chocolate. Enjoy!
Nutrition
Thanks for reading all about my gluten-free Millionaire’s blondies recipe! If you make it, I’d love to see how it turned out so don’t forget to take a snap of your creations and tag me on Instagram!
Any questions about the recipe? Please do let me know by following me on Instagram and leaving me a comment on a recent photo!
Thanks for reading,
Becky xxx
Don’t forget to pin this for later!

