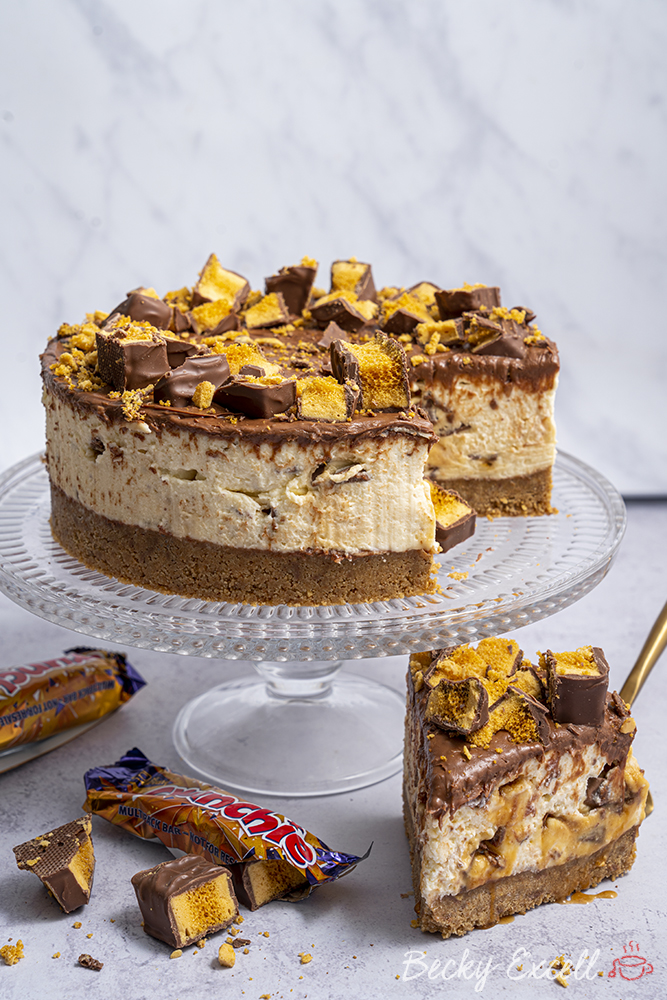
Gluten-free Crunchie cheesecake recipe – totally no-bake and easy to make using just 8 simple ingredients. And yes, one of those is Crunchie bars!
Gluten-free Crunchie cheesecake recipe? Yep, that’s right – Crunchie bars are gluten-free! So naturally, I absolutely had to make a cheesecake to spread/celebrate that fact ? So let’s get… no-baking!
Whether you’re a seasoned pro in the kitchen or a total beginner, a no-bake cheesecake is the perfect DIY dessert. Why?
Well, for one thing, it doesn’t involve baking at all! That means no possibility of burning it, no sunken middles or soggy bottoms. Just mix, chill and enjoy!
But best of all, a gluten-free cheesecake is something that will NEVER EVER taste any different to a cheesecake which contains gluten. The only difference is that you need to use gluten-free biscuits for the base. That’s it!
And fortunately, gluten-free biscuits are one of those things that just taste like, well… regular biscuits! Still need a little convincing? Here’s a few reasons why you need to make this:
Why make my no-bake gluten-free Crunchie cheesecake recipe?
- It’s no-bake which means no oven or gluten-free flour required!
- As it’s no-bake, that also means it’s easy peasy to make. Just mix and chill. Being patient is the only hard part!
- As this recipe uses Crunchie chocolate bars, there’s no need to make your own honeycomb like in my honeycomb cheesecake recipe.
- You only need 8 simple ingredients to make this and they’re all easily available in supermarkets.
- There’s no need for xanthan gum in this recipe.
- You’d never know this was gluten-free by tasting or looking at it AT ALL. You’ll have to fight the muggles to keep them away from this!
So what does my gluten-free Crunchie cheesecake taste like?
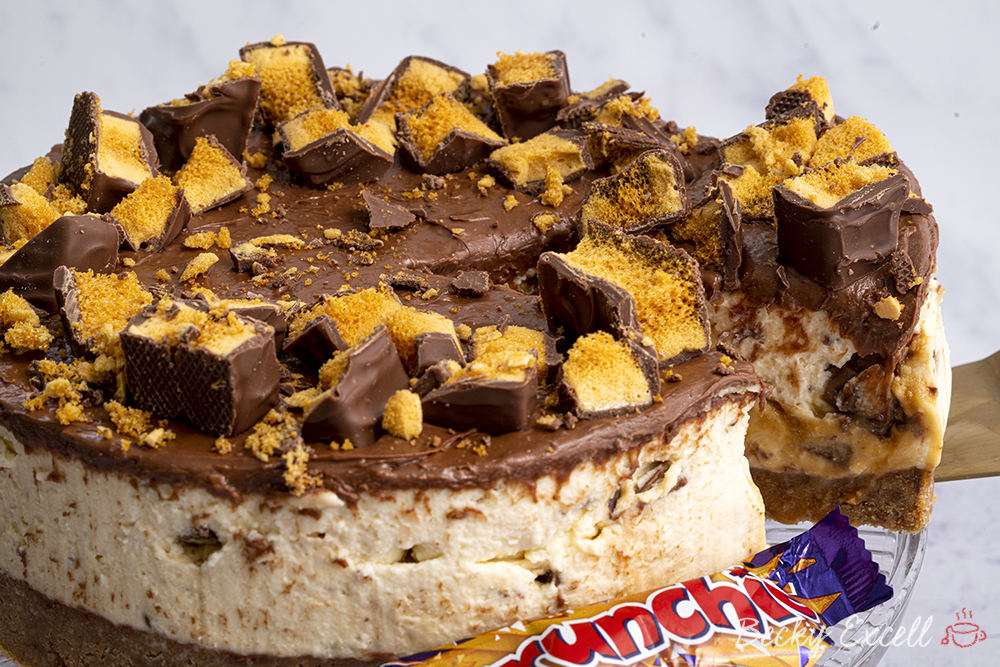
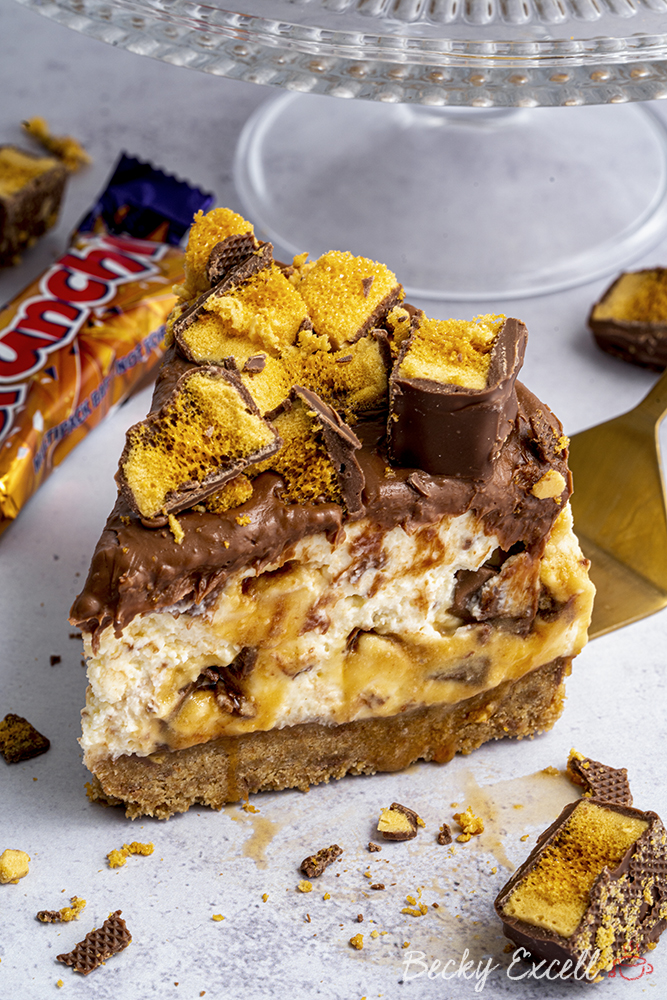
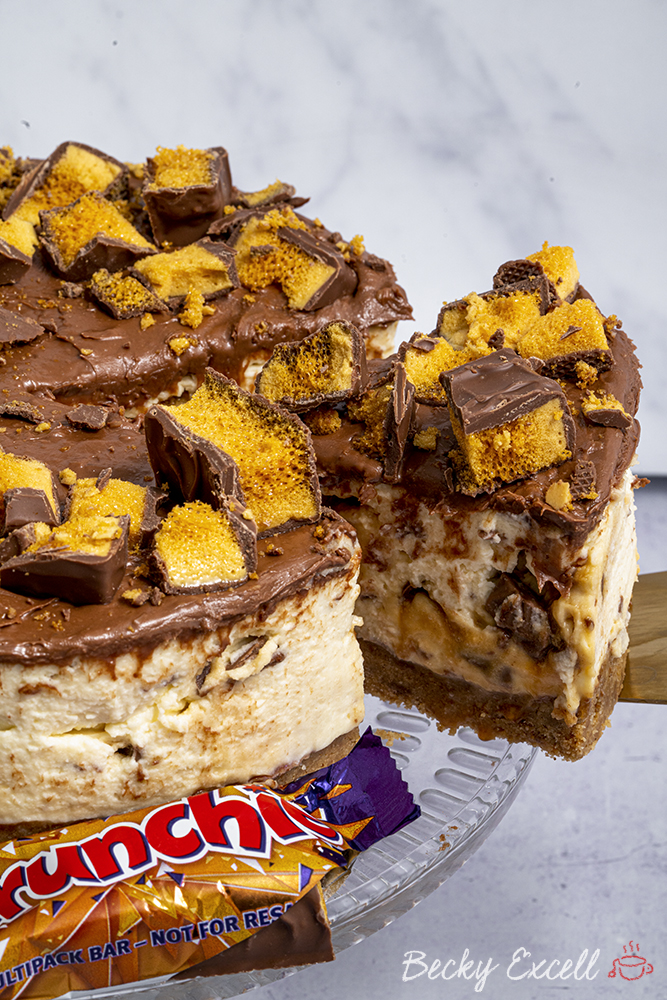
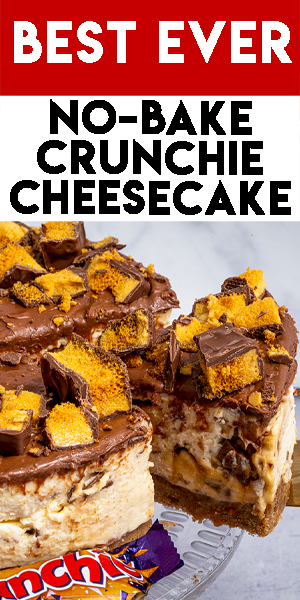
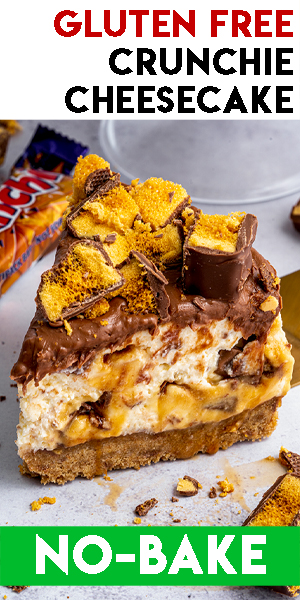
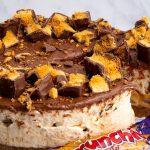
First of all, you’ve got a buttery biscuit base (with a Crunchie bar thrown in for good measure) topped with a creamy, fluffy vanilla filling, packed with crushed up Crunchie bars.
It’s then topped with Crunchie spread and *even more* crushed up Crunchie bars. Yes – Crunchie spread is a thing and it’s gluten-free too! It’s a chocolate spread with bits of honeycomb in it – pure bliss!
So yeah, every bite combines all those beautiful layers to create that undeniable, awesome dessert that is a Crunchie cheesecake. Here’s everything you’ll need for this recipe, keep scrolling until you see the recipe card for the method…
Gluten-free Crunchie cheesecake recipe: Ingredients
For the base
- 320g gluten-free digestive biscuits
- 150g butter, melted
- 1 Crunchie bar (optional)
For the filling
- 600g mascarpone or cream cheese (always full fat) (I sometimes use up to 750g for an even taller cheesecake – you don’t need to adjust the other ingredients if you do this)
- 100g icing sugar
- 300ml double cream
- 1 tsp vanilla extract
- 150g – 200g Crunchie bars, chopped
For the topping
- 150g Crunchie chocolate spread
- extra Crunchies, chopped
So I thought I’d kick things off with a little frequently asked questions section – if you just want the recipe, then keep scrolling.
But I’ve thrown in some tips here that will be really helpful if this is your first time baking this, or you want to adapt it. So here they are!
Gluten-free Crunchie cheesecake recipe: Frequently Asked Questions
Can I make this recipe gluten-free?
It is gluten-free, though nobody would know just by tasting it – trust me!
Bear in mind that minimising cross-contamination is hugely important if you’re Coeliac or making this for someone who is. Here’s some tips from Coeliac UK on minimising the risk of cross contamination.
Also, make sure that all ingredients used don’t have any gluten-containing ingredients. Then make that that they also don’t have a ‘may contain’ warning for gluten, wheat, rye, barley, oats (which aren’t gf), spelt and khorasan wheat (aka Kamut).
Here’s some more info from Coeliac UK on identifying safe gluten-free products.
Can I make your gluten-free Crunchie cheesecake recipe dairy free?
Most of my recipes are really easy to make dairy free with a few simple swaps. But unfortunately, by the time I adapted everything to be dairy-free, it would basically be an entirely different recipe!
I’m working on creating a dairy-free cheesecake using ingredients that are easy to source for everyone, but it’s not easy. Keep your eyes peeled for that in the future though.
Can I make your gluten-free Crunchie cheesecake recipe vegan?
Again, because of the dairy required for the filling and the fact that this uses Crunchie, this isn’t an easy one to make vegan.
Like I said, if I make a dairy free cheesecake in the near future, you can bet that it’ll be vegan too so keep an eye on my Instagram for when I finally post it.
Is your gluten-free Crunchie cheesecake recipe recipe nut free?
Sadly, this isn’t a nut-free recipe because of the Crunchie spread which has a ‘may contain’ allergen warning for nuts. However, you can happily leave this out or replace it with Tiptree chocolate spread.
At the time of writing, Tipfree chocolate spread is made in a nut-free factory which is very rare when it comes to chocolate spread! Please double-check the ingredients label before using for yourself however as you never know when these things might change.
OTHERWISE, this is a nut-free recipe as far as ingredients go, BUT again, make sure you check the ingredients label on ALL the products you use just to be safe.
Crunchies also don’t contain nuts and have no ‘may contain nuts’ allergy warning, but please double-check the labels for yourself just in case!
Is your gluten-free Crunchie cheesecake recipe low FODMAP?
Sadly, because of the high dairy content, this recipe isn’t suitable for the elimination phase of the low FODMAP diet.
So this recipe might be best attempted once the elimination phase of the diet is over and you’ve successfully reintroduced lactose/dairy products.
Are Crunchies gluten-free?
Yep, they certainly are in the UK – but you can double-check the ingredients here for yourself if you fancy.
There’s no gluten-containing ingredients and no ‘may contain’ warning for gluten, wheat etc. Which according to Coeliac UK, makes it safe for those on a gluten-free diet.
Where can I find Crunchie spread? Is it gluten-free?
Yep, Crunchie spread also has no gluten-containing ingredients and no ‘may contain’ warning for gluten, wheat etc. either. Here’s a link where you can read the ingredients and allergy warnings for yourself.
It’s available in Tesco, Sainsburys and Asda, though it’s only currently in stock at Asda at the time of writing. If you can’t find it, simply use any gluten-free chocolate spread instead.
Can I make your gluten-free Crunchie cheesecake recipe in a food processor or standing mixer?
Of course you can! I actually use both in this recipe just to speed up things. I use my food processor to blitz the biscuit base (don’t over-do them, you want them to be nice and chunky!) and my standing mixer to mix the cheesecake filling.
If you only have a food processor, you can happily use it to mix both separately. However, if you only have a standing mixer, you’ll have to bash the biscuits in a plastic bag using a rolling pin.
Just remember to keep scraping down the side of the mixing bowl when making the cheesecake filling – this applies to both a food processor AND standing mixer.
Oh and remember NOT to over-mix the cheesecake filling, otherwise it can split. Once it’s nice and thick and creamy, stop.
Can I make your gluten-free Crunchie cheesecake without any kind of electric mixer/appliance at all?
You can, of course, bake this without any assistance from any appliance – just a good ol’ fashioned wooden spoon or spatula will do.
But you will need a lot of elbow grease to get the biscuits bashed and the filling mixed. Just make sure you give it a lot of welly, otherwise your mixture won’t be consistent!
Remember, an under-mixed cheesecake filling won’t set! And you’re much more likely to under-mix than over-mix if you’re doing it by hand.
Do I need any special equipment to make your gluten-free Crunchie cheesecake recipe?
You won’t need anything in particular apart from a deep, loose bottom tin – here’s the one I use. It’s important to use a deep one as this is a tall cheesecake!
It’s 20cm (8 inch) in diameter, so remember if your tin is wider than mine, your cheesecake will end up looking a lot flatter!
A springform tin is fine too – here’s the one I sometimes use. I don’t use it all the time because it’s next to impossible to get the entire cheesecake off the base at once.
And ideally, I don’t want to be serving the cheesecake and slicing it on my springform base because it’ll get all scratched. So I much prefer to use a loose bottom tin.
But definitely don’t make this in a normal cake tin without a loose bottom/springform mechanism. You won’t be able to get the cheesecake out or cut it!
What cream cheese should I use for the filling?
I often use Philadelphia cream cheese for my cheesecakes, but for this one, I’ve chosen to use mascarpone cheese. You can easily find it in the cheese aisle of any supermarket.
Both are fine, but I tend to use mascarpone for cheesecakes if I can because it makes my cheesecakes set to be a little firmer than when using Philadelphia.
You can happily try this with Philadelphia, but I know from experience that it will be a much softer cheesecake which won’t hold its shape out of the fridge for too long. I’d say try both at some point and see which you prefer!
Can I make your gluten-free Crunchie cheesecake using light cream cheese or reduced fat mascarpone?
Definitely not! Using light cream cheese or reduced fat mascarpone is a very quick way to ensure that your cheesecake is an instant disaster.
As the fat content is much lower, your cheesecake won’t ever have a hope of setting in the fridge. It’s fall-fat or nothing, I’m afraid!
What gluten-free biscuits should I use for the base?
In the photos I used some gluten-free digestive biscuits from Tesco’s free from aisle. However, you can actually use whatever biscuits you fancy! Gluten-free Hob Nobs would work well here too.
Can I make this recipe without xanthan gum?
There’s no added xanthan gum in this recipe at all.
You’ll see xanthan gum in a lot of my recipes as it’s an essential ingredient in gluten-free baking – in cakes and biscuits, it helps to replace gluten by binding the texture together.
Otherwise you can end up with a very crumbly bake. Fortunately, that doesn’t apply here!
Do I need weighing scales to make your gluten-free Crunchie cheesecake?
In short… yes, yes and yes! And I wouldn’t advise attempting any my recipes without them.
A lot of work went into fine tuning ratios and quantities and for me, baking is all about consistency and precision. I want you to make this recipe and for it to turn out EXACTLY like mine did.
I’d recommending using digital cooking scales like these so you know you’re getting an accurate measurement and replicating my recipe as accurately as poss.
Can I make your gluten-free Crunchie cheesecake without sugar?
I can understand the need to reduce sugar in our foods, but this recipe is one where I wouldn’t recommend it!
The sugar in the cheesecake filling helps to balance out the rich cheese flavour from the mascarpone. That makes it taste more like a dessert than an actual cake made of cheese if you know what I mean ?
So yeah, remove the sugar at your own risk!
Can I use other sugar apart from icing sugar in this recipe?
I’ve chosen to use icing sugar in this recipe because it’s nice and light, powdery and almost vanishes into the cheesecake filling. Other sugars just wouldn’t work the same.
By using other granulated sugars (like caster sugar, brown sugar, coconut sugar etc), you’ll end up with an almost gritty-like texture in your cheesecake filling which is far from ideal!
That’s because this is a no-bake recipe. That means there’s no heat to break the sugar down and dissolve it, so it’ll just be all grainy in the filling.
So yeah, icing sugar is the only way to go!
How long can I keep your gluten-free Crunchie cheesecake for?
Obviously keep this in the fridge at all times – it should last around 4-5 days. Also try to keep it in an airtight container, or covered with clingfilm.
Can I freeze my gluten-free Crunchie cheesecake?
Yep! You can freeze it for up to 2-3 months without a problem – just make sure you put it in an airtight plastic container. It’s probably a good idea to slice it first so you can defrost a slice at a time.
If you want to defrost the whole thing at once, you can leave it at room temperature to thaw for around 12 hours. A single slice will probably take about 5 hours to thaw, so get it out ahead of time!
Can I bake my gluten-free Crunchie cheesecake in the oven?
No, please don’t! This is a no-bake cheesecake, meaning that it’s made to be chilled in the fridge and that’s it.
I can guarantee that if you try and bake this in the oven, you’ll just end up with a big mess to clear up ?
A baked cheesecake will usually have eggs in the filling which will help it to set when heated – this isn’t one of those recipes!
Troubleshooting
My cheesecake filling mixture split – what happened?
That means you probably over-mixed it, which you must be careful not to do! This will definitely cause the entire mixture to split.
You can avoid this happening by not using the highest setting on your mixer whilst making this. Also, don’t leave the filling in the mixer for any more than it needs to! Once it’s whipped up nicely to a nice, thick consistency, stop.
My cheesecake filling became really thin. What happened?
That’s what happens when you over-mix your cheesecake filling too. Try to avoid mixing once the cheesecake filling is thick and combined/consistent.
If it all goes wrong, still try giving it a chance to set in the fridge anyway – it might set, you never know! And if it doesn’t, just pop it in the freezer and serve it up slightly more frozen!
My cheesecake filling spilt out everywhere when I removed it from the tin. What did I do wrong?
That could be a case of not waiting long enough for your cheesecake to set.
A cheesecake really does need a good 12 hours to set – after all, we’re not baking anything in this recipe at all! So you’ve got to give it a lot of time to chill in the fridge and set. Patience is important.
If you did allow your cheesecake an adequate time to set and this happened, then it’ll be down to two other reasons. Firstly, you might have over-mixed your mixture and it either split, or became really thin.
Secondly, you could have under-mixed it. The cheesecake filling shouldn’t be of a ‘pourable’ consistency, it should whip up to a nice thickness that you can spoon into your loose-bottom tin. That’s how to tell when to stop mixing!
My cheesecake filling was a bit lumpy instead of being smooth. What happened?
Sounds like you didn’t mix your cheesecake filling well enough. Adding in the ingredients gradually (not all at once!) can help prevent this massively.
My cheesecake isn’t as tall as yours – how come?
That means you probably used a cake tin that’s bigger than mine (mine is 20cm/8 inches).
I mean, don’t go rushing out to buy a new one if you have one that’s 10 inches wide – but your cheesecake will look flatter!
Can I print your recipe?
Of course! Just hit the print button located on the recipe below (otherwise you might end up printing this entire post which would probably make your printer go into early retirement)
Gluten-free Crunchie cheesecake recipe: Method
Oh and here’s a printable version of my gluten-free Crunchie cheesecake recipe. Please remember to give it 5 stars if you tried it and enjoyed it as it helps people know it’s worth trying too! ⭐️
Gluten-free Crunchie Cheesecake Recipe (No-bake)
Equipment
Ingredients
For the base
- 320 g gluten-free digestive biscuits
- 150 g butter melted
- 1 Crunchie bar optional
For the filling
- 600 g mascarpone or cream cheese always full fat (I sometimes use up to 750g for an even taller cheesecake - you don't need to adjust the other ingredients if you do this)
- 100 g icing sugar
- 300 ml double cream
- 1 tsp vanilla extract optional
- 150 g - 200g Crunchie bars chopped
For the topping
- 150 g Crunchie chocolate spread
- extra Crunchies chopped
Instructions
- Firstly, make your base. Crush your gluten free biscuits and 1 Crunchie bar (you could use more if you like in the base). Either place them in a sandwich bag and hit them with a rolling pin or you can place them in a food processor and blitz, but don't over blitz them into a fine dust!
- Melt your butter - I do this in the microwave on a medium power (600W) for around 30 seconds to 1 minute. But if it melts before this time, stop - it's done!
- Pour your melted butter into your crushed biscuits and mix together in a bowl.
- Press your biscuit mixture into the tin you are going to be making your cheesecake in. Press it down nice and firmly. I use a 20cm loose bottom tin (linked above and below).
- Place it in the fridge to chill whilst you make your cheesecake top. (I leave mine in the fridge for at least 30 minutes)
- To make your cheesecake filling, mix together your mascarpone (cream cheese), icing sugar and vanilla extract. I use my electric hand mixer to do this on a low/medium setting for only about 10-20 seconds. You could use a stand mixer too.
- Add in the double cream and keep mixing until it firms up a little. (I mixed on a medium setting for just under 2 minutes for this - try not to over mix though... don't let it split - it's better to stop early than let it split!) It should end up being a nice, fairly thick mixture you can spoon - NOT a pourable consistency.
- Fold in your chopped up pieces of Crunchie, so they are evenly dispersed throughout the mixture.
- Spread your mixture on top of the biscuit base and place in the fridge to chill overnight.
- Mix up your Crunchie spread in a bowl to loosen it up - this will make it easier to spread. Spread it over the top of the chilled cheesecake. I do this whilst it's still in the tin. Place back in the fridge briefly to let the Crunchie spread chill (if you don't have time it wouldn't matter too much here).
- Remove from the tin and decorate however you like. I just break up some extra Crunchie bars and cover the top in a random pattern.
- Keep refrigerated until serving, or if you have any leftovers. Enjoy!
Video
Nutrition
Thanks for reading all about my gluten-free Crunchie cheesecake recipe! If you make it, I’d love to see how it turned out so don’t forget to take a snap of your creations and tag me on Instagram!
Any questions about the recipe? Please do let me know by following me on Instagram and leaving me a comment on a recent photo!
Thanks for reading,
Becky xxx
Oh and don’t forget to pin this for later!

