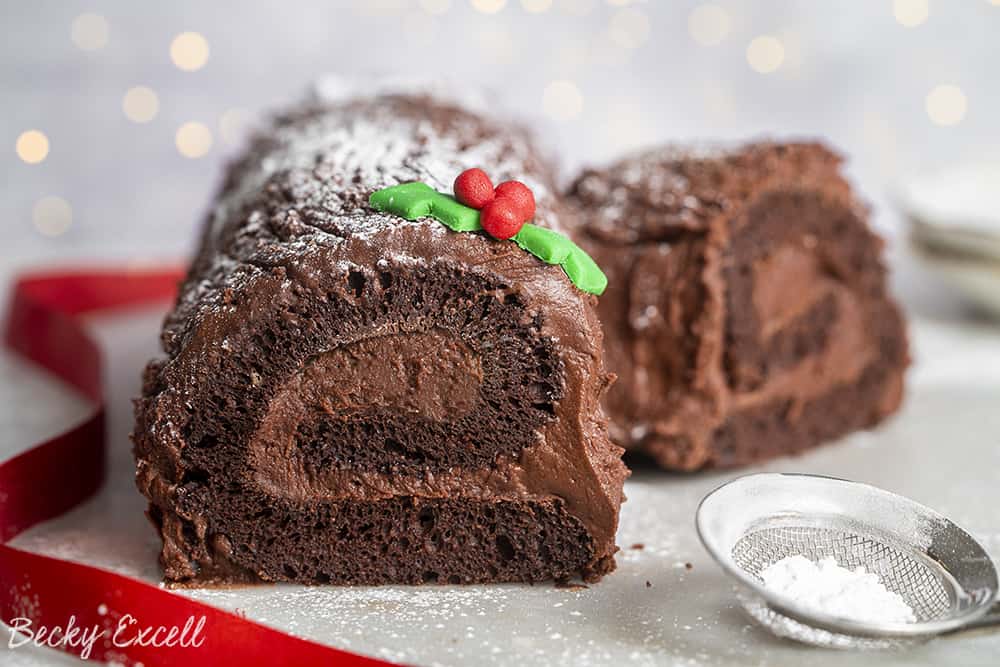
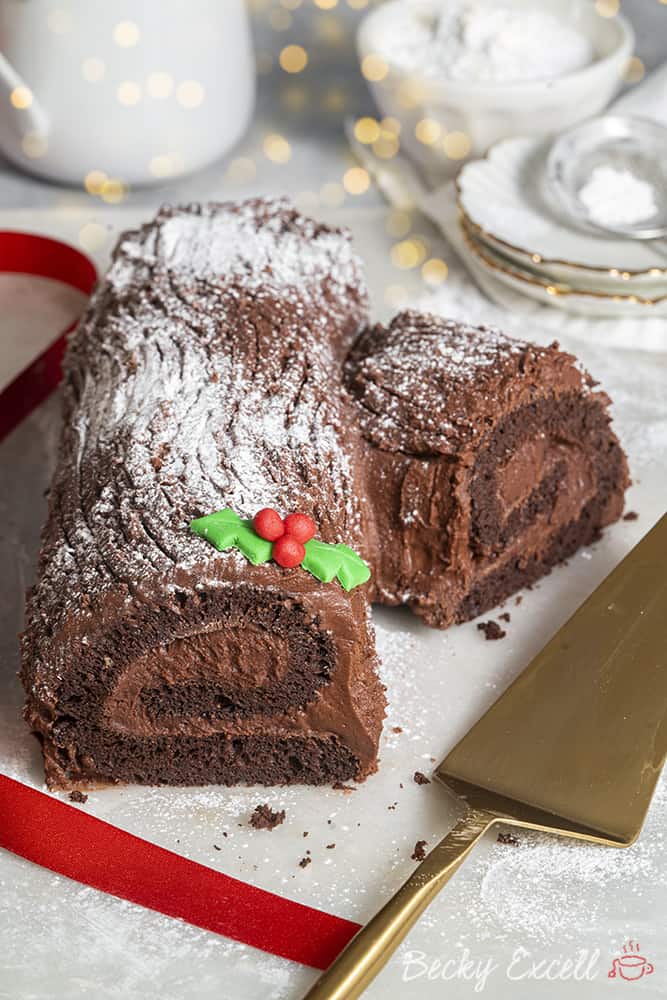
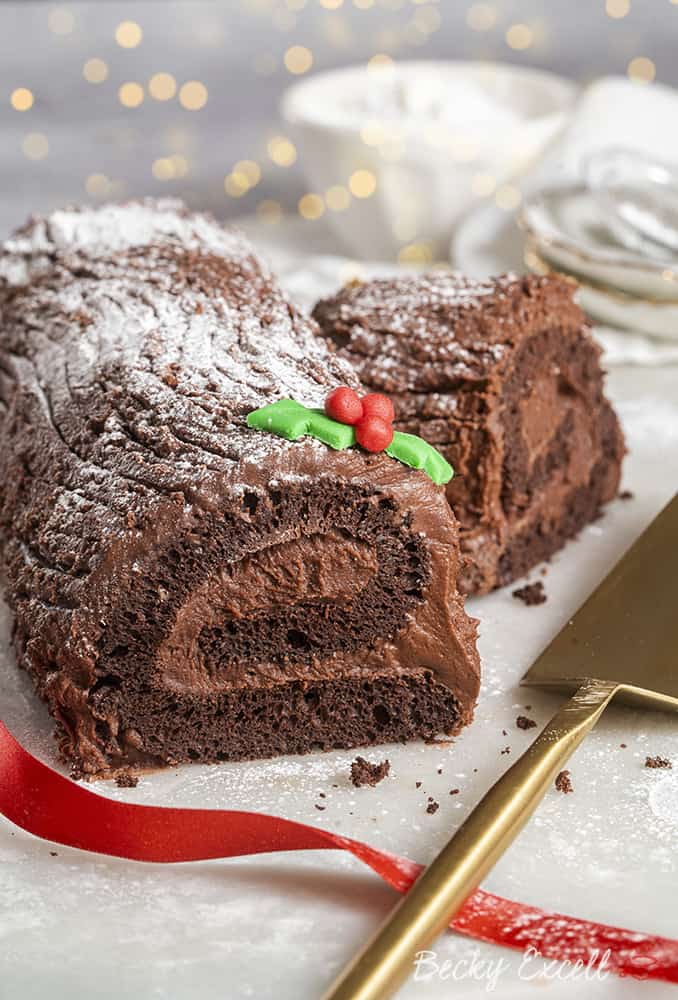
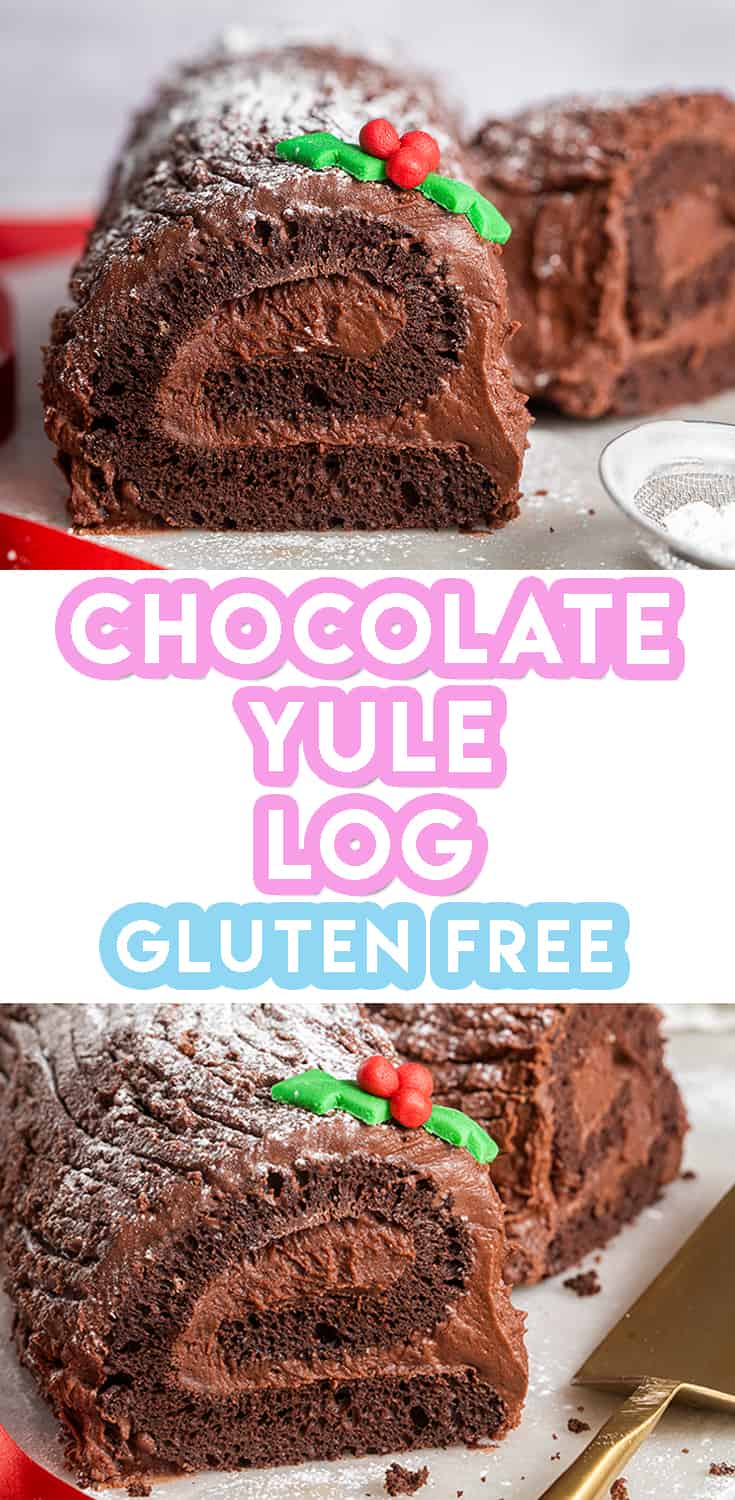
Gluten free yule log recipe? You’re in the right place! Since sooo many of you guys requested it on Instagram, here’s my BEST ever yule log that’s easy peasy to make…
After all, my gluten free yule log recipe is just a sponge and some icing… simple right?! But it’s sooo good – super chocolatey, with a lovely light sponge. So here’s my BEST EVER festive yule log that you can easily recreate at home…
My gluten free yule log is everything you could ever dream of at Christmas and all throughout the festive season.
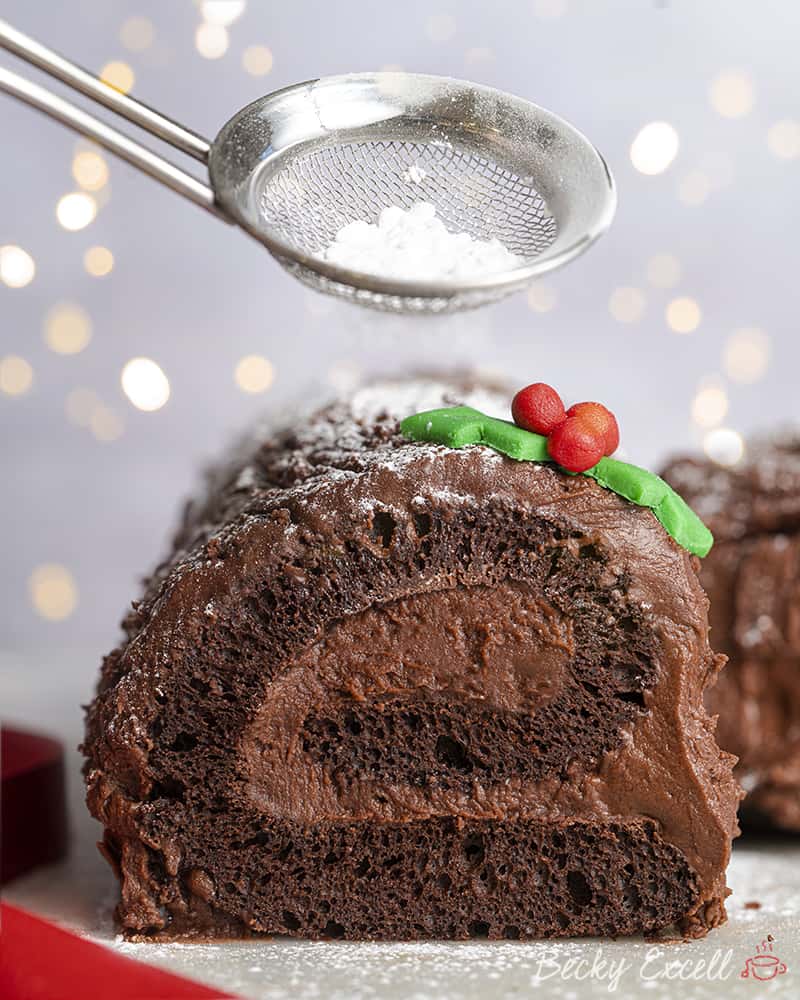
Imagine an incredibly light and airy chocolate sponge, with a lovely swirl of sweet, fluffy chocolatey icing inside and outside of it. One slice is never enough!
So if you’re not a fan of all your typical traditional Christmas treats like mince pies, Christmas pudding etc. then I promise you – this is one you’ll definitely love.
And whilst you might have seen a gluten free yule log or two down the free from aisle this year, I only have one question… where’s the swirl?! They never have a swirl – and that’s not a true yule log in my opinion!
Wait, does that make me a yule log snob?!
So yeah, this recipe is super simple as it only involves make a swiss roll-style sponge and some chocolate icing. That’s the easy part!
(And there’s only 5 ingredients in the sponge and 5 ingredients in the icing too, not bad, right?)
The tricky part is assembling your yule log – but actually… it’s not tricky at all if you follow the recipe very closely. I wouldn’t steer you wrong!
You’ll get a lovely swirl every time and you’ll be super-surprised how well a swiss roll-style sponge can roll without any gluten required at all. Honestly, it’s like magic.
What’s my biggest secret to making the perfect gluten free yule log?
Hands down, without a doubt, it’s rolling the sponge whilst in baking paper AND whilst it’s hot. Then, keeping it nicely rolled up whilst it cools.
First of all, the paper helps to support the sponge so it can roll instead of fold – and by fold, I mean break!!
And yeah, if you don’t keep it all rolled up whilst it cools, you will have absolutely zero chance of rolling up the sponge without it breaking. Trust me – that happened to me last year!
Ok, so here’s your shopping list for my gluten free yule log recipe…
Ingredients for my gluten free yule log recipe
For the sponge
- 100g caster sugar
- 4 large eggs
- 65g gluten free self raising flour
- 1/4 tsp xanthan gum (add this even if your flour already has it in it)
- 40g cocoa powder (ensure dairy free if necessary)
For the icing
- 675g icing sugar
- 45g cocoa powder (ensure dairy free if necessary)
- 65g butter, softened (dairy free alternative if necessary)
- 2 tsp vanilla extract
- 125ml milk (any milk should work here)
Optional Extras
- Icing sugar (for dusting)
- Red and green fondant icing (to make some holly
Keep scrolling to the bottom of the post for the full recipe card with the method by the way ??
Aaaand here’s a few frequently asked questions and tips on how to make my gluten free yule log recipe without a hitch…
Can I make this recipe gluten free?
It is gluten free!
Can I make your gluten yule log recipe dairy free?
Of course you can! This recipe is actually really simple to make dairy free.
All you’ve got to do is substitute butter for hard margarine (I use Stork) and milk for any dairy free milk. Also, just double-check that your cocoa powder is dairy free – it usually is!
You might need to add a little extra icing sugar for the buttercream icing just to bring it together, as hard margarine can be a little looser than when using butter.
Otherwise, you’re all good to go!
Is your gluten free yule log recipe low FODMAP?
If you use lactose free milk, then it certainly is! Butter is incredibly low in lactose, so that makes it low FODMAP too.
Otherwise, you’re good to go and for once, there’s no scary, high FODMAP ingredients required!
Is your gluten free yule log recipe nut free?
Yep, this is a nut-free recipe as far as ingredients go. But please, please make sure you check the ingredients label on ALL the products you use to bake this cake just to be safe.
Even if the products don’t contain nuts, they might have a ‘may contain nuts’ warning due to being produced in a factory that handles nuts.
You can never be too careful so always read the labels on everything first!
Can I make your gluten free yule log recipe vegan?
Though egg replacement options are available, this recipe isn’t so easy to make vegan unfortunately.
The first stage of this recipe involves whisking eggs and sugar together so you can get lots of air into it. I definitely don’t see how that would be possible with egg replacer!
Since there’s no butter in the sponge, the eggs become even more important and especially how much air you can whisk into them.
If you’d like me to create a gf AND vegan version of this recipe then let me know in the comments below this post ??
Can I make your gluten free yule log in a food processor or standing mixer?
Of course you can! I don’t actually use a standing mixer or food processor to make the cake mixture for this recipe – I use an electric whisk. Just because I’m used to it.
(here’s a link to the electric whisk I use)
When it comes to buttercream, I prefer to use my standing mixer as you have to mix it for a longer period of time (around 10 minutes). So it’s much easier to just let the mixer do the hard work!
Can I make your gluten free yule log without any kind of electric mixer at all?
Yep! But just make sure that when you whisk the sugar and eggs together, you use a hand whisk and gets lots and lots of air into the mixture until frothy. It’s super-important that the sponge mixture is really consistently mixed!
Oh and when it comes to the buttercream, it might take you a while! It can be a bit of a mission, but just make sure you don’t leave any dry mixture at the bottom of the bowl and you should be fine.
Do I need any special equipment to bake your gluten free yule log?
Certainly not! As I mentioned, a food processor, standing mixer or electric whisk will cut down on prep time, but they’re not mandatory.
What you will need however is a swiss roll tin – I use this one by Mary Berry and Lakeland, it’s 35cm by 25cm.
If you’re in a bit of a pinch and don’t have a swiss roll tin, you can easily use a baking tray instead as long as it’s roughly the same size and sides aren’t too low.
Oh and make sure you have some baking paper – I use Bacofoil. You’ll definitely need this to successfully roll up your sponge.
Can I bake this using the all-in-one method?
In case you didn’t already know, the all-in-one method involves bunging all your sponge ingredients into a bowl at once and mixing them together. That’s instead of adding them gradually.
This isn’t a regular sponge recipe – there’s no butter! So definitely don’t throw all the sponge ingredients at once. Trust me, it won’t turn out ok and we need the sponge to be spot on so it can be rolled without breaking.
For example, the first stage, which involves whisking sugar and eggs, is really important to do separately so you get lots of air into the eggs so they go nice and frothy.
So no – definitely don’t throw everything in the bowl at once, please!
Can I make this recipe without xanthan gum?
In some of my recipes, yes, but I wouldn’t recommend leaving xanthan gum out of this one. You’ll see xanthan gum in a lot of my recipes as it’s an essential ingredient in gluten free baking.
Without gluten to bind the cake together, you can be left with a very loose and crumbly sponge texture which won’t work for this recipe. In other words, you won’t have a hope in hell of being able to roll it up without xanthan gum!
Some people have asked if they can use psyllium husk powder instead of xanthan gum, but I’ve found that it definitely results in a denser sponge so I wouldn’t overly recommend it.
So TLDR; definitely use xanthan gum if you can!!
Can I make this recipe using other gluten free flours like buckwheat flour or coconut flour?
There’s a big difference between ‘gluten free plain/self-raising flour’ and a *singular* type gluten free flour. When I say ‘gluten free plain or self-raising flour’ in a recipe, I mean a BLEND of gluten free flours, not just one, singular flour.
Most gluten free flour you buy in the supermarket typically contains a blend of rice flour, potato flour, maize flour, tapioca flour AND buckwheat flour. That’s a lot of different flours!
In gluten free self-raising flour, there’s usually even a little baking powder and xanthan gum in it too which always helps.
So to replace it with just one specific type of flour… that’s not going to cut it at all. Definitely go for a gluten free flour blend.
Do I need weighing scales to bake your gluten free yule log?
In short… yes, yes and yes! And I wouldn’t advise attempting any my recipes without them. One of the worst things you can do in any baking recipe is alter the quantities by mistake or on purpose.
(unless you know what you’re doing of course)
Why? Well, you’re sort of just gambling with the recipe and praying that it turns out ok, don’t you think? And I’ve generally already done the hard work there for you, so you don’t have to do the guesswork with measurements!
A lot of work went into fine tuning ratios and quantities so I wouldn’t mess around with them unless you really know your stuff. I’d recommending using digital cooking scales like these so you know you’re getting an accurate measurement.
Can I bake your gluten free yule log with less sugar?
I can definitely understand the need to reduce sugar in our foods, but this is one of the recipes where I wouldn’t advise it.
Of course, the sugar isn’t just for sweetness – it’s integral to the structure of the cake once baked and is sooo important.
If you wanted to tone things down a bit sugar-wise, you could use icing on the inside of the cake only, skipping the icing on the outside. Though obviously… it won’t look very yule log-like!
I’ll leave the choice up to you!
How long can I keep your gluten free yule log for?
I’ve kept my gluten free yule log for about 3-5 days in an air-tight container with no problems. If you need to keep it any longer than that, I’d highly recommend freezing it in slices (see advice below for doing that).
When the sponge starts getting a little dry, it’s probably starting to get past its best.
Can I freeze your gluten free yule log?
Of course! I’ve frozen it for up to 2-3 months no problem. I’d recommend slicing it up first – otherwise it’ll take an age to defrost! That way, you can also defrost a few slices at time instead of defrosting the whole cake, which you might not be able to eat all at once.
When you want to eat them, a couple of slices should take around 3 hours to defrost at room temperature.
How can I tell when my sponge is done?
The sponge should start to come away from the edges of the swiss roll tin and have a nice, smooth-looking finish on the outside.
You can also poke a skewer into the middle to check if it comes out clean if you fancy.
Troubleshooting
Why did my sponge break when I tried to roll it?
Rolling your sponge is the tricky part, which if you do it successfully, the rest is a walk in the park – promise! Here’s a few tips on how to make sure your sponge doesn’t ever break when you roll it up…
- Once you’ve trimmed off the edges (if needed), score a line across the sponge along the long side of the sponge about 2cm in with a knife. And by score, I mean just use a sharp knife to create a clearly visible line that doesn’t go more than 1-2mm deep into the sponge. This will help the sponge to coil up at its tightest point without breaking.
- Then, make sure that you roll your sponge AND the baking paper into a swirl. The baking paper is really important as it’ll support the sponge whilst you roll it into shape. It’ll be a little sticky too, so baking paper will help the whole process massively.
- Do this whilst the sponge has only just come out the oven and still nice and warm. Trust me when I say that you won’t have a hope in hell of rolling this sponge once it’s cooled. I’ve tried – and failed!
- Whilst rolling it up, don’t be too heavy handed and don’t try and roll it too tightly. Gentle is the correct word! Just imagine you’re trying to loosely roll up a sheet of A4 paper into a tube without folding or bending it. Remember, you never want to bend the sponge at a 90 degree angle or anything close – it will break!
- You MUST leave the sponge in this rolled up position whilst it cools. Once I’ve rolled up my sponge, I just put a weighty object either side to keep it that way. By this point, you should be happy as the hard part is over!
- It doesn’t even need to be rolled particularly tight either so don’t try and roll it up incredibly compact and put the sponge under more strain than it needs to be.
When I sliced my yule log, it’s more of an angular swirl in the middle than a nice, smooth, one like yours. What happened?
The nice, smooth swirl comes from following all of the advise I listed above in the previous question ??
An angular swirl in the middle means the sponge was folded at some point during the rolling process. That most likely comes from the sponge breaking because you might have tried to roll it too tight at first.
A nice, curved swirl comes from rolling the sponge quite loosely (not tightly rolled) and very gently!
The swirl in my sponge looks a little flat, what happened?
If you don’t spread enough icing onto your sponge when you roll it, you’ll end up with a swirl that’s mostly sponge, with not a lot of icing. This can look a little flat and squashed.
Without a decent amount of icing in the swirl, you might see the sponge part of the swirl, touching another part of the sponge which we don’t want!
I spread a nice, thick layer of icing on my sponge before I roll it for the final time – with a little extra along where you scored a line, That should give you a nice, plump swirl of icing in the very middle!
Why is my sponge dry with a tough outer crust?
If the sponge comes out feeling dry, hard with a tough outer crust, it’s probably over-baked.
That either means it had too long in the oven, or the oven temperature was too hot. It’s very unlikely that you’ll be able to successfully roll an over-done sponge as it won’t be flexible enough to roll without breaking.
Can I print your gluten free yule log recipe?
Of course! Just hit the print button located on the recipe below ?? (otherwise you might end up printing this entire post which would probably make your printer go into early retirement)

My Gluten Free Yule Log Recipe
Ingredients
For the sponge
- 100 g caster sugar
- 4 large eggs
- 65 g gluten free self raising flour
- 1/4 tsp xanthan gum add this even if your flour already has it in it
- 40 g cocoa powder ensure dairy free if necessary
For the icing
- 675 g icing sugar
- 45 g cocoa powder ensure dairy free if necessary
- 65 g butter softened (dairy free alternative if necessary)
- 2 tsp vanilla extract
- 125 ml milk any milk should work here
Optional Extras
- Icing sugar for dusting
- Red and green fondant icing to make some holly
Instructions
- Prepare your swiss roll tin by greasing it and then placing baking paper onto it. Make sure it fits really well as you want the full shape of the tin.
- Preheat your oven to 180C Fan / 200C.
- Using an electric hand whisk, whisk together your sugar and eggs until light and a little frothy. It should only take a few minutes.
- Sift in your gluten free flour, xanthan gum and cocoa powder (always sift cocoa powder otherwise it can be quite lumpy). Fold this into your mixture carefully until fully combined.
- Pour/spoon the mixture into your tin, ensuring it spreads right to the edges. Try your best to get it even as it will be pretty thin.
- Bake in the oven for about 9 minutes. The sponge should have come away a little bit from the sides of the tin and be slightly risen.
- Remove the sponge from the oven and very carefully invert it (turn it upside down!) onto another piece of baking paper on a flat surface. Carefully peel off the baking paper that was on the bottom of it in the oven.
- Cut off a tiny slither of each edge to make them all straight and even and lightly score a line along the longest side (about an inch or 2.5cm in). Now, whilst the sponge is still warm, roll the sponge up with the paper inside it as you roll. Put your rolled up sponge to one side and leave it to cool completely whilst still rolled. I usually put something heavy against it to ensure it stays fairly tight and doesn't unroll.
- Whilst your sponge cools, make your icing for the inside and out. Add all your ingredients to a standing mixer (you could use an electric hand mixer too) ensuring you sift in the icing sugar and cocoa powder.
- Start the mixer on low and then increase to a higher speed as it all comes together. If it's not coming together, add a little extra milk very slowly.
- It should be lovely and thick but still able to be spread. If you want it to be thinner, then add a little extra milk, and if you want it more thick then sift in some extra icing sugar (mine is always perfect or a little too thick, never too runny).
- Now to put the Yule Log together. Carefully unroll and remove the baking paper. Fortunately I never find the sponge cracks using my recipe, but if it does, it doesn't matter - it will all be covered in icing!
- Spread a layer of about 1cm thick of your icing on the unrolled sponge (I leave about a half cm gap around the edge). Carefully roll the sponge back up and transfer it to the serving board.
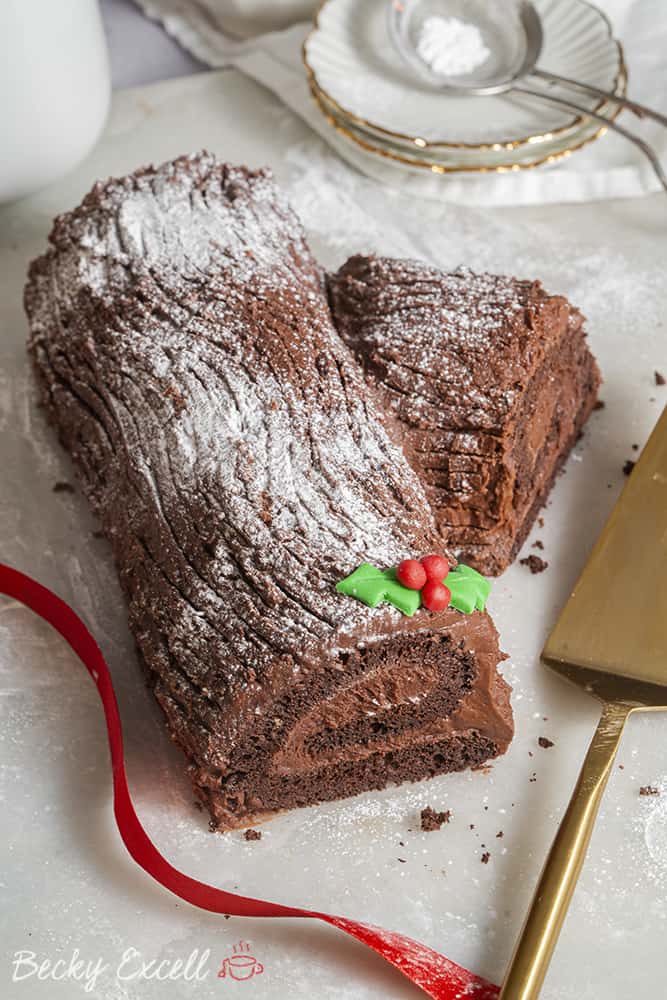
- Your now rolled up cake should look a little long. I cut a quarter of the entire cake off to use it as a branch (see the photos for what I mean). If you want to do this too, take the quarter you cut off and at one end of it, use a sharp knife to trim it at a 45 degree angle. Then simply place it right next to the main cake on the serving board and proceed to step 15.
- Cover the rolled up sponge with the remaining icing and use a fork or sharp knife to go over it to make a wood like pattern. Dust with icing sugar and to finish you can add a holly decoration - I make mine by using some red and green fondant icing.
- Cut the ends off to reveal your swirl and enjoy!
Notes
Nutrition
Thanks for reading how to make my gluten free yule log recipe! If you make it, I’d love to see how it turned out so don’t forget to take a snap of your creation and tag me on Instagram!
Any questions about the recipe? Please do let me know by following me on Instagram and leaving me a comment!
Thanks for reading,
Becky xxx
Oh and don’t forget to pin this for later!

