


Gluten-free pumpkin pie recipe with buttery shortcrust pastry and a smooth, creamy, warmly spiced filling. Easy to make using tinned pumpkin, Coeliac-friendly and perfect for an autumnal dessert or Thanksgiving. See the FAQ section for dairy-free advice.
My gluten-free pumpkin pie combines golden, buttery pastry with a creamy pumpkin filling flavoured with cinnamon, ginger, nutmeg and cloves. It’s one of those seasonal bakes you’ll be looking forward to all year round, and using tinned pumpkin makes the filling incredibly easy to prepare!

For the pastry, I’m using my ultimate gluten-free shortcrust pastry recipe. You’ll need to make one quantity using the sweet option, then follow the instructions for lining and blind baking a 23cm tart case. Once the case is blind baked, come back here to make the filling and finish baking your pie.
I always revel at the chance to make a gluten-free version of an absolute classic like this and I must say, I’m a little surprised at just how good this one turned out. The pastry has a lovely flaky quality, while the filling is bursting with warming spice, caramelised sweetness and a wonderful depth of flavour from the vanilla and pumpkin. It basically tastes like autumn to me!
As you might have noticed, I’ve already put tinned pumpkin to good use in my pumpkin spiced loaf cake and pumpkin spiced cookies. But for the autumnal main event, it had to be a gluten-free pumpkin pie!
I think I can safely say that the chances of finding a slice of gluten-free pumpkin pie when I’m out and about are approximately… less than 0%. But fortunately, in my kitchen, those odds now vastly improve! And once the pastry case is ready, the filling is simply mixed together in a bowl and poured in.

Why you’ll love my gluten-free pumpkin pie recipe
- Proper buttery gluten-free pastry. My ultimate shortcrust pastry has a lovely flaky quality without turning rock solid or crumbling into dust.
- A smooth, creamy pumpkin filling. Light brown sugar, vanilla and warming spices give it that unmistakable pumpkin pie flavour.
- No fresh pumpkin to prepare. Tinned pumpkin puree saves you chopping, cooking and blending a pumpkin before you even begin.
- A lovely dessert to make the day before. The pie needs time to cool and set, so you can get it ready ahead of serving. The pastry decorations are entirely optional too!
Ingredients for my gluten-free pumpkin pie recipe
- Gluten-free shortcrust pastry: Start with one quantity of my gluten-free shortcrust pastry, using the sweet option. The recipe is also in my second book, ‘How To Bake Anything Gluten-free‘, on page 206. Make the dough, chill it, then follow the tart-case instructions before returning here for the filling.
- Eggs: These help the filling set as it bakes. I used large UK eggs, although medium eggs are fine for the filling too. You’ll need separate eggs for the pastry, where I recommend sticking to large.
- Tinned pumpkin puree: Use plain, unsweetened pumpkin puree, such as 100% tinned pumpkin. Check that you haven’t picked up a sweetened, spiced pumpkin pie filling, as we’re adding our own sugar and spices. You only need 285g, so weigh it out rather than automatically using the whole tin.
- Light brown sugar: This is key for that distinctive caramelised sweetness, which works so well with the spices below.
- Vanilla extract: The better quality your vanilla extract is, the better it will taste!
- Cornflour: Along with the eggs, this helps the filling set. This is UK cornflour, also called cornstarch, rather than cornmeal.
- Spices: My spices of choice are ground cinnamon, ground ginger, ground nutmeg and ground cloves. They give a warming flavour and subtle spice that combines so well with pumpkin.
- Double cream: This gives the filling its luxuriously smooth texture and rich, creamy flavour. Use it straight from the carton without whipping it first. See the FAQ section below for dairy-free advice.
Shopping list
For one batch of sweet gluten-free shortcrust pastry and one 23cm pumpkin pie:
- 300g gluten-free plain flour, plus extra for dusting – I use FREEE by Doves Farm
- 1½ tsp xanthan gum
- 145g butter
- 3 tbsp caster sugar for the pastry
- 4 large eggs – 2 for the pastry and 2 for the filling
- 285g plain, unsweetened pumpkin puree
- 165g light brown sugar
- 1 tsp vanilla extract
- 1½ tbsp cornflour
- 1 tsp ground cinnamon
- ⅓ tsp ground ginger
- ⅓ tsp ground nutmeg
- Pinch of ground cloves
- 160ml double cream
You may also need a little cold water to bring the pastry dough together. An extra egg white is optional for sealing the blind-baked pastry case before adding the filling.

How to make my gluten-free pumpkin pie
You’ll find the full quantities and filling instructions in the recipe card below. Here’s how the pastry and filling stages fit together:
- Make and chill the sweet pastry. Follow my gluten-free shortcrust pastry recipe, adding the caster sugar for the sweet version. Chill until firm but workable.
- Line and blind bake the tart case. Follow the instructions on the pastry page for a 23cm tart case, including the baking time after removing the paper and baking beans. The photos below show the pastry-making and tart-case stages.
- Reduce the oven temperature. Once the pastry case is blind baked, turn the oven down to 180C/160C fan for the filling stage.
- Mix and add the filling. Mix the filling ingredients in a large bowl until evenly combined, then carefully pour into the warm pastry case. You don’t need to let the case cool completely first.
- Bake for 50-55 minutes. The edges of the filling should be set, with a slight wobble in the centre. It shouldn’t ripple like liquid when you gently move the tin.
- Cool before slicing. Leave the pie to cool in its tin on a cooling rack, then refrigerate within 2 hours of baking. Allow it to chill and firm up before removing it from the tin and slicing. Add any separately baked pastry decorations before serving.


A few tips before you start
Allow time for the pastry and cooling. The filling is quick to mix, but the dough needs chilling, the case needs blind baking and the finished pie needs time to set before slicing. This is a lovely one to make the day before!
Keep the pastry cool but workable. Start with cold butter and chill the dough as directed. If it’s rock solid, let it soften slightly before rolling. If it becomes warm and sticky, give it a short spell back in the fridge.
Roll gently without pulling or stretching. Use good non-stick baking paper to support the pastry when transferring it into the tin. Ease it into the corners and smooth small cracks with a finger very lightly dipped in water.
Don’t skip blind baking. Ceramic baking beans or uncooked rice help support the pastry during the first stage. Removing them for the final part lets the base dry out before the wet filling goes in.
Seal the case if you like. The optional extra egg-white coating in the pastry recipe helps create a barrier between the pastry and filling. Brush it on and return the case to the oven for 1 minute before filling.
Weigh the pumpkin puree. Use 285g rather than the whole tin. The amount of pumpkin affects the balance of the filling, so adding the rest isn’t a harmless way to use it up!
A slight wobble is what you’re looking for. Don’t keep baking until the middle is completely rigid. The filling will continue to firm up as the pie cools, and overbaking can cause cracks.
Making ahead, storage and leftovers
You can make this pumpkin pie the day before serving. Leave it to cool in the tin on a cooling rack, then refrigerate within 2 hours of baking. Once cold, cover and keep refrigerated. Eat within 48 hours.
The filling contains eggs and cream, so this isn’t a pie to leave on the kitchen counter overnight. Keep it chilled until you’re ready to serve. A chilled pie is also easier to cut into neat slices than one that’s still warm.
Can I freeze gluten-free pumpkin pie?
Yes! Once baked, cool and refrigerate as described above, then wrap the completely cold pie or individual slices well in clingfilm and foil. Freeze for up to 1 month, without any whipped cream topping.
Defrost overnight in the fridge and eat within 24 hours of fully defrosting. The pastry may be a little softer afterwards, so if you’re making it for a special occasion, I’d make it the day before and refrigerate for the best texture.

Recipe tips, swaps and FAQs
Is this pumpkin pie gluten-free? Is it suitable for Coeliacs?
Yes! Provided all the ingredients you use are gluten-free, including the flour used for dusting and rolling. Nobody would know just by tasting it – trust me!
If you’re making this for someone with coeliac disease, use clean equipment and surfaces and take care to avoid cross-contamination. Here’s some advice from Coeliac UK, plus their guide to reading food labels. Check ingredient labels and any ‘may contain’ warnings whenever you buy your ingredients.
Can I make your gluten-free pumpkin pie dairy-free?
Yep! Firstly, make the pastry using a hard dairy-free block, such as Stork hard margarine, instead of butter. Avoid a soft, spreadable tub margarine. The dough may need a little extra chilling if it feels soft.
Then replace the double cream in the filling with the same amount of a dairy-free double cream alternative suitable for cooking. Remember to use a dairy-free topping too if you’re serving it with cream!
Can I make this pumpkin pie vegan or egg-free?
I don’t have a tested egg-free version of this recipe. There are eggs in both the pastry and the pumpkin filling, where they help the filling set. Swapping the butter and cream for dairy-free alternatives alone won’t make the pie vegan, and I wouldn’t recommend simply leaving out the eggs.
Is this recipe low FODMAP?
It can be! Use a FODMAP-friendly gluten-free flour blend for the pastry and lactose-free cream in the filling. There’s no need to replace the butter for low FODMAP purposes.
Stick to one of the 10 slices the recipe makes, and choose any toppings to suit your requirements too. Pumpkin portions matter, so a much larger slice isn’t the same serving.
Where can I buy tinned pumpkin puree in the UK?
I’ve bought mine in Sainsbury’s and Tesco before. Depending on the shop, it can be with the baking ingredients or American foods rather than the tinned vegetables. Availability varies, so check before making a special trip.
You can also look for America’s Finest tinned pumpkin at Waitrose, or order 100% pumpkin puree on Amazon. The important part is choosing plain pumpkin without added sugar or spices.
Is pumpkin puree the same as pumpkin pie filling?
Plain pumpkin puree is what you need here. A tin labelled pumpkin pie filling or pumpkin pie mix may already contain sugar and spices, which would change the flavour and sweetness of this recipe. Check the ingredients – you’re looking for pumpkin on its own.
Can I use fresh pumpkin instead of tinned?
You’d need to cook the pumpkin, blend the flesh until smooth and drain off excess liquid before weighing out 285g. Here’s a guide to making pumpkin puree. I haven’t tested this pie with homemade puree, so tinned is my recommendation for following the recipe as written.
Can I use the whole tin of pumpkin?
Only if your tin contains exactly 285g! A 425g tin contains more than this recipe needs, so weigh out the pumpkin rather than adding it all. Adding extra changes the ratio of pumpkin to eggs, cream and sugar and can affect how the filling sets.
Transfer any leftover puree to a covered container and refrigerate according to the tin’s instructions. You can put it towards another pumpkin bake rather than squeezing it into this one!
Which gluten-free flour should I use for the pastry?
I use FREEE by Doves Farm gluten-free plain white flour. Use a plain gluten-free flour blend rather than self-raising flour or a single flour such as coconut flour. You’ll find the full ingredient advice, including xanthan gum and adding a little water if needed, in my gluten-free shortcrust pastry recipe.
Do I need to blind bake the pastry?
Yes, for this recipe. The pumpkin filling is wet, so the pastry case needs that initial bake before you add it. Follow both stages of the tart-case instructions on the pastry page, including the short bake without the paper and baking beans. Then add the filling to the warm case and continue with the pumpkin pie instructions.
What equipment do I need?
Apart from your usual mixing bowls, scales, rolling pin and a spoon or whisk, you’ll need a 23cm loose-bottom, fluted tart tin. The loose base makes removing the finished pie much easier once it’s cooled and set.
You’ll also need non-stick baking paper, a baking tray and ceramic baking beans for blind baking. Uncooked rice can stand in for the baking beans.
A rolling pin with guides like the one I use can help you get an even thickness when rolling out the pastry. It’s handy, but you can absolutely use a normal rolling pin too!
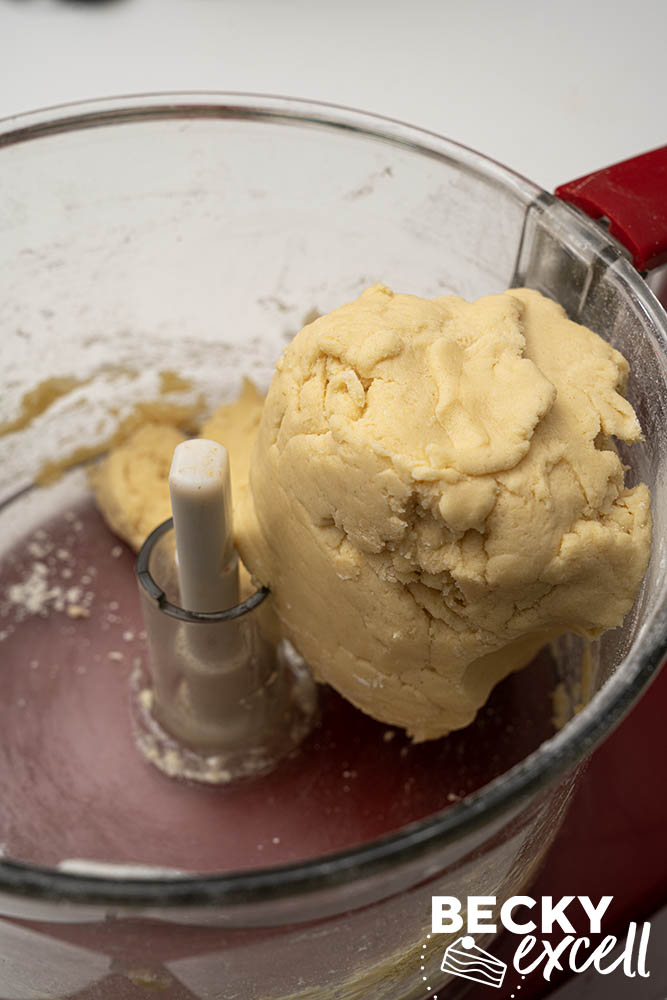
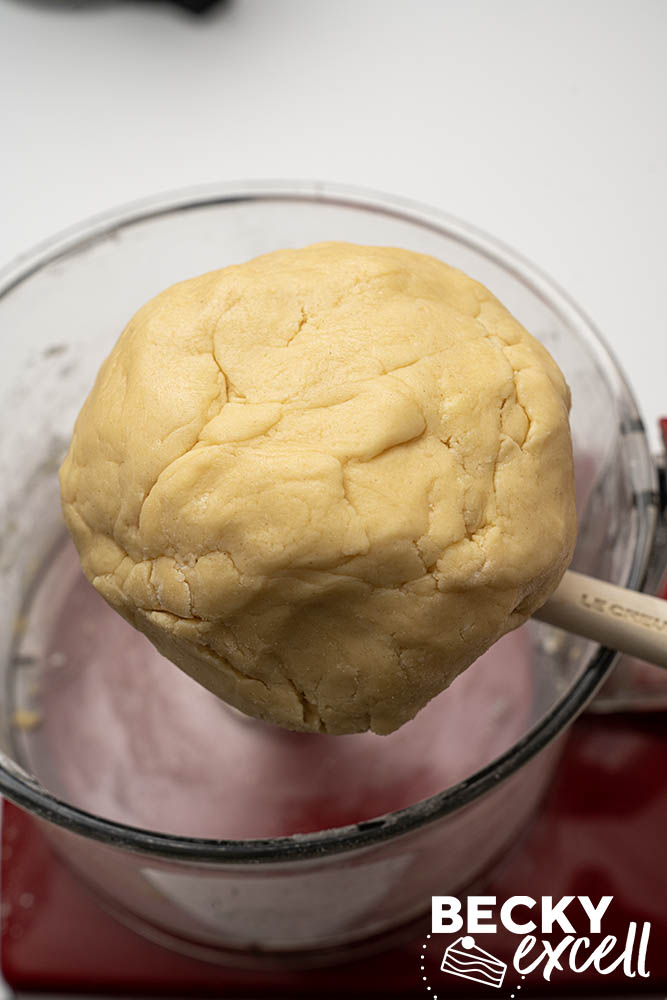
Can I make the pastry in a food processor?
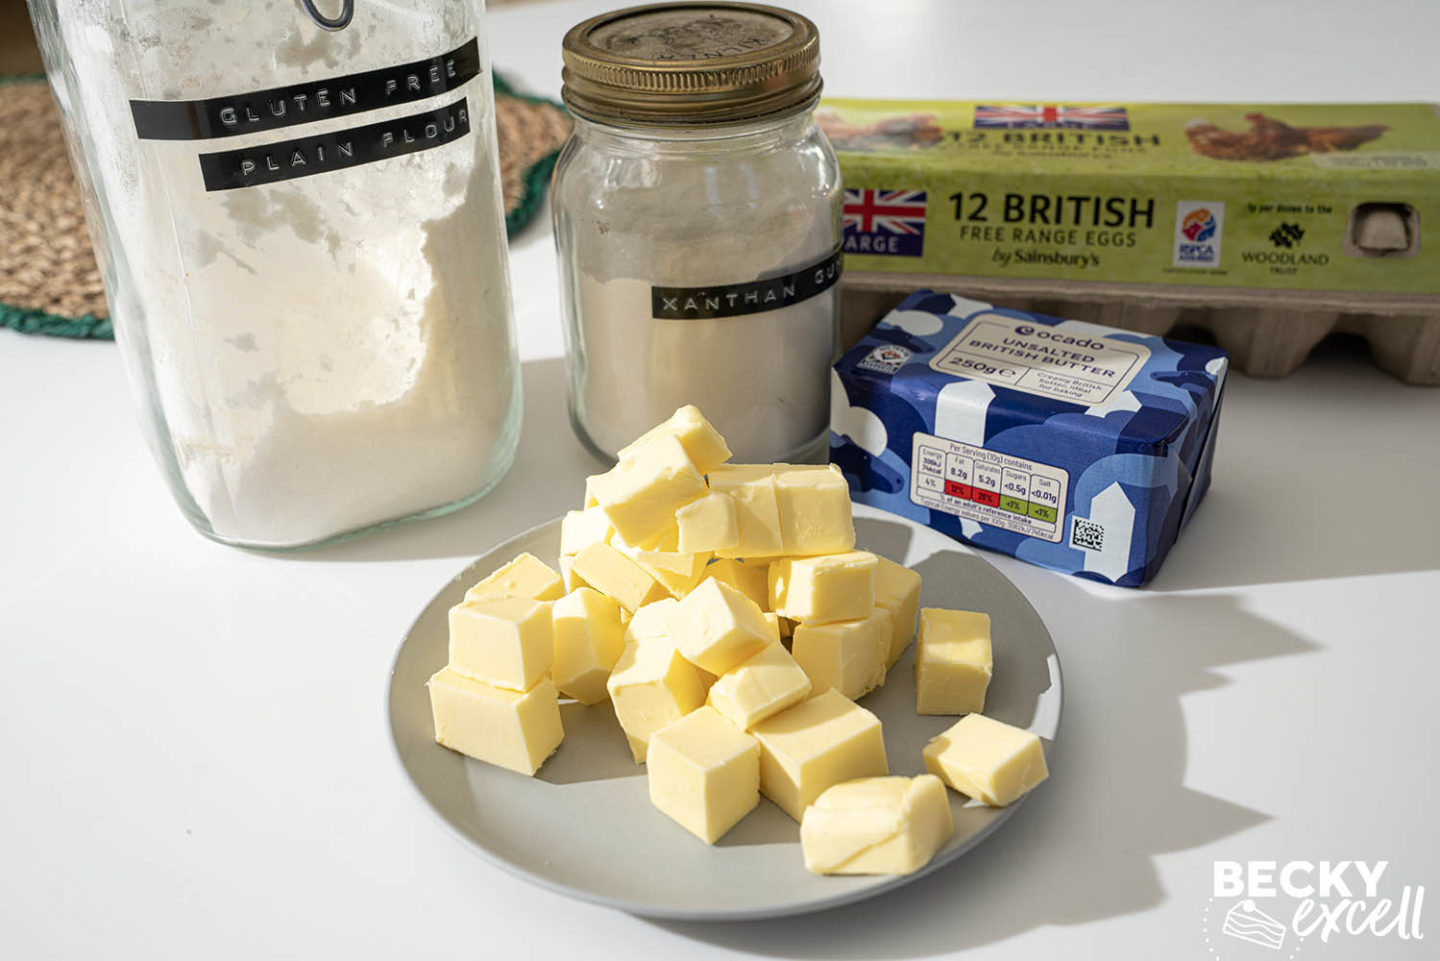
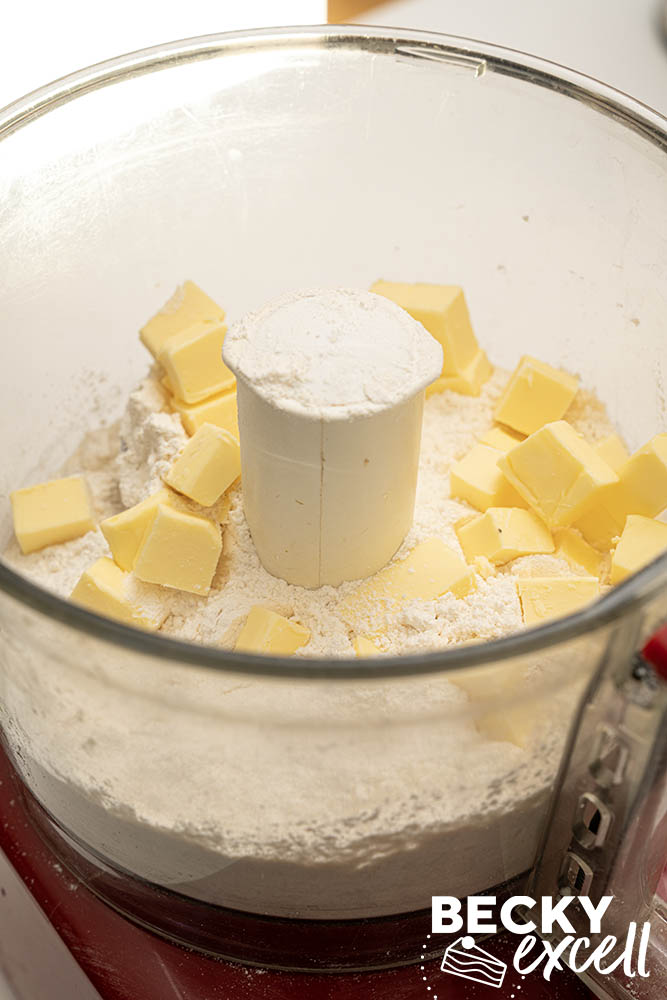
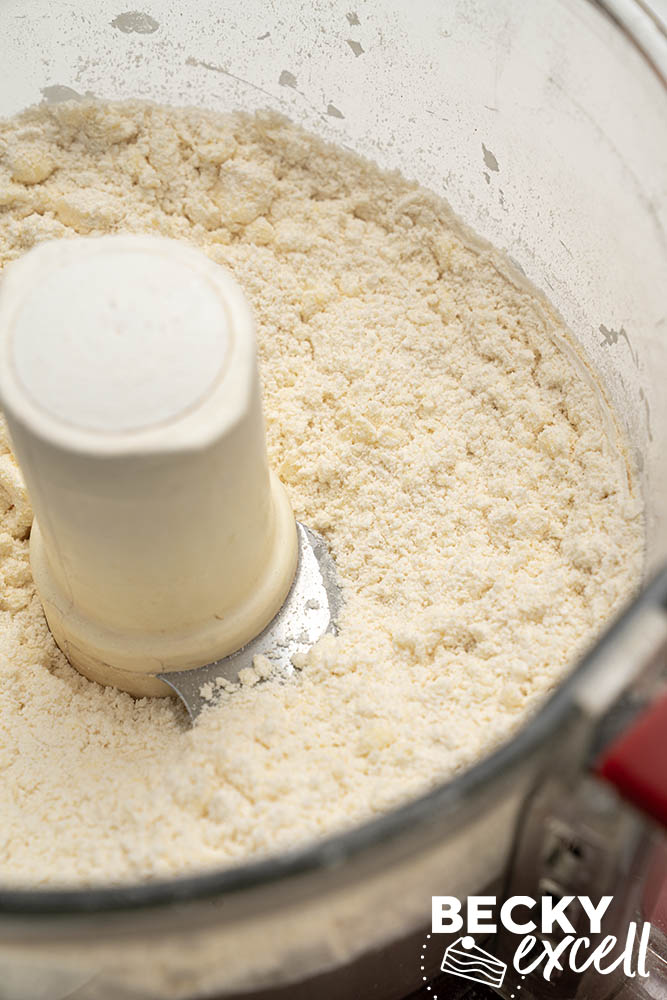
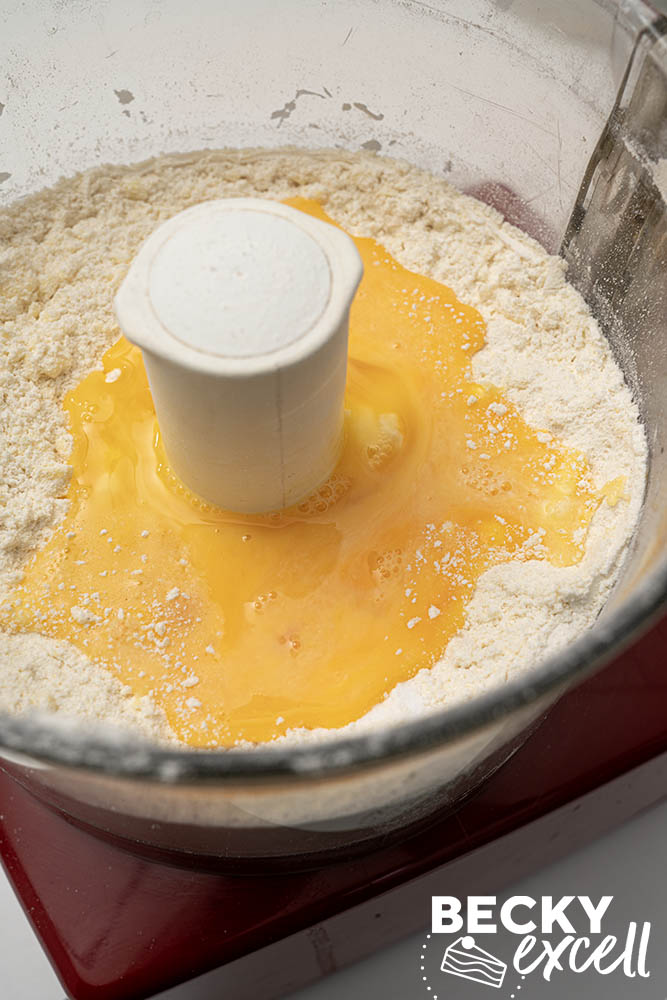
Yes! This is the food processor I use. Mix the caster sugar and xanthan gum into the gluten-free flour, then blitz with the cold, cubed butter until the mixture resembles breadcrumbs. Add the beaten eggs and pulse until it comes together into a dough, then stop.
Wrap and chill before rolling. You’ll find the full processor method, including what to do if the dough needs a little water, on the pastry recipe page. There’s no need to buy a processor specifically for this recipe – making the pastry by hand works too!
What biscuit cutters can I use for the pastry decorations?
The decorations are entirely optional, but they’re a lovely way to use the pastry offcuts. I used squirrels, stars and tiny hearts for the pie in the photos.
For a similar finish, try squirrel biscuit cutters, star cutters or heart cutters. No need to rush out and buy these specifically, though – any biscuit cutters you already have will do!
Cut the shapes from your pastry offcuts and bake separately on a lined tray at 180C/160C fan for 5-10 minutes, depending on their size, until golden. Tiny shapes can be ready much sooner than the larger ones, so remove them as they’re done. Allow to cool and add to the pie before serving.
Should I serve pumpkin pie warm or cold?
For neat slices, let it cool and chill until the filling has firmed up. Cutting into it straight from the oven won’t give you the same result! Serve chilled with a little cream, whipped cream or a dairy-free alternative if needed.
Troubleshooting
How do I know when my pumpkin pie is cooked?
Look for set edges with a slight wobble in the centre when you gently move the tin. The centre should move together rather than slosh like liquid. Start checking towards the end of the 50-55-minute baking time.
If the middle still looks liquid, continue baking and check again. If it’s only slightly wobbly and the edges are set, don’t keep baking until the entire surface is rigid – the filling firms up further as it cools.

Why has my pumpkin pie cracked on top?
Overbaking is a common cause. The filling is a custard, so leaving it in the oven until the centre looks completely solid can take it too far. Use the slight wobble as your guide and check that you’re using the correct oven temperature.
And if you do get a crack, don’t panic! It doesn’t automatically mean the pie is ruined. A few pastry decorations or a little whipped cream can cover it up beautifully.
Why is my pumpkin pie filling too soft to slice?
First, check whether it’s had time to cool and chill. A warm filling will be softer than a chilled one. If it’s still too soft once cold, it may have needed longer in the oven, or the ingredient quantities may have been changed.
Use the specified 285g pumpkin puree, eggs, cornflour and cream. Extra pumpkin or a much wetter homemade puree can affect the result. Chilling helps a properly baked filling firm up, but it won’t fix an underbaked pie.
How do I stop the pastry getting a soggy bottom?
Blind bake the case before adding the filling, including the final few minutes without the paper and baking beans. Follow the pastry recipe’s instructions for baking on a preheated tray. The optional egg-white coating can also help seal the base before the filling goes in.
What if my gluten-free pastry cracks when I line the tin?
Use the baking paper to support the pastry as you transfer it, then gently ease it into the corners rather than pulling it to fit. Gluten-free pastry doesn’t have the same elasticity as pastry made with wheat flour, so stretching it can cause cracks and tears.
Smooth little cracks with a finger very lightly dipped in water, gently pressing the pastry together. Patch larger holes with a little spare dough before blind baking. You’ll find more help with dry, sticky or difficult dough on my shortcrust pastry page.

Gluten-free Pumpkin Pie Recipe
Equipment
- Star biscuit cutters if making optional shapes
- Heart biscuit cutters if making optional shapes
- Squirrel biscuit cutters if making optional shapes
Ingredients
- 1 quantity of shortcrust pastry made using the sweet option; see the link in the first instruction for the pastry recipe
For the filling:
- 2 large eggs
- 285 g plain, unsweetened pumpkin puree tinned/canned – see link above or in FAQ section
- 165 g light brown sugar
- 1 tsp vanilla extract
- 1 ½ tbsp cornflour
- 1 tsp ground cinnamon
- ⅓ tsp ground ginger
- ⅓ tsp ground nutmeg
- pinch ground cloves
- 160 ml double cream
Instructions
- Begin by making the gluten-free shortcrust pastry recipe over here to create a sweetened 23cm (9") tart case. Follow the instructions for making the dough and blind baking a 23cm tart case, including the baking time without the baking beans. Once your pastry case is blind baked, come back here to make the filling.
- Reduce the oven to 180C / 160C fan.
- For the filling, mix the eggs, pumpkin puree, light brown sugar, vanilla extract, cornflour, spices and double cream together in a large mixing bowl until evenly combined. The cream should be added without whipping it first.
- Carefully pour the filling into the warm, blind-baked pastry case. Place the tin on a baking tray.
- Bake at 180C/160C fan for 50-55 minutes. The edges of the filling should be set, with a slight wobble in the centre when you gently move the tin. If the centre still ripples like liquid, continue baking and check again. Don't wait until the middle is completely rigid, as the filling will firm up further as it cools.
- Remove from the oven and leave to cool in the tin on a cooling rack, then refrigerate within 2 hours of baking. Chill until completely cold and the filling has firmed up before carefully removing from the tin and slicing. Serve with cream or whipped cream, if you like.
- Optional pastry decorations: Cut shapes from your pastry offcuts using biscuit cutters. Place on a baking tray lined with non-stick baking paper and bake separately at 180C/160C fan for 5-10 minutes, depending on their size, until golden. Smaller shapes may need removing before larger ones. Allow to cool, then place on the pie before serving.
Notes
Nutrition


