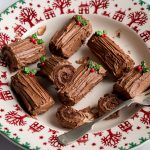
Gluten-free Mini Yule Logs Recipe (dairy-free option)
Gluten-free mini yule logs recipe - complete with a perfect chocolatey swirl. Nobody would ever know they're Coeliac-friendly and wheat-free!
Servings 10
Calories 453kcal
Equipment
Ingredients
For the sponges:
- 2 medium eggs separated
- 50 g caster sugar
- 1 tbsp vegetable oil
- 1 tsp vanilla extract
- 1 tbsp milk dairy-free if necessary
- 20 g gluten-free plain flour
- 10 g cocoa powder ensure dairy-free if needed
- pinch of xanthan gum
For the filling and coating:
- 250 g butter softened (use Stork hard margarine if dairy-free)
- 250 g dark chocolate melted and cooled (dairy-free if necessary
- 250 g icing sugar
- gluten-free festive sprinkles see FAQ section
Instructions
For the sponge:
- Preheat your oven to 180°C fan / 200°C. Lightly grease your Swiss roll tin and line with non-stick baking paper.
- Separate your eggs into two small bowls - egg whites in one and yolks in the other.
- In a larger mixing bowl, add your egg yolks and half the caster sugar (25g). Whisk together until combined, then add your vanilla extract, milk and oil and whisk once more. Sift in the flour, cocoa powder and xanthan gum, and mix in until well combined, thick and glossy.
- In a separate bowl, whisk your egg whites (using an electric hand whisk or stand mixer ideally) until they start to turn white and frothy. Gradually add the remaining caster sugar (25g), whisking until you have medium peaks.
- In 2-3 stages, add your egg white mixture to your egg yolk mixture, folding it in carefully between each addition using a silicone spatula. Once all the egg white mixture is fully folded in, pour your mixture into your prepared tin. Spread it out gently to make sure it’s nice and even and bake in the oven for 8 minutes until cooked through.
- Place a piece of non-stick baking paper on your work surface and dust it with the icing sugar.
- While your sponge is still warm, loosen it from the tin and flip it out onto the baking paper. Carefully peel off the baking paper on top that once lined the tin – don’t worry if you lose the outer layer of the cake because it sticks to the paper as you peel it off, that’s totally normal, but do be more careful as its a very thin sponge. Using your baking paper, roll the sponge up from the long end – the paper should be inside it as you roll. Try to roll fairly tightly, then leave the sponge to cool fully while rolled up. I prop something up against it to stop it from unrolling itself.
For the chocolate filling and coating:
- Whilst your sponge cools, make your icing for the inside and out. Place your butter in a stand mixer (or in a bowl with an electric hand whisk if you don't have a stand mixer), mix on its own on a high speed for about 3-5 minutes. The butter should change from a more yellow colour to being a lot more pale.
- Add your icing sugar gradually to the butter (I do this in two stages). I mix each addition of icing sugar for a couple of minutes before adding the second half.
- Now add in your melted, cooled chocolate and mix until fully combined. It should be the right consistency at this point.
To assemble:
- Carefully unroll your sponge. Fortunately I never find the sponge cracks using my recipe, but if it does a little, it doesn't matter - it will all be covered in icing - just be delicate!
- Spread a very thin layer of of your filling on the unrolled sponge (I leave about a half cm gap on the long edges - otherwise you will have too much filling in your mini rolls.
- Tightly roll your sponge up again (from the long side once more) but this time, stop half way. Then, roll the opposite long side to meet the part you just rolled. Then use a sharp knife to cut down the middle so you have two long rolls.
- Cut each roll into 5 smaller mini rolls - push them to be a bit more round if they have flattened slightly from your cutting. Place them on a board and chill briefly in the fridge (this isn't super necessary but I think it helps a little).
- Take each mini roll and spoon a small amount of icing onto each and spread it so they are all nicely covered. You can use a fork or sharp knife to go over each to make a wood like pattern.
- Finish with some festive sprinkles and optionally some icing sugar dusted. Enjoy!
Notes
If you prefer you can dip the yule logs in a melted milk chocolate coating and allow to set.
Nutrition
Serving: 1g | Calories: 453kcal | Carbohydrates: 43g | Protein: 3g | Fat: 31g | Saturated Fat: 18g | Polyunsaturated Fat: 10g | Trans Fat: 1g | Cholesterol: 89mg | Sodium: 181mg | Fiber: 2g | Sugar: 37g